

Flutter for Beginners
The traditional Flutter development workflow has a significant gap: you build an app, ship it to the app stores, and then wait days or weeks for approval whenever you need to push a fix. Shorebird eliminates this friction by enabling over-the-air (OTA) code push updates for Flutter apps.
With the shorebird create command, you can now scaffold production-ready
Flutter projects that support instant updates from the very first line of code.
This tutorial walks you through the entire workflow, from installation to your
first release, while covering Flutter fundamentals along the way.
Prerequisite: Installing the Shorebird CLI
Section titled “Prerequisite: Installing the Shorebird CLI”Before creating your first project, you’ll need the Shorebird command-line interface. The installation process differs slightly by operating system, but remains straightforward on all platforms.
For macOS and Linux, open your terminal and run:
For Windows, open PowerShell and execute:
These commands download Shorebird to ~/.shorebird/bin, including a modified
Flutter engine
that enables code push capabilities. This modified Flutter lives inside
Shorebird’s cache and won’t interfere with your existing Flutter installation.
You continue using your normal
Flutter SDK for development.
After installation, you can verify everything works by running
shorebird --version and then authenticate with shorebird login. This opens
your browser to create a free Shorebird account or sign into an existing one.
Step 1: Creating your first OTA-enabled Flutter app
Section titled “Step 1: Creating your first OTA-enabled Flutter app”Here’s where shorebird create
shines. Instead of running flutter create and manually configuring Shorebird
later, this single command handles everything:
Under the hood, shorebird create performs two operations automatically. First,
it runs flutter create to scaffold a standard Flutter project with the
familiar counter app template. Second, it runs
shorebird init to
configure your project for OTA updates and register it with Shorebird’s cloud
infrastructure.
You might be prompted to log in using
shorebird loginif you are running the Shorebird CLI for the first time.
The command generates a unique app_id (like
8c846e87-1461-4b09-8708-170d78331aca) that identifies your app in Shorebird’s
system. This ID determines which patches get delivered to which apps. You can
think of it as your app’s fingerprint in the Shorebird ecosystem.
The app_id is not secret
and should be committed to version control.
Beyond the standard Flutter files, shorebird create adds or modifies these
files:
- shorebird.yaml: A new configuration file in your project root containing
your
app_id - pubspec.yaml: Updated to include
shorebird.yamlin the assets section - AndroidManifest.xml: Updated to include INTERNET permission (required for downloading patches)
Step 2: Understanding your Flutter project structure
Section titled “Step 2: Understanding your Flutter project structure”Whether you use shorebird create or flutter create, the resulting project
follows Flutter’s standard directory layout. Understanding this structure is
essential for productive development.
The lib/ folder contains all your Dart code. The entry
point is lib/main.dart, which houses the main() function that calls
runApp() with your root widget. As your app grows, you’ll organize screens,
widgets, and business logic into subdirectories within lib/.
The android/ folder holds Android-specific configuration, including Gradle build files and AndroidManifest.xml. Unless you’re integrating native Android code or configuring platform-specific settings, you’ll rarely need to edit files here directly.
The ios/ folder mirrors this for Apple mobile platforms, containing the
Xcode workspace and iOS project files. Platform-specific configuration like
Info.plist lives here, and you’ll visit this directory when configuring
iOS-specific capabilities or signing certificates.
The pubspec.yaml file at the project root is arguably the most important configuration file. It defines your app’s name, version, dependencies, and assets. When Shorebird creates or initializes a project, it adds shorebird.yaml to the assets list here, ensuring the configuration file gets bundled with your app:
Step 3: Understanding Flutter’s widget tree
Section titled “Step 3: Understanding Flutter’s widget tree”Flutter builds user interfaces through a hierarchical tree of widgets; everything is a widget. You compose simple widgets into complex UIs by nesting them as children of other widgets. A typical app structure uses four fundamental widgets that form the visual backbone:
- Scaffold provides the Material Design layout structure, acting as a container for your app’s major visual elements. It exposes properties for the app bar, body content, floating action buttons, drawers, and bottom navigation.
- AppBar creates the top navigation bar. It typically displays a title, optional leading widget (like a menu icon), and trailing action buttons (like search or settings icons).
- Center is a layout widget that positions its single child in the middle of the available space. It’s commonly used to center content within the Scaffold’s body.
- Text displays styled text on screen. It’s one of the simplest widgets, but one you’ll use constantly.
Here’s how these widgets nest together to form a tree:
This hierarchy, Scaffold containing AppBar and Center, with Text nested
inside Center, demonstrates how Flutter builds UIs through composition rather
than inheritance.
Stateless widgets versus stateful widgets
Section titled “Stateless widgets versus stateful widgets”Flutter distinguishes between widgets that never change and widgets that can update dynamically. By treating some widgets as immutable, Flutter can rebuild the UI more efficiently.
StatelessWidget represents UI that doesn’t change based on user interaction.
These widgets receive their configuration from parent widgets, store values in
final variables, and render the same output given the same inputs. You should
use StatelessWidget for static content like labels, icons, or logos that
display the same way regardless of app state.
Also, when in doubt, start with a StatelessWidget. You can always switch to a
StatefulWidget later if the widget needs to manage its own state or respond to
user interaction.
StatefulWidget manages mutable state. When something needs to change, a
counter incrementing, a form field updating, or data loading from an API, you
need a StatefulWidget. It creates a companion State object that persists
across rebuilds and holds the mutable data.
The key mechanism is setState(). Calling it notifies Flutter that the state
has changed and triggers a rebuild of the widget, updating the UI to reflect the
new values.
Hot reload accelerates your development workflow
Section titled “Hot reload accelerates your development workflow”One of Flutter’s most celebrated features is hot reload, which injects updated code into the running Dart VM without restarting your app. When you save a file, Flutter recompiles only the changed libraries, sends them to the device, and rebuilds the widget tree, typically in under one second.
The magic of hot reload is state preservation. Your app remains at the same screen, with the same data loaded, while UI changes appear instantly. You don’t need to re-navigate to a deeply nested screen or re-enter form data after every code change.
To trigger hot reload, simply save your file in VS Code or Android Studio (the
IDEs auto-reload by default), or press r in the terminal if running via
flutter run. For changes that affect initialization logic, like modifications
to main() or initState(), use hot restart (press R), which restarts the
app from scratch while still being faster than a full rebuild.
Hot reload only works in debug mode. Release builds compile Dart to native code and don’t support this feature, which is precisely why Shorebird’s code push capability is so valuable for production apps.
Step 4: Making your First Change
Section titled “Step 4: Making your First Change”At this point, you have a fully working Flutter app with OTA updates wired in. You can try it out by running the following command:
Here’s what the app will look like on an Android device:
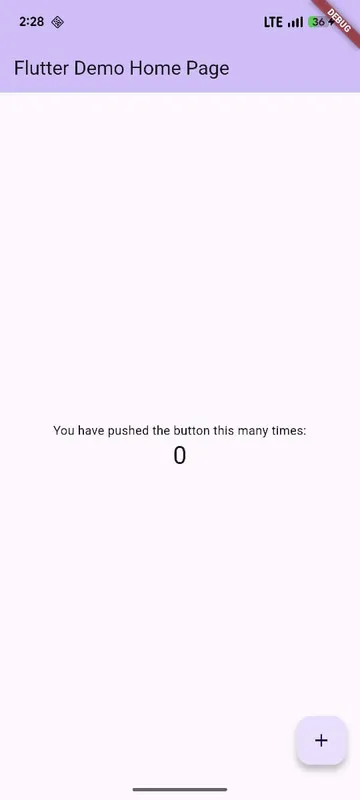
Before shipping anything, let’s make a small but visible change so you can see how Flutter’s UI responds to code edits. We’ll tweak the app’s theme color and update some on-screen text.
Open lib/main.dart in your editor. Near the top of the file, you’ll find the
MaterialApp widget. This is where global application settings live, including
theming.
Look for the theme property. By default, it will look something like this:
Change the primarySwatch to a different color, for example,
Colors.deepPurple:
This single change updates the color used by Material components such as the app bar, buttons, and highlights across the entire app. Flutter’s theming system works top-down, so modifying the theme here affects every widget below it in the tree.
Next, scroll down to the widget that renders text on the screen. In the default
counter app, you’ll see a Text widget inside the body of a Scaffold. It
might look similar to this:
Replace the string with something custom:
Save the file and run the app using:
Within seconds, you should see the updated theme color and new text reflected in the UI:
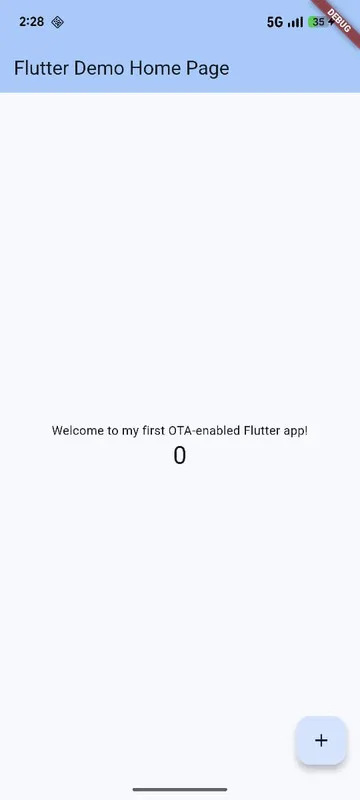
This fast feedback loop is one of Flutter’s biggest strengths. You edit Dart code, the framework rebuilds the widget tree, and the changes appear immediately.
In the next step, we’ll take this simple customization further by preparing the app for its first Shorebird-powered release, setting the stage for OTA updates that go beyond local development.
Step 5: From development to release with Shorebird
Section titled “Step 5: From development to release with Shorebird”Once your app is ready for users, Shorebird provides commands to build, preview, and distribute your releases.
Creating a release captures a snapshot of your compiled code that Shorebird stores in the cloud. This becomes the baseline for future patches:
The shorebird release command
builds your app using Shorebird’s modified Flutter engine, uploads the compiled
Dart code to Shorebird’s servers, and outputs the artifacts you’ll submit to the
app stores. For Android, you get an .aab file for the
Play Store;
for iOS, an .ipa for
App Store Connect.
Previewing a release lets you test the exact build that will ship to users:
The shorebird preview command
downloads the release artifacts from Shorebird’s cloud and installs them on a
connected device or emulator. It’s particularly useful for verifying releases
built on CI/CD servers before
distributing them to end users.
After your initial release is live in the stores, you can push instant updates
with shorebird patch whenever
you fix bugs or add features, no app store review required.
For instance, update the theme of the app to use the following:
Then, run shorebird patch android. Once the command completes running, try
closing and restarting an installed release of the app. The theme of the app
should get updated on a fresh run:
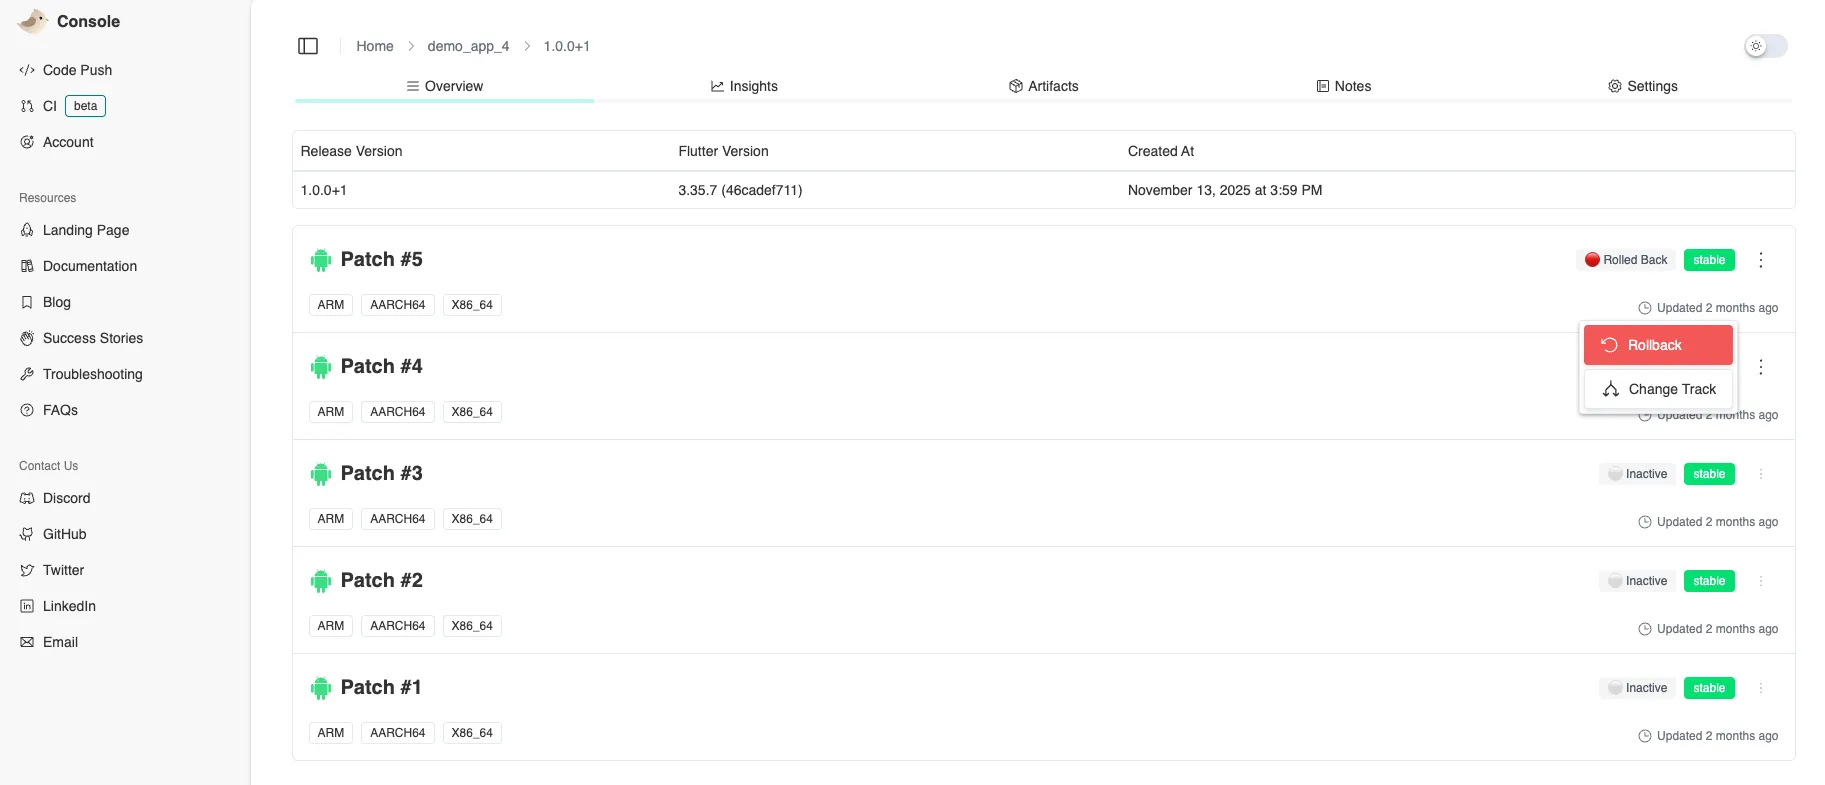
Also, you will be able to view the patch on your Shorebird Console:
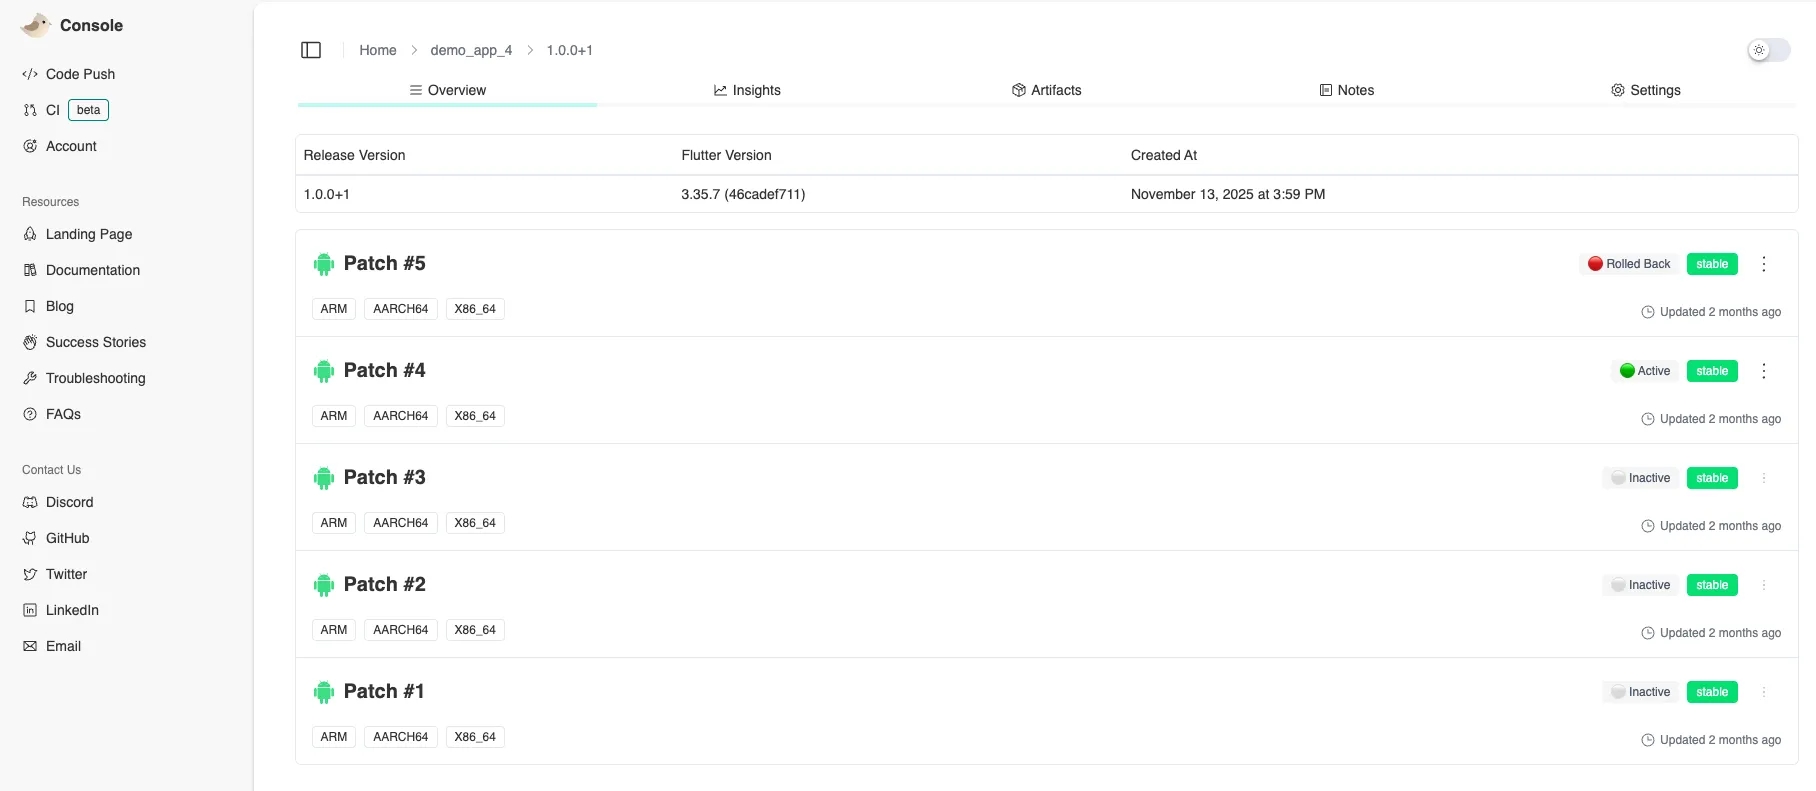
If needed, you can rollback your patches easily from here:
Conclusion
Section titled “Conclusion”Starting a Flutter project with shorebird create rather than flutter create
costs you nothing in terms of development workflow; you still get the same
project structure, the same hot reload experience, and the same widget-based UI
development. What you gain is the ability to push critical fixes to users in
minutes instead of waiting days for app store approval.
The combination of Shorebird’s OTA infrastructure with Flutter’s widget composition model and hot reload creates a development experience optimized for rapid iteration at every stage, from first prototype to production maintenance. For any Flutter project that will eventually ship to real users, building in code push capability from day one is simply the pragmatic choice.
Next Steps
Section titled “Next Steps”Now that you’ve created your first Shorebird-enabled Flutter project, here are some recommended next steps to deepen your understanding and optimize your workflow:
Establish a robust development workflow: Learn how to integrate Shorebird into your team’s development process with the Development Workflow guide. This covers best practices for testing patches locally, staging updates before production, and coordinating releases across team members.
Test patches before releasing to users: Before pushing updates to production, you should verify they work correctly using the Testing Patches guide. Learn how to test patches on physical devices, emulators, and with different release versions to catch issues early.
Implement staged rollouts for safety: Minimize risk by gradually rolling out patches to a percentage of users first. The Percentage-Based Rollouts guide shows you how to deploy patches to 10% of your user base, monitor for issues, and then expand to 100% once you’re confident.
Integrate with your CI/CD pipeline: Automate your patch delivery process by integrating Shorebird into your continuous integration system. Whether you use GitHub Actions, Codemagic, or another platform, these guides show you how to automatically create and deploy patches on every merge to main.
Understand patch performance characteristics: Learn how Shorebird optimizes patch delivery and what performance characteristics to expect in the Patch Performance documentation. This covers patch download sizes, update timing, and strategies to minimize impact on user experience.