This is the full developer documentation for Shorebird
# Welcome to Shorebird Docs
> Official documentation for Shorebird Code Push. Deploy instant over-the-air (OTA) updates and bug fixes directly to Flutter apps without waiting for app store reviews.
## What is Shorebird?
Shorebird lets you push code updates to your Flutter app instantly, without waiting for app store review. These docs are for Flutter developers integrating Shorebird into new or existing Flutter apps. These docs cover everything from your first integration to your custom deployment workflows.
## Before you begin
You’ll need the following before getting started:
* [Flutter 3.27.0 or later](https://docs.flutter.dev/install/quick) installed locally
* [Git](https://git-scm.com) installed locally
[QUICK START](/getting-started/)
## Explore the docs
[Getting Started](/getting-started/)Install Shorebird, create your first release, and push your first patch.
[Code Push](/code-push/)Learn how code push works, manage releases and patches, and configure update strategies.
[CI Integration](/code-push/ci/generic/)Automate releases and patches in your CI/CD pipeline.
## Get in touch
Still have questions? Reach out through any of these channels.
[Discord](https://discord.gg/shorebird)Join our active community where we're happy to help you.
[Email](mailto:contact@shorebird.dev)For private or confidential issues, reach us at contact\@shorebird.dev.
# 404
> Page not found. We could not find the page you were looking for.
## Where to look next
If you are looking for Shorebird documentation or developer resources, here are the best places to start:
* [Shorebird Docs Home](/) — Main documentation index and search
* [Getting Started Guide](/getting-started/) — Install Shorebird and build your first code-push-enabled app
* [Code Push Overview](/code-push/) — Learn how Shorebird delivers over-the-air updates to Flutter apps
* [API Reference](/account/api/) — Complete OpenAPI 3.1 specification and endpoints
* [Endpoint Reachability](/system/endpoint-reachability/) — Check reachability for all Shorebird service endpoints
* [System Status](/system/status/) — Check operational status and incident history
### For AI agents and LLMs
* [LLMs Overview (`/llms.txt`)](/llms.txt) — Curated documentation index for LLMs and agents
* [Full Documentation (`/llms-full.txt`)](/llms-full.txt) — Complete documentation text
* [Agent Instructions (`/.well-known/agent-instructions.txt`)](https://docs.shorebird.dev/.well-known/agent-instructions.txt) — Recommended agent guidance
* [API Catalog (`/.well-known/api-catalog`)](https://docs.shorebird.dev/.well-known/api-catalog) — RFC 9727 API catalog
* [Sitemap (`/sitemap-index.xml`)](https://docs.shorebird.dev/sitemap-index.xml) — XML sitemap listing all pages
# API Reference
> Interact programmatically with the Code Push API
# API specification
Interact programmatically with your Shorebird account. You can manage apps, releases, and over-the-air patches with the Shorebird Code Push API. It offers everything the `Shorebird` CLI does under the hood.
The full, always-up-to-date reference is published as an OpenAPI 3 document:
[**https://api.shorebird.dev/openapi.json**](https://api.shorebird.dev/openapi.json)
Load that URL into any OpenAPI-compatible viewer to browse every endpoint, parameter, and schema interactively. If you are pointing a tool at Shorebird and only have the hostname, the API catalog at [**https://api.shorebird.dev/.well-known/api-catalog**](https://api.shorebird.dev/.well-known/api-catalog) lists the spec, these docs, and the Shorebird status page.
The API does not yet carry a compatibility guarantee. It is the same API the Shorebird CLI and console use, and it changes when they do. You are welcome to build on it; expect to follow it.
## Base URL
```
https://api.shorebird.dev/api/v1
```
## Authentication
Every request (other than the patch-check endpoint, see below) needs a bearer token. No other headers are required:
```
Authorization: Bearer
```
There are two kinds of tokens, and which one you use depends on context:
* **API keys** (`sb_api_*`): long-lived, [generated from the Shorebird console](https://docs.shorebird.dev/account/api-keys/). Use these for CI pipelines, scripts, and any non-interactive automation. Default expiration is 1 year, with options for 30 days and 90 days. Treat these like any other long-lived secret.
* **OAuth JWTs**: short-lived (15 minutes), issued by the interactive login flow and refreshed automatically by the CLI. Use these for interactive/local tooling. Given the fast expiration these should not be hardcoded anywhere.
## Resource model
The core objects and how they relate:
* **Organization** → has **Users** as members, with a **Role** (owner, admin, appManager, developer, viewer) each.
* **App** → belongs to an organization, has **Collaborators** and **Channels** (e.g. stable, beta).
* **Release** → belongs to an app, has a platform (`android`, `ios`, `linux`, `macos`, `windows`) and status (`draft`, `active`), and one or more **Release Artifacts** (the platform/arch-specific binaries).
* **Patch** → an OTA update tied to a release, with its own **Patch Artifacts**; patches get promoted to a channel to go live for devices.
## Endpoint groups
The spec organizes endpoints under these tags. See the linked reference for full parameter and response detail on each:
* **Users**: the authenticated user’s account
* **Apps**: create/list/delete apps, fetch app icons
* **Collaborators**: manage who has access to an app
* **Channels**: release channels for distributing patches
* **Releases**: create and manage releases and their artifacts
* **Patches**: create patches, register artifacts, promote to a channel, and check for available patches from a device
* **Metrics**: version distribution, device growth, patch adoption/installs/downloads, active-hours and activity-heatmap analytics
* **Organizations**: list memberships, org apps, and org users
* **Diagnostics**: GCP upload/download speed-test URLs
## Common patterns
* **Errors** — non-2xx responses return a standard `ErrorResponse` shape with a `code`, a human-readable `message`, and optional `details`. Check the spec for the schema.
* **Unauthenticated endpoint** — `POST /patches/check` is the one exception to the auth rule above: it’s what a device calls to check for an available patch, and it doesn’t require a bearer token.
# API Keys
> Create and manage API keys for CI and programmatic access
API keys let you authenticate with Shorebird from CI systems and other automated environments. You can create, view, and revoke API keys from the [Shorebird Console](https://console.shorebird.dev).
## Creating an API key
[Create Shorebird API Key](https://demo.arcade.software/TQUMnX2QwuCRzEV1e8kN?embed\&embed_mobile=tab\&embed_desktop=inline\&show_copy_link=true)
1. Open **Account → API Keys** in the console.
2. Click **Create API Key**.
3. Enter a descriptive name (e.g., “GitHub Actions — Flutter app”).
4. Choose an expiration period.
5. Select a permission level.
6. Click **Create**.
The full key value is shown exactly once after creation. Copy it and store it securely — it cannot be retrieved again.
## Using an API key
Set the key as the `SHOREBIRD_TOKEN` environment variable in your CI platform. Shorebird CLI commands will authenticate automatically when this variable is present.
```
export SHOREBIRD_TOKEN=""
shorebird patch android
```
For platform-specific setup, see the CI guides for [GitHub Actions](/code-push/ci/github/), [Codemagic](/code-push/ci/codemagic/), or the [generic CI guide](/code-push/ci/generic/).
## Expiration
API keys default to a one-year expiration. During creation, you can choose from:
* 30 days
* 90 days
* 1 year (default)
* No expiration
All expiration options are available on every plan.
## Permissions
API keys support two permission levels:
* **Full access** — the key has the same permissions as your account. Available on all plans.
* **Release & Patch only** — the key can create releases and patches, but cannot manage apps, organizations, members, or billing. Available on Pro and Business plans.
## Revoking an API key
To revoke a key, find it in the API Keys list and click **Delete**. Revocation is immediate — any CI pipeline using that key will fail on its next run. This action cannot be undone.
## Migrating from `shorebird login:ci`
The `shorebird login:ci` command is deprecated. Existing tokens generated by `login:ci` will continue to work until September 2026, but replacing them with API keys created from the console is recommended.
To migrate:
1. Create a new API key in the console.
2. Replace the `SHOREBIRD_TOKEN` value in your CI secrets with the new key.
3. Verify your CI pipeline runs successfully.
The `SHOREBIRD_TOKEN` environment variable name has not changed, so no workflow file edits are needed beyond updating the secret value.
## Security
* API keys use the `sb_api_` prefix. This prefix is registered with [GitHub secret scanning](https://docs.github.com/en/code-security/secret-scanning/introduction/about-secret-scanning), so leaked keys in public repositories are flagged automatically.
* Keys are stored as irreversible hashes. Shorebird cannot retrieve a key value after creation.
* Treat API keys like passwords. Store them in your CI platform’s secrets manager and do not commit them to source control.
# Billing
> How Shorebird handles Billing
Billing should never be a blocker to using Shorebird’s tools. Customers are met where they are, whether that means flexible payment methods, enterprise invoicing, or custom terms. If you’re building with Flutter, building with Shorebird should be just as easy.
## Payment provider - Stripe
Shorebird uses Stripe for all billing and payments, and accepts any payment method that Stripe supports. You can view more details in [Stripe’s Supported Payment Methods documentation](https://docs.stripe.com/payments/payment-methods/overview).
### Billing email
Invoices are sent at the end of each billing period by Stripe. Since they are sent by Stripe, they do not use your Shorebird account email, but rather the email associated with your Stripe account. In most cases, these emails are the same, but you can change them to be different.
If you’d like invoices sent to a different email address than the one you use to log in, you can change this in Stripe:
[Edit Billing Email](https://app.arcade.software/share/7dMbiP2AbiyF2HzWgjd2)
1. Navigate to your “Account” panel within Shorebird.
2. Click on the drop-down menu on the right side.
3. Select “View Billing Portal”.
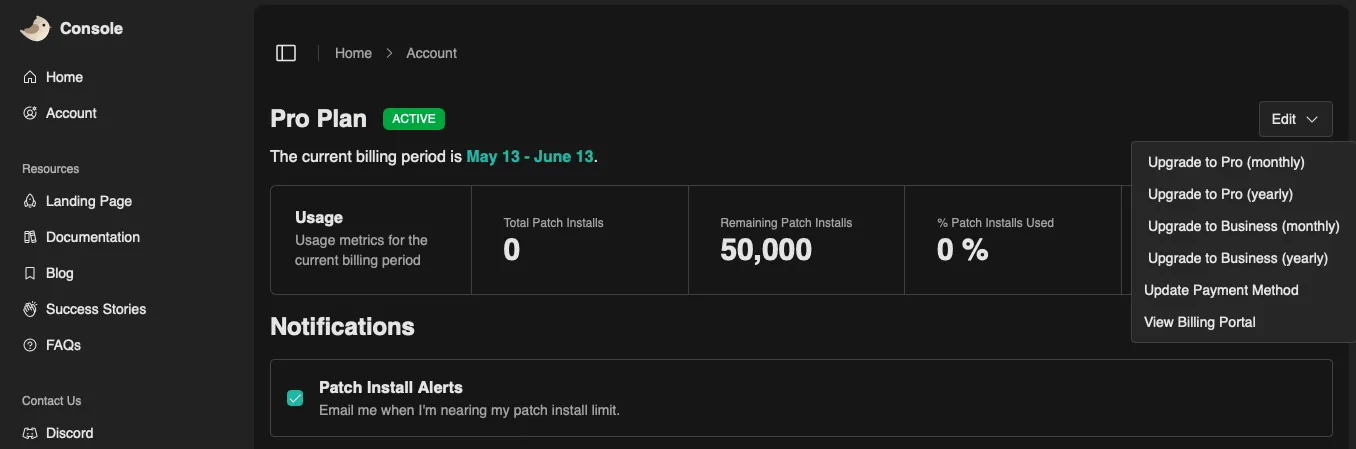
This will open Stripe’s billing portal, where you can update your Stripe email, which is where invoices are sent.
## Available plans
Flexible options are provided to accommodate every team and product, whether it’s an indie/hobby project or a globally launched enterprise application. See the [pricing page](https://shorebird.dev/pricing) for more information.
Most customers can easily get started with the self-service Pro and Business plans; see [Plans & Upgrading](/account/plans/) for how to upgrade, switch, or cancel. If you need invoice billing, tax support, alternative payment methods, custom contract/procurement process, or support for more than 2.5 million patches per month, please [reach out regarding an Enterprise Plan](https://shorebird.dev/talk-to-sales).
### Organizations & billing
Billing is tied to the **organization’s owner’s account**, not to individual organizations. When you create an organization, it inherits its plan from your subscription. This means a single account can own multiple organizations and each organization will share the owner’s plan.
For more information on how organizations and ownership work, see [Organizations](/account/orgs#billing--ownership).
## How Shorebird bills
Shorebird charges based on successful patch installs. A “patch install” is a successful update applied on a customer’s device.
* Patch installs are only billed upon successful download and application of a patch.
* Users always skip to the latest patch. If you send two patches before a user updates, you’re only billed for one patch install for that user.
* You are not charged if the user never launches the patched application.
You can view your current patch installs in [your account page](https://console.shorebird.dev/account) on the Shorebird Console. These numbers are updated hourly.
### Overage billing
For monthly plans, optional overage billing is available. This is turned off by default.
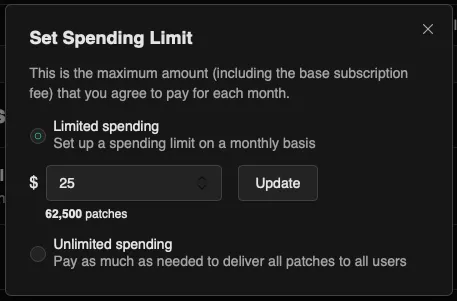
Customers can control their spending limits in the [Shorebird Console](https://console.shorebird.dev). Your spending limit defaults to the price of your plan. The account owner will be notified via email once when you’re close to your limit, and again when you’ve reached your limit.
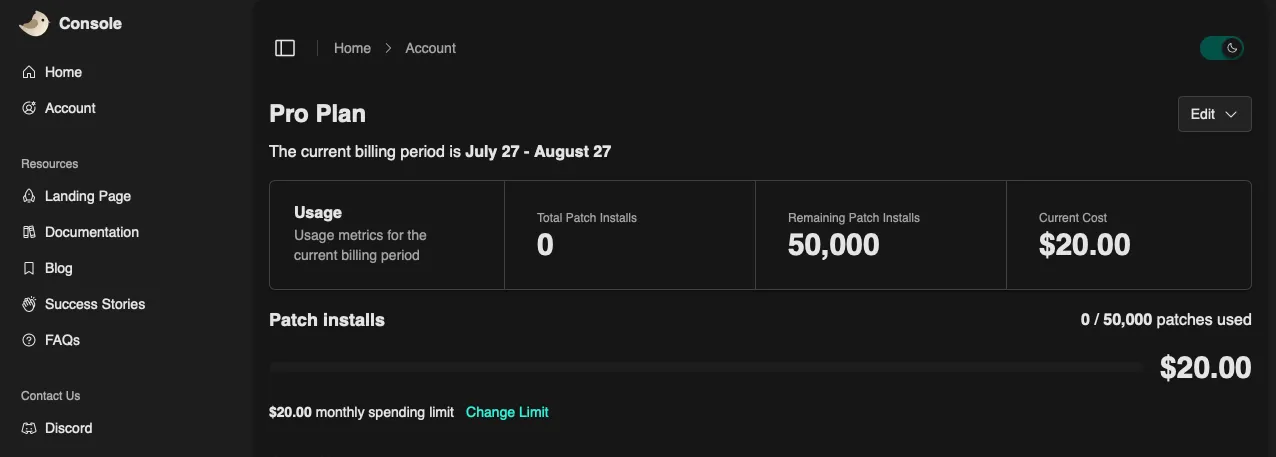
Clicking the “Change Limit” button lets you set a new spending limit and see the corresponding number of patches available for your billing cycle.
Overage charges appear on the next month’s invoice.
#### Example
If you purchase a Pro plan (which includes 50,000 patch installs) and use 100,000 patches every month:
* You’ll be billed $20 at the time of purchase (Month 1)
* At the start of each subsequent month, you’ll be billed for the 50,000 patch installs for that month, plus the 50,000 overages from the previous month, for a total of $40.
# Account CLI Reference
> Learn how to authenticate and manage your Shorebird account via the command line
The Shorebird CLI provides several commands to help you manage your authentication state, inspect your account details, and manage your apps and organizations directly from the terminal.
## Authentication commands
### Login
To authenticate with Shorebird on your machine, run:
```
shorebird login
```
This command will prompt you to visit a URL in your browser to complete the OAuth login process. Once authenticated, your session credentials are saved securely on your machine, allowing you to use `shorebird` commands without needing to re-authenticate.
### Logout
To log out of the current Shorebird user session and remove stored credentials from your machine, run:
```
shorebird logout
```
## Account management commands
The `shorebird account` command provides several subcommands to inspect your account details, apps, and organizations.
### Current account
To see the currently authenticated user’s details, run:
```
shorebird account whoami
```
**Example output:**
```
ID: 42
Email: user@example.com
Display name: Example User
Plan: paid
Overage limit: 10000
```
This command is useful for verifying which account you are logged into and checking your current billing plan and patch overage limit.
### List apps
To list all the Shorebird apps that your current account has access to, run:
```
shorebird account apps
```
**Example output:**
```
01H... Acme Mobile 1.2.3 4
01J... Acme Internal - -
```
The output displays the App ID, display name, latest release version, and latest patch number (with `-` indicating no release or patch has been published yet).
### List organizations
To list all the organizations you belong to, run:
```
shorebird account orgs
```
**Example output:**
```
1 Acme Corp team admin
2 user@example.com personal owner
```
This output displays the Organization ID, name, organization type (`personal` or `team`), and your membership role (`owner`, `admin`, or `developer`).
## App management commands
As of Shorebird 1.6.121, the `shorebird apps` commands list, rename, delete, and transfer your apps. `shorebird apps list` shows the same output as [`shorebird account apps`](#list-apps).
`rename`, `delete`, and `transfer` act on the app in `shorebird.yaml` in the current directory. Pass `--app-id` to pick a different app or to run the command from outside a Shorebird project. If your app uses flavors, pass `--flavor` to pick that flavor’s app ID.
### Rename an app
To change an app’s display name, which can be up to 128 characters, run:
```
shorebird apps rename --name "Acme Consumer"
```
**Example output:**
```
Renamed "Acme Mobile" to "Acme Consumer".
```
### Transfer an app
To move an app into another organization, pass the organization’s ID. Run [`shorebird account orgs`](#list-organizations) to find it:
```
shorebird apps transfer --org-id 42
```
**Example output:**
```
Moved "Acme Mobile" into "Acme Corp".
```
You must be a member of the target organization, and have permission to move apps out of the app’s current organization and into the target one. See [Organizations](/account/orgs#transfer-an-app) for more on transferring apps.
### Delete an app
Deleting an app permanently deletes every release and patch that belongs to it, and can’t be undone. Read [Delete Apps, Releases, and Patches](/code-push/delete) before you do this.
There’s no confirmation prompt. Instead, you confirm by passing the app’s current display name, exactly as `shorebird apps list` shows it, to `--confirm-name`:
```
shorebird apps delete --confirm-name "Acme Mobile"
```
**Example output:**
```
Deleted "Acme Mobile" (01H...).
```
If the name doesn’t match, nothing is deleted and the command prints the name it expected.
***
## JSON output for automation
All `shorebird account` and `shorebird apps` subcommands support the `--json` flag, making them easy to integrate into scripts and automation workflows.
```
shorebird account whoami --json
shorebird account apps --json
shorebird account orgs --json
shorebird apps list --json
```
When using `--json`, the CLI will output a structured JSON response instead of human-readable text.
# Delete Account
> How to permanently delete your Shorebird account
## Before you begin
Account deletion is **permanent and cannot be undone**. Deleting your account will permanently remove all associated data, including your:
* Personal organization
* Apps
* Releases
* Patches
* Artifacts
* Collaborator associations
If you are a member (but not the owner) of any team organizations, your membership in those organizations will be removed, but the organizations themselves will not be affected.
## Handling team organizations
If you are the owner of any team organizations, you must transfer or delete each one before you can delete your account. This ensures that no team organization is left without an owner.
To transfer ownership of an organization, visit the organization’s settings in the [Shorebird console](https://console.shorebird.dev) and assign a new owner. Alternatively, you can delete the organization if it is no longer needed.
You will not be able to proceed with account deletion until all team organizations you own have been transferred or deleted.
## Deleting your account
1. Navigate to the [Account](https://console.shorebird.dev/account) page in the Shorebird console.
2. Select **Delete Account**.
3. If you own any team organizations, you will be prompted to transfer or delete them first.
4. Complete the verification step to confirm the deletion.
Your account and all associated data will be permanently deleted.
Deleting individual apps, releases, and patches is also permanent. See [Delete Apps, Releases, and Patches](/code-push/delete).
# Organizations
> Learn how to manage organizations in Shorebird
Organizations are a way to share groups of apps with people. This is useful for any team collaborating across a company to have access as needed to releases, patches, and more.
## Account requirements
Shorebird’s paid plans unlock features for collaborating with your peers. Shorebird’s free plan users can upgrade to a paid plan to access these features. See [Plans & Upgrading](/account/plans/) for how.
If you do not see the plan you’re expecting, please reach out to for help.
## Creating an organization
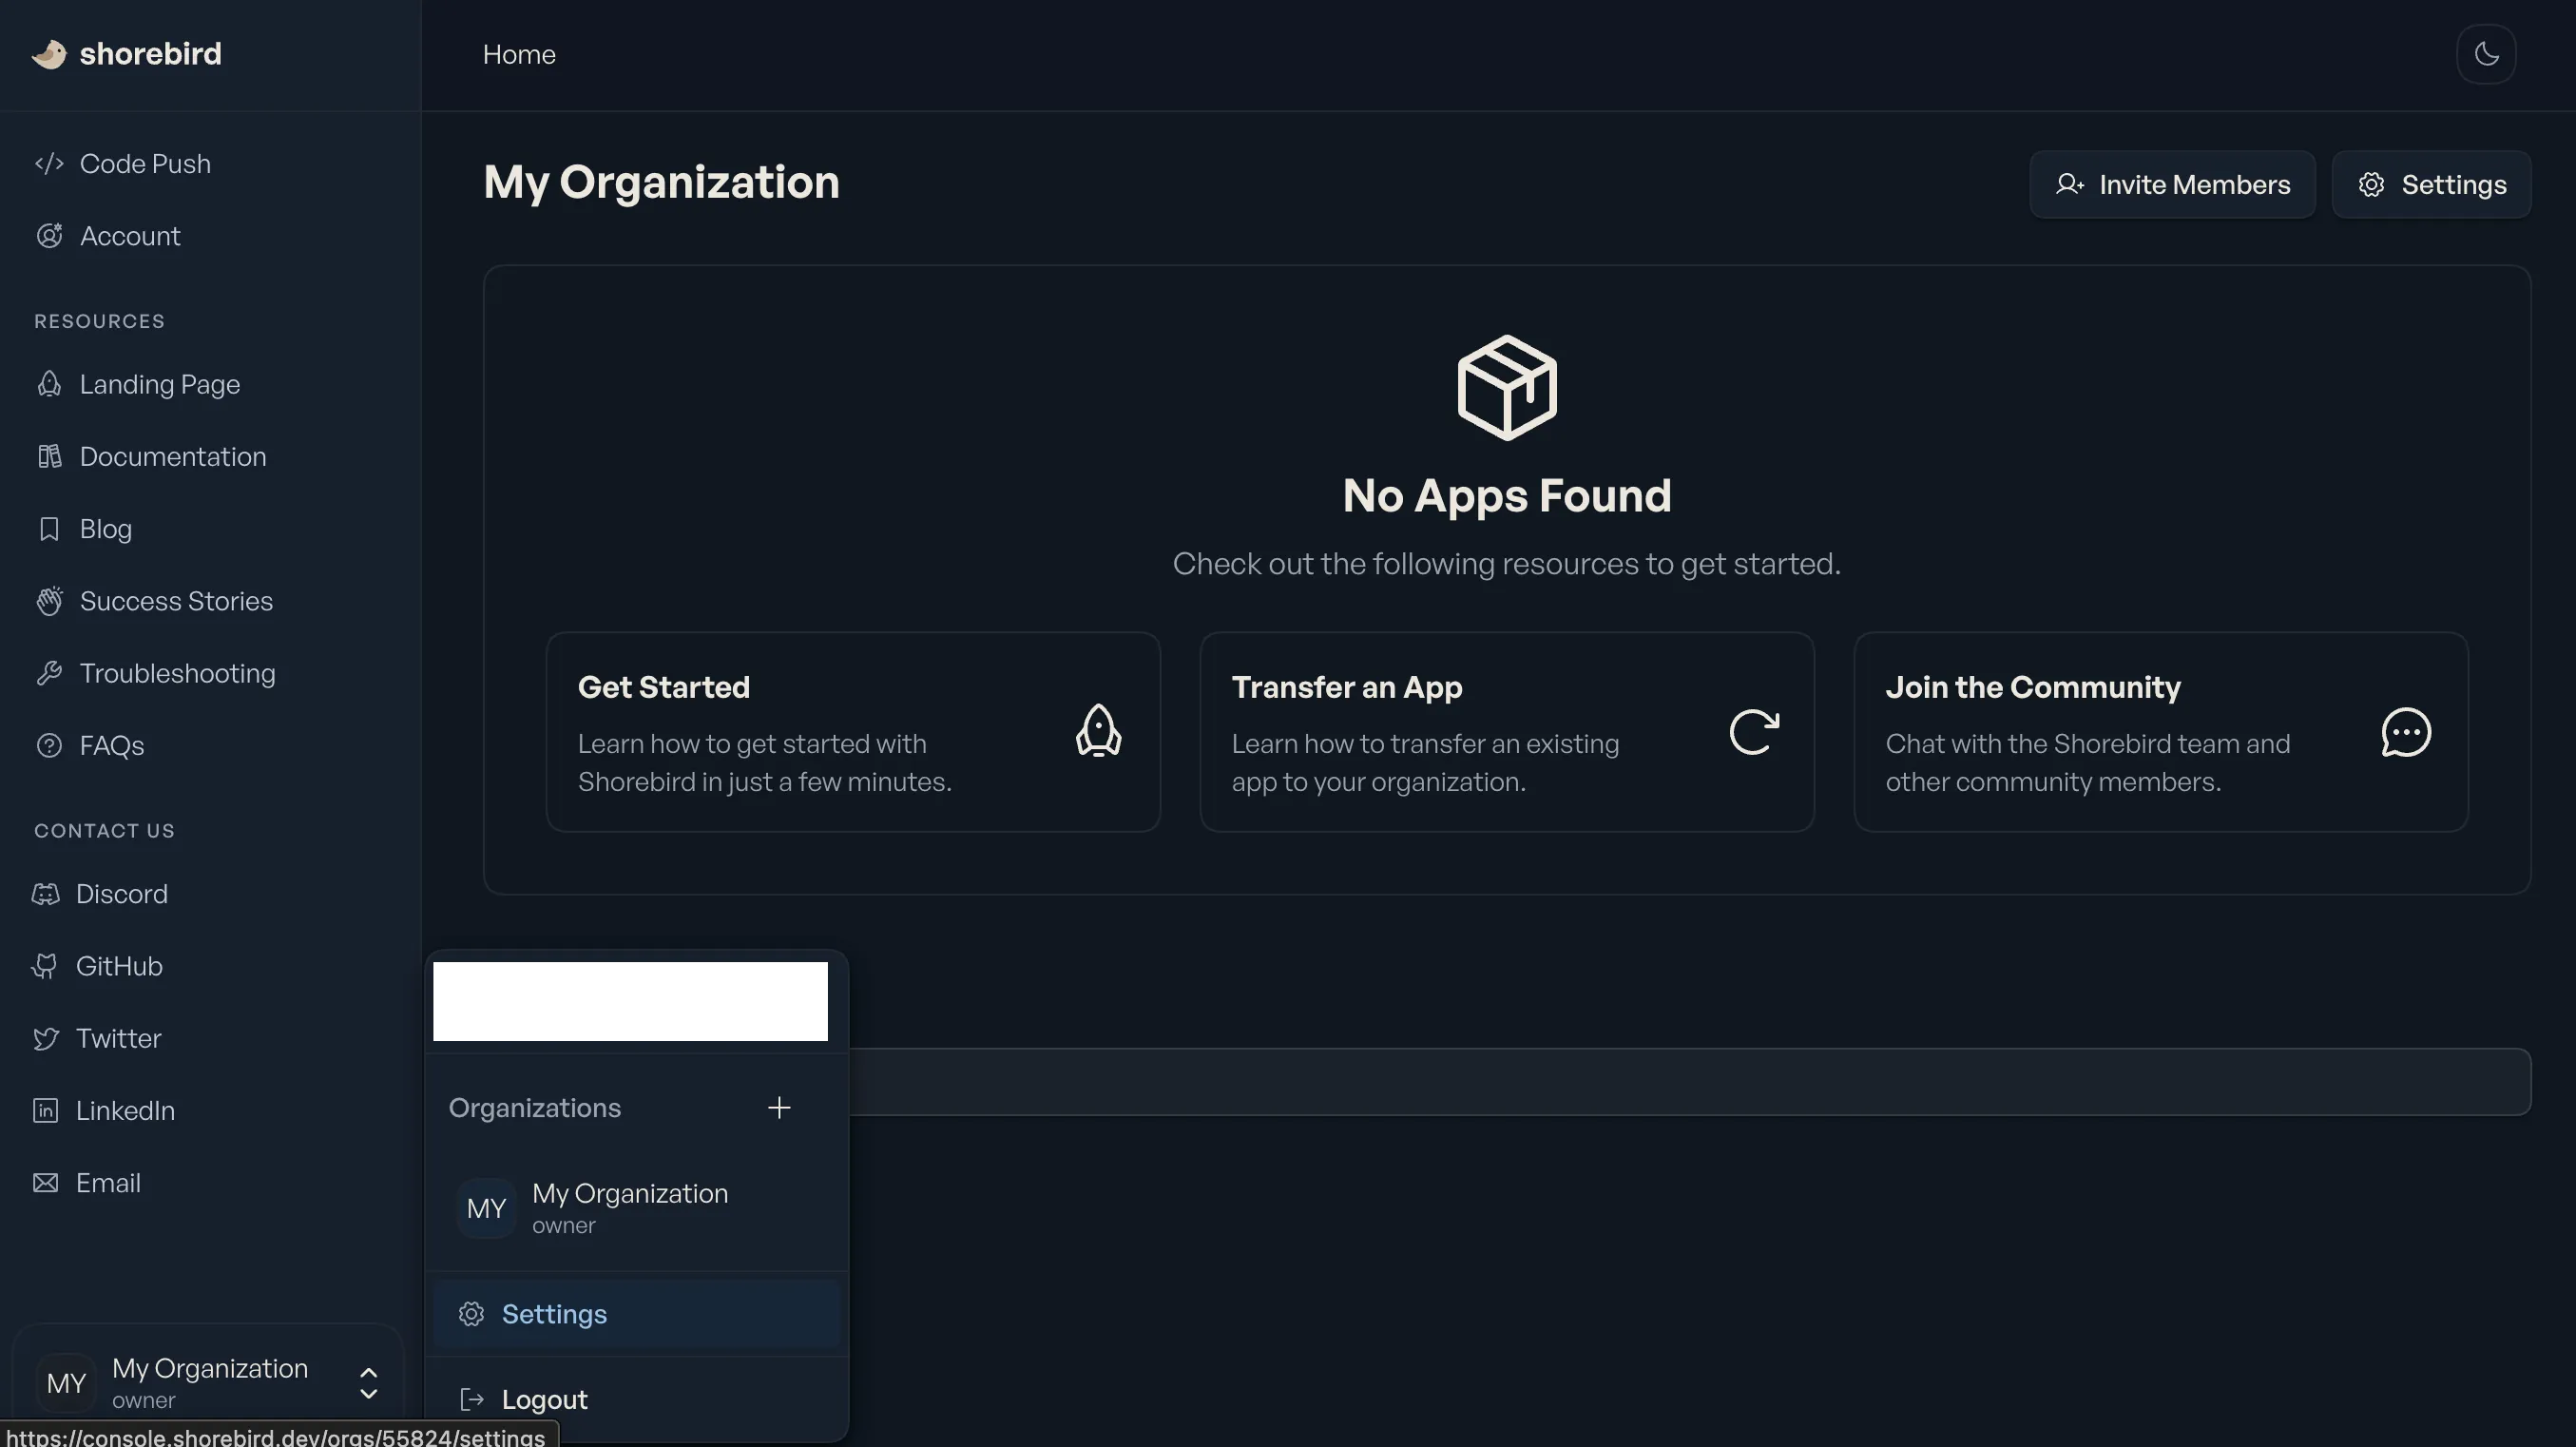
To create an organization, visit the Shorebird console and click on your email address in the bottom left corner. From there, click the ”+” button next to “Organizations”.
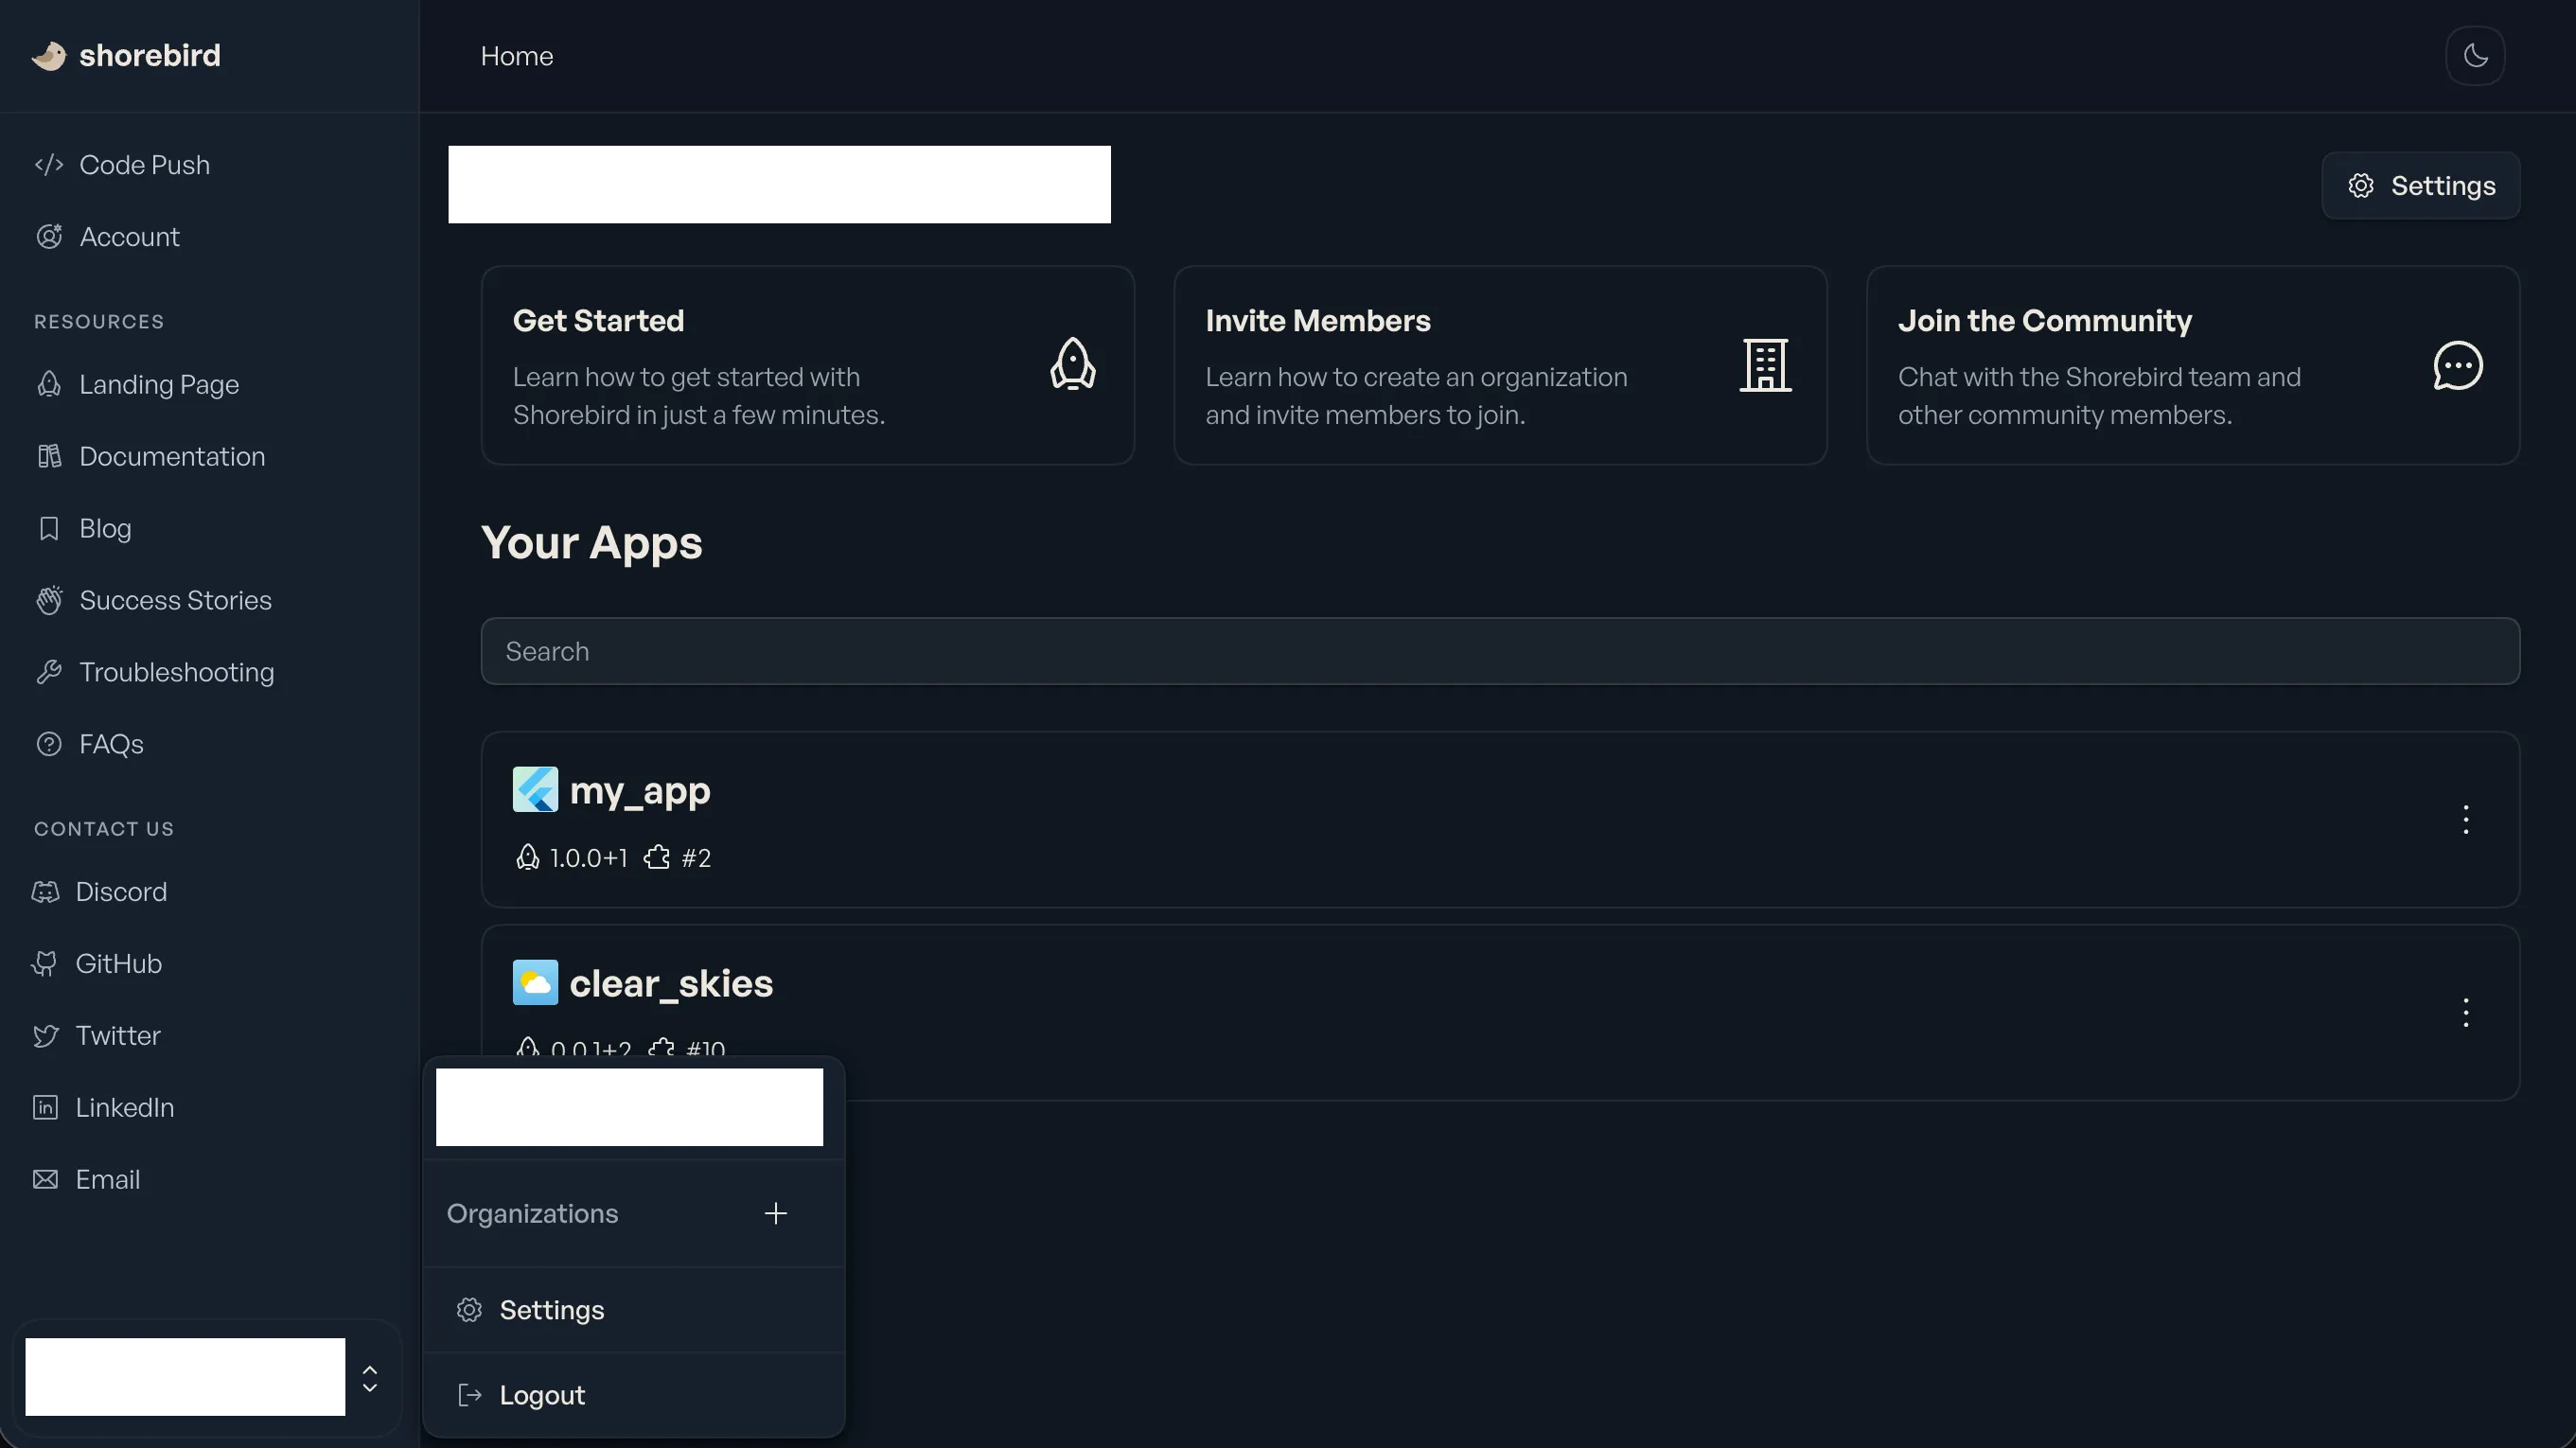
This will automatically create a new organization called “My Organization”. You can head over to the organization’s settings to change its details, including the name.
## Managing apps
Organizations can have multiple apps associated with them. You can either transfer existing apps to an organization or create new apps within the organization directly.
### Create a new app
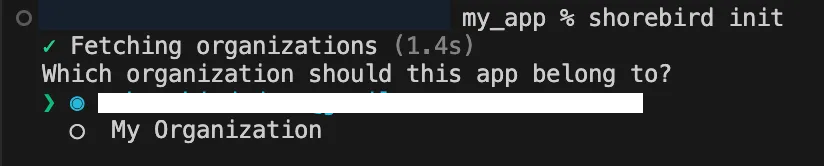
To create a new app within an organization, select the organization when running `shorebird init`:
### Transfer an app
To transfer an existing app to an organization, visit the app’s settings and click the “Transfer” button besides “Transfer Ownership” section. You can then select the organization you want to transfer the app to from the dropdown. You can only transfer to an organization you are part of.
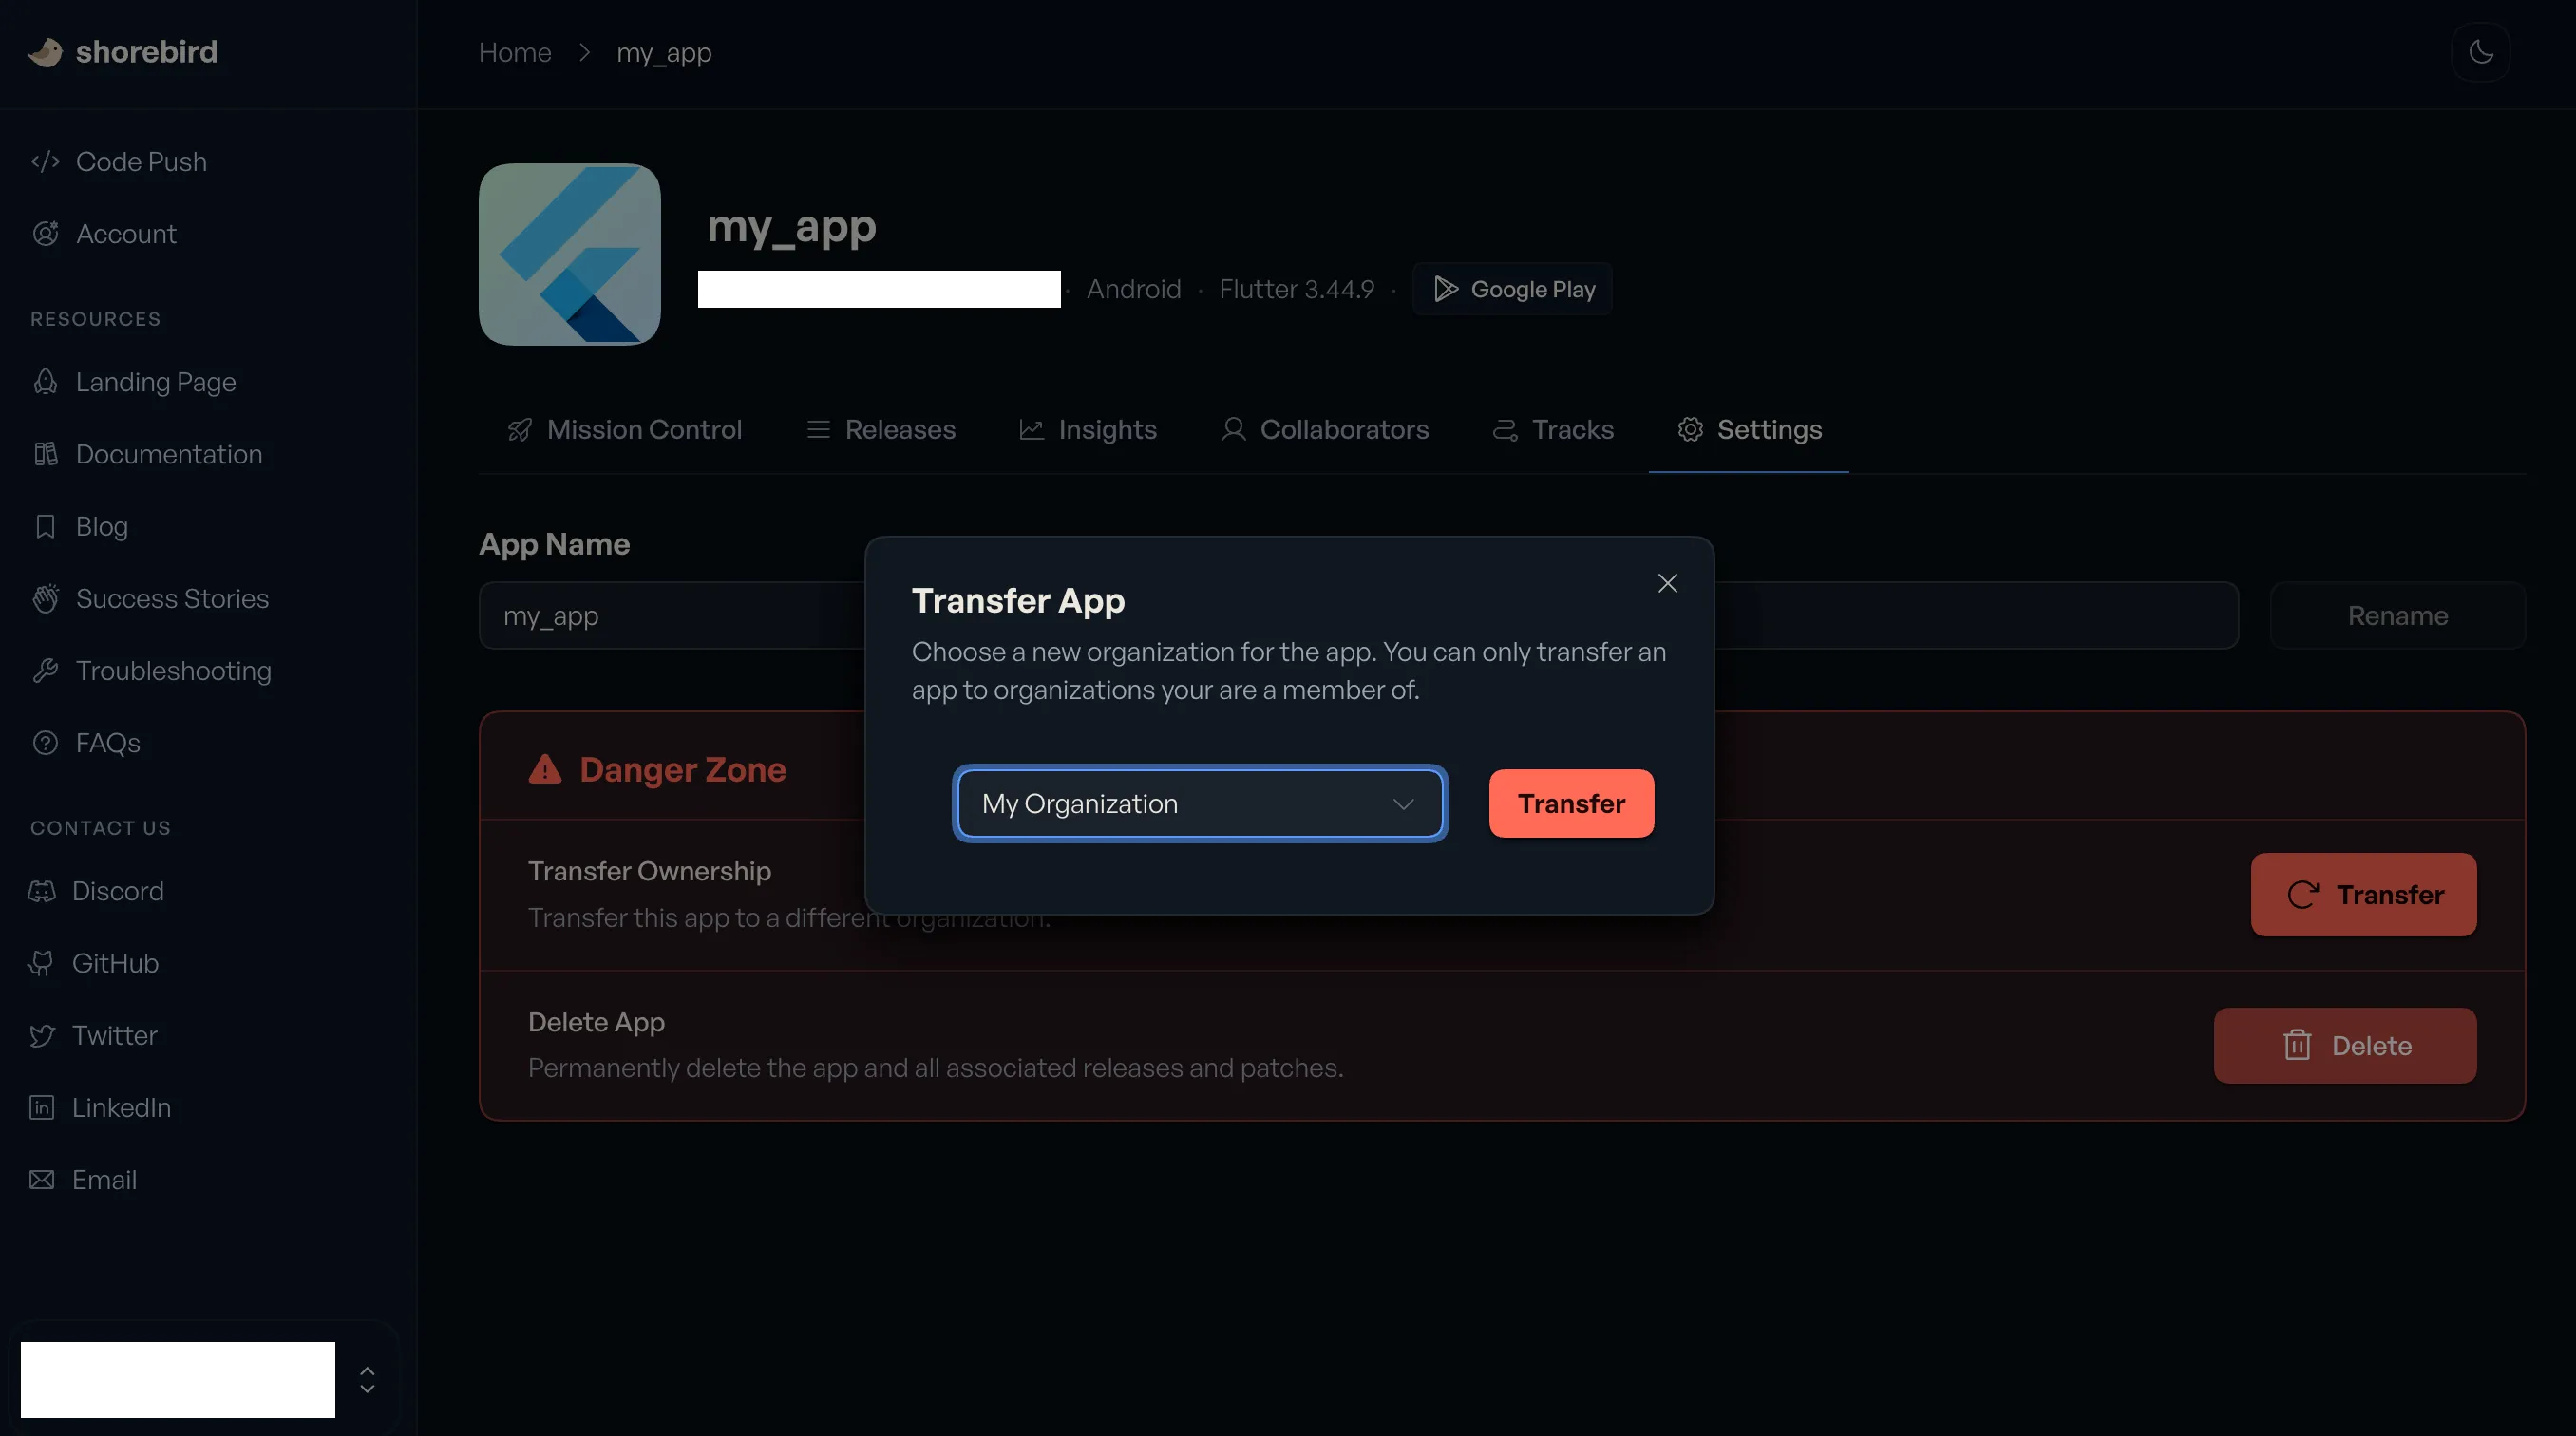
You can also transfer an app from the command line with [`shorebird apps transfer`](/account/cli#transfer-an-app).
## Managing members
### Add a member
[Adding Members to the Organization](https://app.arcade.software/share/Cl6LTDv4A3TKhJJOdJse)
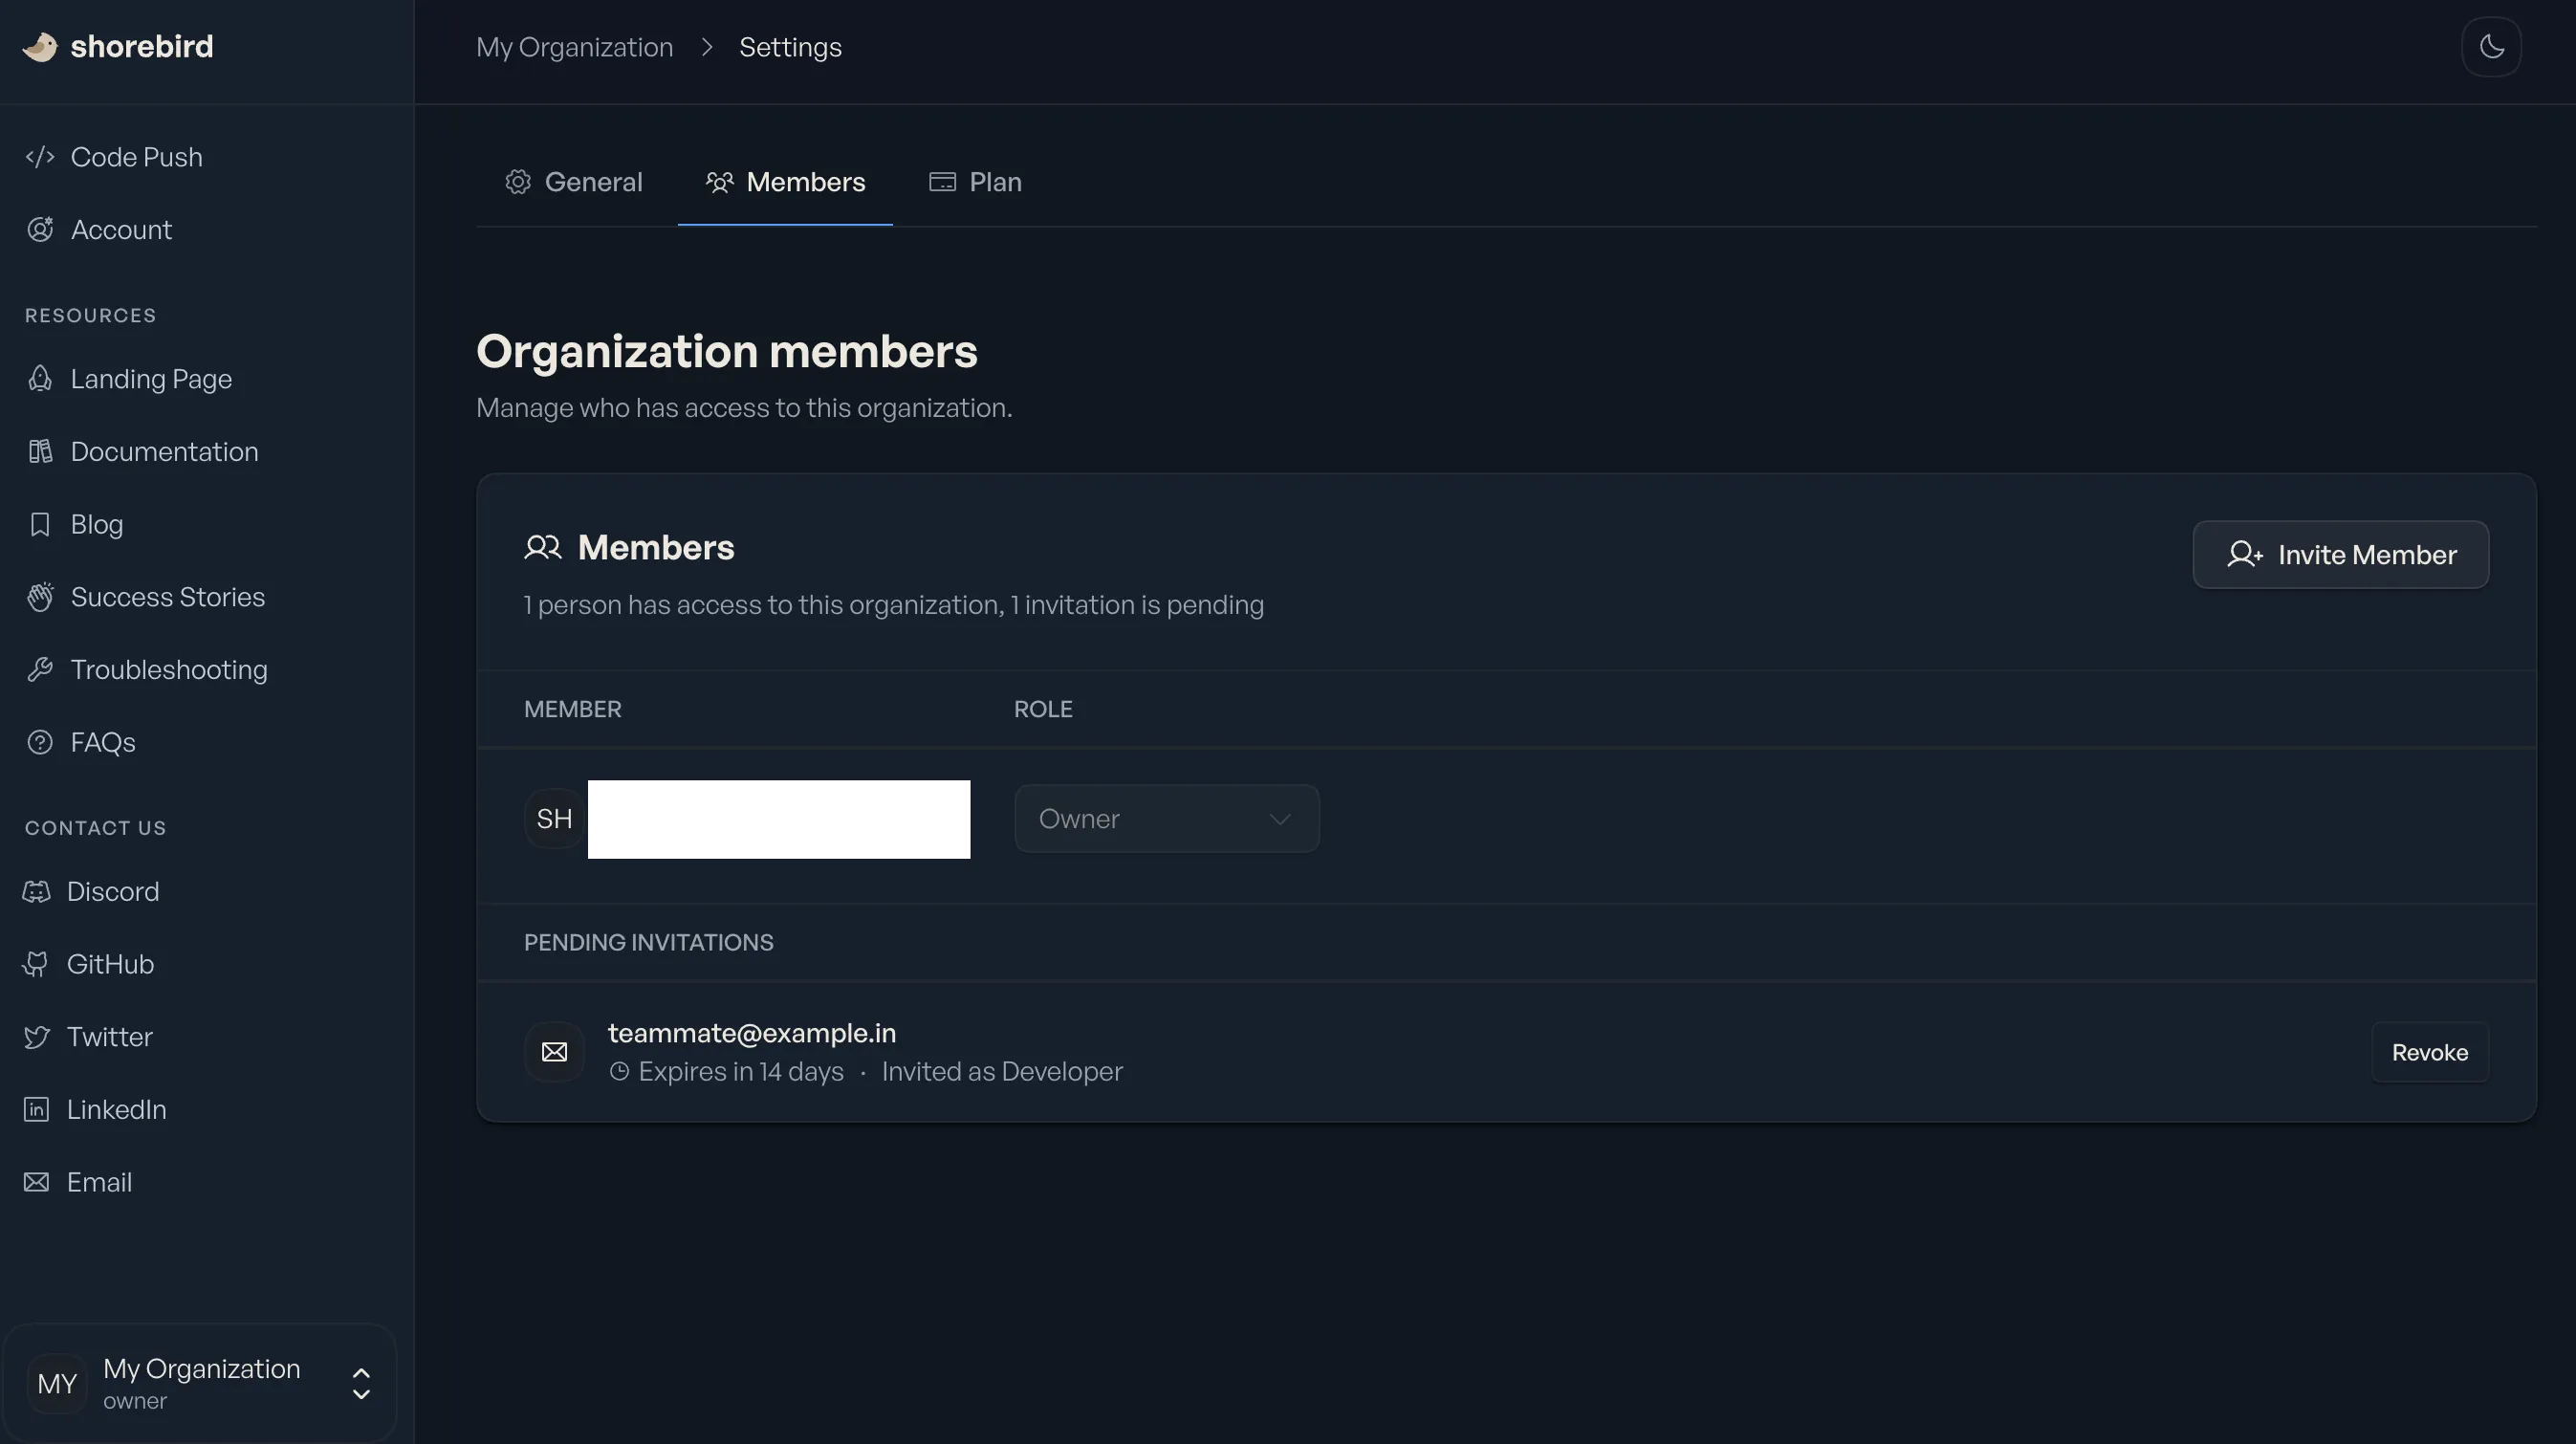
To add one or more members to your organization, visit the organization’s settings, go to “Members” section and click the “Invite Member” button.
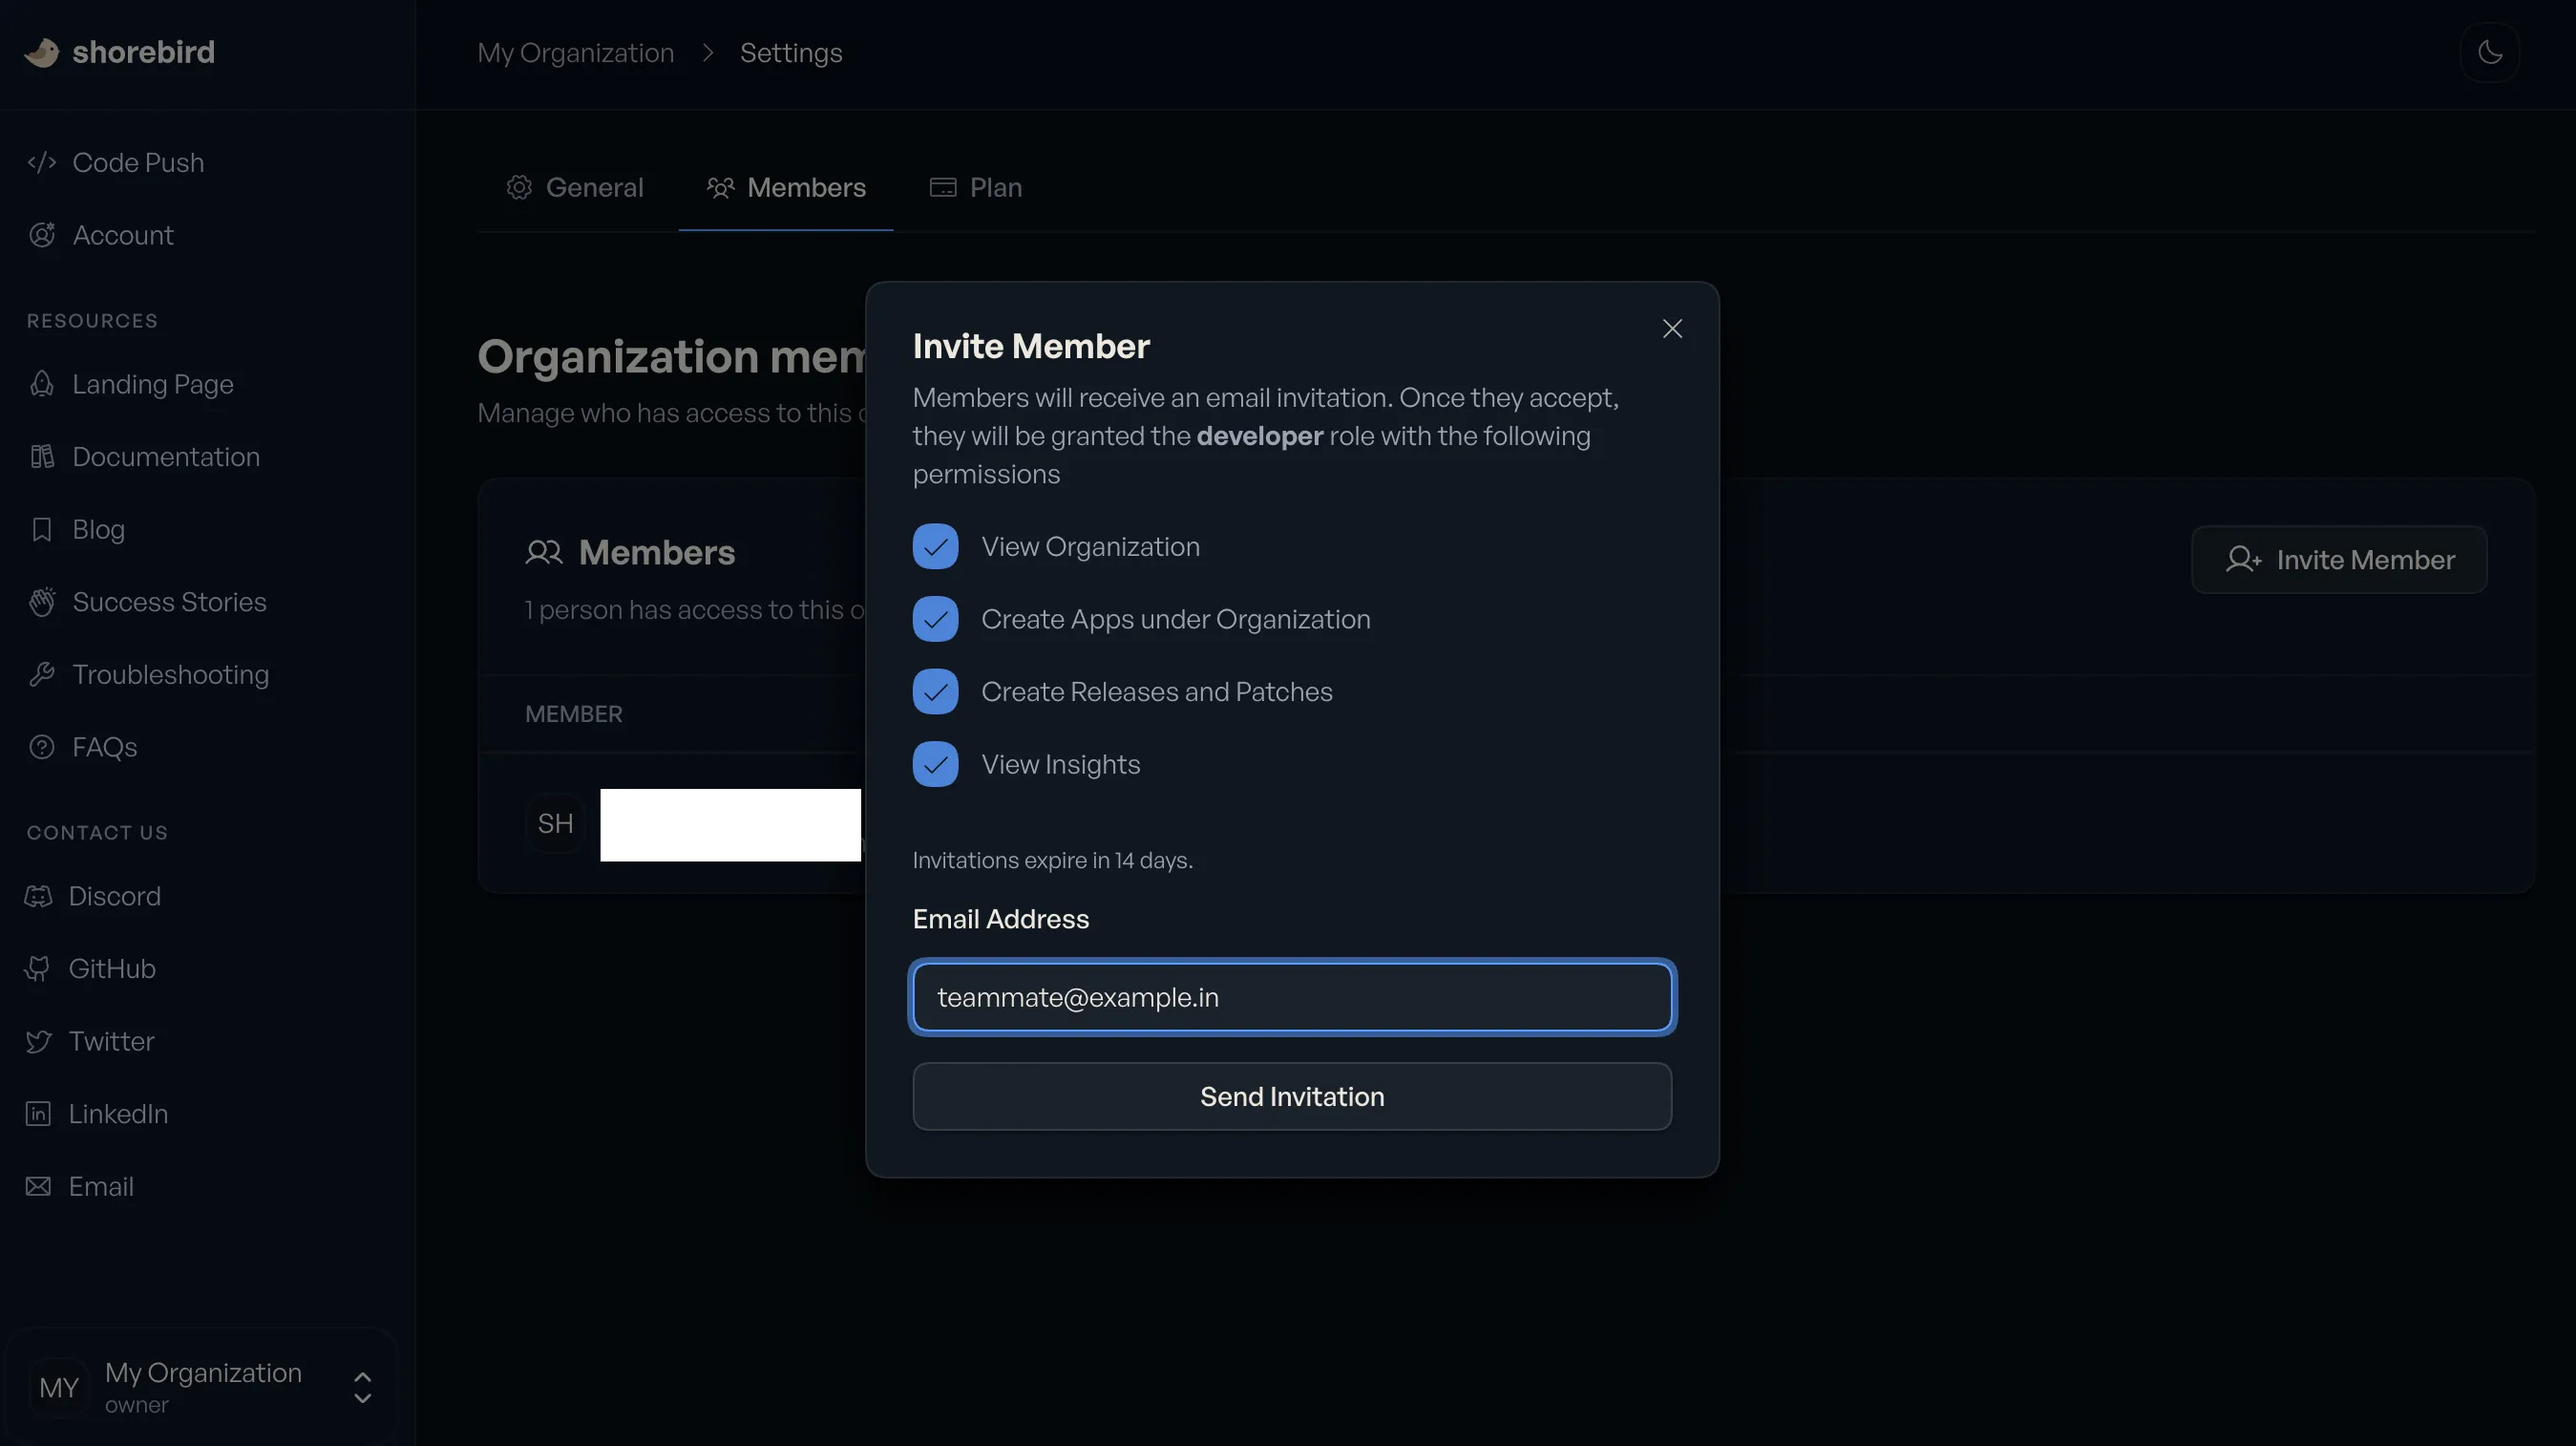
You can also edit a member’s role or remove them from the organization from the same members page.
### Remove a member
You can easily remove a member from an organization via the organization’s settings page. Locate the member you wish to remove, click the Trash icon, and confirm the action.
## Member roles
Organization roles apply to all apps within the organization and can be managed via the organization settings page in the Shorebird console. The roles available to you are based on the plan that you have.
| | Free | Pro | Business | Enterprise |
| ----------- | ---- | --- | -------- | ---------- |
| Viewer | | | ✅ | ✅ |
| Developer | | ✅ | ✅ | ✅ |
| App Manager | | | | ✅ |
| Admin | | ✅ | ✅ | ✅ |
| Owner | | ✅ | ✅ | ✅ |
### Viewer
Read-only access for stakeholders who need visibility into apps, releases, and patches without the ability to make changes. Ideal for product managers, QA, support, or leadership teams.
### Developer
Hands-on role for engineers actively building and shipping apps. Can create releases and patches, promote patches, and manage day-to-day development workflows without administrative access.
### App manager
Responsible for managing application lifecycle and release strategy. Has all Developer capabilities plus elevated control over app-level configuration, environments, and release coordination.
### Admin
Administrative role for managing team access and organization-level settings. Can configure apps, manage users and roles, and handle most operational tasks, excluding billing and plan changes.
### Owner
Full control over the organization. Can manage billing and plans, ownership settings, and all platform capabilities. Intended for primary account holders.
## Billing & ownership
Each organization has a single owner. An organization’s plan is determined by its [owner’s](#owner) subscription. Their Shorebird subscription is what sets the plan and available features for the entire organization.
To manage billing, the organization owner can visit the [billing settings](https://console.shorebird.dev/account) in the Shorebird console. See [Billing](/account/billing) for more details.
## Managing per app collaborators
Per-app collaborators can also be added and managed via the Shorebird console. The same management and permissions structure of organizations applies to collaborators, just at a per-app level.
To add a collaborator, from your app’s page:
1. Select the “Collaborators” tab.
2. Click “Invite Collaborator”.
3. Enter the email address of the person you would like to add as a collaborator. Note that the email address must be associated with an existing Shorebird account.
4. Click “Send Invitation”.
Existing collaborators can be removed by clicking the trash icon next to their email address.
# Plans & Upgrading
> How to upgrade, downgrade, switch, or cancel your Shorebird plan
Shorebird’s Pro and Business plans are self-service. You can upgrade, downgrade, switch between monthly and annual billing, and cancel from the [Plan page](https://console.shorebird.dev/account/plan) in the Shorebird Console. Enterprise plans are set up by the Shorebird team.
See the [pricing page](https://shorebird.dev/pricing) for what each plan includes.
## Who can change the plan
Plans belong to an **account**, not to an organization. Every organization you own runs on your plan, and their patch installs count against it.
This means only the [organization owner](/account/orgs#owner) can upgrade the plan for an organization. If you’re an Admin or Developer and your team needs a bigger plan, ask the owner to upgrade. To see who owns an organization, open the organization’s settings in the console.
## Upgrade from Free
1. Go to [Account](https://console.shorebird.dev/account) in the Shorebird Console and click **Manage Plan**.
2. Click **Upgrade plan**.
3. Pick **Monthly** or **Annual**, then click **Upgrade to Pro** or **Upgrade to Business**.
4. Complete checkout in Stripe.
Your new plan is active as soon as checkout completes, and your billing period starts today.
## Upgrade from Pro to Business
1. Go to [Account](https://console.shorebird.dev/account) and click **Manage Plan**.
2. Click **Change plan**.
3. Click **Upgrade to Business** on the billing interval you want.
4. Review the prorated amount due today and click **Confirm and pay**.
Upgrades take effect immediately. You’re charged a prorated amount for the rest of the current billing period, and your plan renews as Business at the next renewal date.
## Switch between monthly and annual billing
Open **Manage Plan** → **Change plan** and use the **Monthly** / **Annual** tabs to pick the interval, then click **Switch to** your plan on that interval.
* **Monthly to annual** takes effect immediately. You’re charged the annual price, less a prorated credit for the unused part of the current month.
* **Annual to monthly** is scheduled for the end of your current annual period. Nothing is charged today.
## Downgrade from Business to Pro
Open **Manage Plan** → **Change plan** and click **Switch to Pro**.
Downgrades are scheduled, not immediate: your current plan stays active through the period you’ve already paid for, and it becomes Pro at the start of the next period. Nothing is due today. Until then, the Plan page shows the scheduled change with a **Keep current plan** button that cancels it.
## Cancel your plan
Open **Manage Plan** and click **Cancel plan**.
Nothing changes today. Your plan runs to the end of the current billing period, after which your account drops to the Free plan. Your apps and release history stay on your account, and devices keep the last patch they received. See [Will your app still work if you cancel?](/code-push/faq#will-your-app-still-work-if-you-cancel-your-shorebird-subscription)
Until the period ends, the Plan page shows a **Resume plan** button if you change your mind.
## Enterprise
Enterprise plans include SAML single sign-on, invoice billing, custom contracts, and higher patch volumes. They aren’t self-service: [reach out to sales](https://shorebird.dev/talk-to-sales) and the Shorebird team will set up your account. See [Enterprise](/enterprise/) for what’s included.
If you’re already on an Enterprise or other negotiated plan, the Plan page doesn’t offer self-service changes. Contact your Shorebird representative or [email billing](mailto:billing@shorebird.dev) for changes.
## Troubleshooting
### I upgraded but my organization still shows the old plan
Plans belong to the account that owns the organization. If you upgraded your own account but someone else owns the organization, the organization is still on the owner’s plan. Either the owner upgrades, or ownership of the organization is transferred to the account with the paid plan.
### Change plan is disabled
Plans can’t be changed while a payment is past due. Update your payment method from the **Payment** card on the Plan page to settle the balance, then try again.
### I need a plan that isn’t listed
If none of the self-service plans fit, or you need invoice billing or a custom contract, [talk to sales](https://shorebird.dev/talk-to-sales).
# Shorebird CI
> Shorebird CI was deprecated on August 8, 2026. Find migration options for existing users.
Shorebird CI has been deprecated
Shorebird CI was deprecated on **August 8, 2026**. See the [Shorebird CI README](https://github.com/shorebirdtech/shorebird/blob/main/packages/shorebird_ci/README.md) for migration options.
# Overview
> A high-level explanation of what Code Push is and how it works.
For a quick overview, check out the demo below.
[Send over the air updates to Flutter app](https://demo.arcade.software/x5ifkvJ8yFZh63hYJF0g?embed\&embed_mobile=tab\&embed_desktop=inline\&show_copy_link=true)
## What is Code Push?
Code Push is a tool that allows you to update your Flutter app instantly over the air, without going through the store update process. This allows you to directly deploy fixes and new features to your end users’ devices.
## How does Code Push work?
Apps built with Shorebird include a modified Flutter engine, which checks for updates to your app’s Dart code on startup. If an update is available, the engine downloads the update. The user will see the update on the next app restart after the update is downloaded.
When do users see the update?
By default, the Shorebird updater runs on a background thread on startup to prevent blocking app launch. The patch is downloaded in the background while the user is using the app and will be applied on the **next launch** (meaning users will see the update on their second launch of the app). If you require immediate/mandatory updates, you can trigger checks programmatically using `package:shorebird_code_push`.
### Is your change patchable?
Not all changes can be shipped via a patch. Use this flowchart to decide whether you need to publish a new release to the app stores or if you can push a patch:
```
flowchart TD
A["Did you make changes?"] --> B{"Do changes include native code?\n(Java, Kotlin, Swift, Obj-C)"}
B -- Yes --> C["New Store Release Required\n(Run 'shorebird release')"]
B -- No --> D{"Do changes include asset updates?\n(Images, fonts, pubspec assets)"}
D -- Yes --> C
D -- No --> E["Patchable OTA!\n(Run 'shorebird patch')"]
```
Patch compliance
Shorebird automatically checks for native code and asset changes before creating a patch. Ensuring the *content* of your Dart changes complies with App Store and Play Store behavioral policies remains your responsibility. See [Store Compliance](/code-push/faq#store-compliance) and [What can’t Shorebird be used for](/code-push/faq#what-cant-shorebird-code-push-be-used-for) for details.
A typical Code Push workflow looks like this:
1. Use the Shorebird CLI to create a new **release** of your app.
2. Distribute that release through the App Store or Google Play.
3. Make changes to your app’s Dart code. This could be a bug fix, a new feature, or anything else, and is not limited to your app’s UI — this can include updated Dart dependencies as well.
4. Use the Shorebird CLI to create a new **patch** to the release you created in the first step.
5. That’s it. Your users will see the update the next time they restart your app.
### Platform feature support matrix
Below is a summary of feature support status across all Shorebird target platforms:
| Feature | Android | iOS | macOS | Windows | Linux |
| :---------------------------------------------- | :-----: | :-: | :---: | :-----: | :---: |
| **Dart Code Patching (OTA)** | ✅ | ✅ | ✅ | ✅ | ✅ |
| **Flavors / Custom Targets** | ✅ | ✅ | ✅ | ✅ | ✅ |
| [**Add-to-app**](/flutter-concepts/add-to-app/) | ✅ | ✅ | ❌ | ❌ | ❌ |
| **Code Obfuscation (`--obfuscate`)** | ✅ | ✅ | ✅ | ✅ | ✅ |
| **Patch Signing / KMS** | ✅ | ✅ | ✅ | ✅ | ✅ |
Note
Code Obfuscation support on all platforms requires Flutter 3.41.2 or later.
## Concepts
This section contains a high-level overview of various concepts within Shorebird. Feel free to skip it now and come back later if you need.
### Code Push
Code Push, also referred to as “over-the-air updates” (OTA), is a cloud service enabling Flutter developers to deploy updates to their apps in production. Shorebird works on Android, iOS, macOS, Linux and Windows.
“Code Push” is a reference to the name of a deploy feature used by the React Native community from [Microsoft](https://appcenter.ms) and [Expo](https://expo.dev), neither of which support Flutter.
### Patching
Patching is the process of updating an application’s code without requiring the user to download a new version from the App Store or Play Store. This is done by creating a patch, which is a set of changes to the application’s code that can be applied over-the-air.
#### What types of changes can be included in a patch?
Patches can change any Dart code in your application. This includes:
* App code
* Generated code (including `app_localizations` if following the recommended [Internationalization Approach](https://docs.flutter.dev/ui/accessibility-and-internationalization/internationalization))
* Dependencies in `pubspec.yaml`, as long as they don’t include native code changes.
This does **not** include:
* Asset files (images, fonts, etc.), although support for this is planned for the near future (see ).
* Native code (e.g. Java/Kotlin on Android or Objective-C/Swift on iOS).
* Flutter engine changes (i.e., you cannot change the Flutter version of your app using Code Push).
### Glossary
#### Application
An application is what is created by running `flutter create [app_name]` and corresponds to a listing in the App Store or Play Store.
Each application has a unique `app_id` that is assigned when you run `shorebird init`. You can find your application’s ID in the `shorebird.yaml` file at the root of your project.
An application can have zero or more [releases](#release).
Note
Applications that use build flavors will have a unique `app_id` for each flavor.
#### Release
A release is a specific version of an [application](#application), identified by a version and build number (e.g., `1.0.0+1`). Although Code Push works for apps distributed outside of the App Store and Play Store, a release most often corresponds with a specific version of your app that is published to the App Store or Play Store.
A release can have zero or more [patches](#patch) applied to it.
Releases are created by running `shorebird release [platform]`, where `platform` is `android`, `ios`, `windows`, `linux` or `macos`.
`shorebird release` is a drop-in replacement for `flutter build`. It builds your app and uploads the compiled Dart artifacts to Shorebird’s servers. After running this command, you still need to upload the generated artifact (`.aab` for Android, `.ipa` for iOS) to the respective store.
#### Patch
A patch is a change to a specific [release](#release), applied as an over-the-air update. For example, a patch could be a bug fix or a new feature. Multiple patches can be published for a given release, although only one patch can be active at a time. Patches are identified by their associated release version and a patch number, which is an auto-incrementing integer.
When your application starts, it checks for available patches and applies the latest one. This patch will be visible the next time your application launches.
Patches are created by running `shorebird patch [platform]`, where `platform` is `android`, `ios`, `windows`, `linux`, or `macos`.
Note
There is no limit on the number of patches you can publish. See [Is there a limit to how many patches you can ship?](/code-push/faq#is-there-a-limit-to-how-many-patches-i-can-ship-per-release) for more details.
#### Track
A track is a named deployment channel that controls which devices receive a patch. Every app has a built-in `stable` track (the default). Additional tracks such as `staging` or `beta` are created on demand by naming them when publishing a patch, and allow you to validate patches with a subset of devices before promoting them to all users.
For a full explanation, see [Tracks](/code-push/tracks).
#### Artifact
An artifact is the output of a build or patch operation. For example:
* `shorebird release android` generates and uploads several architecture-specific `libapp.so` files and an Android App Bundle (.aab) file. These are **release artifacts**.
* `shorebird patch android` generates and uploads diff files that capture differences between your Dart code at patch time and the code in the associated release. These are **patch artifacts**.
# Codemagic Integration
> Integrate Shorebird into your Codemagic workflow
Note
Codemagic has also published [their own guide](https://blog.codemagic.io/how-to-set-up-flutter-code-push-with-shorebird-and-codemagic/) on how to integrate with Shorebird.
# Codemagic workflow integration
This guide will help you integrate Shorebird into your Codemagic Workflow using the [Codemagic YAML](https://docs.codemagic.io/yaml-basic-configuration/yaml-getting-started/).
The reference code is available on GitHub at .
## Prerequisites
This guide assumes that:
1. Shorebird CLI is installed on your machine ([guide](https://docs.shorebird.dev/#install)).
2. Codemagic is connected to your repository ([guide](https://docs.codemagic.io/yaml-quick-start/building-a-flutter-app/#adding-the-app-to-codemagic)).
## Authentication
Most Shorebird functionality, like creating releases and patches, requires authentication. To authenticate in your CI, create an API key from the [Shorebird Console](https://console.shorebird.dev):
[Create Shorebird API Key](https://demo.arcade.software/TQUMnX2QwuCRzEV1e8kN?embed\&embed_mobile=tab\&embed_desktop=inline\&show_copy_link=true)
1. Go to **Account → API Keys**.
2. Click **Create API Key**.
3. Give the key a name (e.g., “GitHub Actions — Flutter app”), choose an expiration, and select a permission level.
4. Copy the key value — it is only shown once.
Use this key as your `SHOREBIRD_TOKEN` in CI. The environment variable name is unchanged from previous versions.
Caution
`SHOREBIRD_TOKEN` is a secret. Do not check it into source control or share it publicly. Store it in your CI platform’s secrets manager.
See [API Keys](/account/api-keys/#permissions) for details on permission levels and other key management options.
Migrating from `shorebird login:ci`
The `shorebird login:ci` command is deprecated. Existing tokens generated by `login:ci` will continue to work until September 2026, but new tokens should be created from the console. The `SHOREBIRD_TOKEN` environment variable name has not changed, so your CI workflow files need only a new key value.
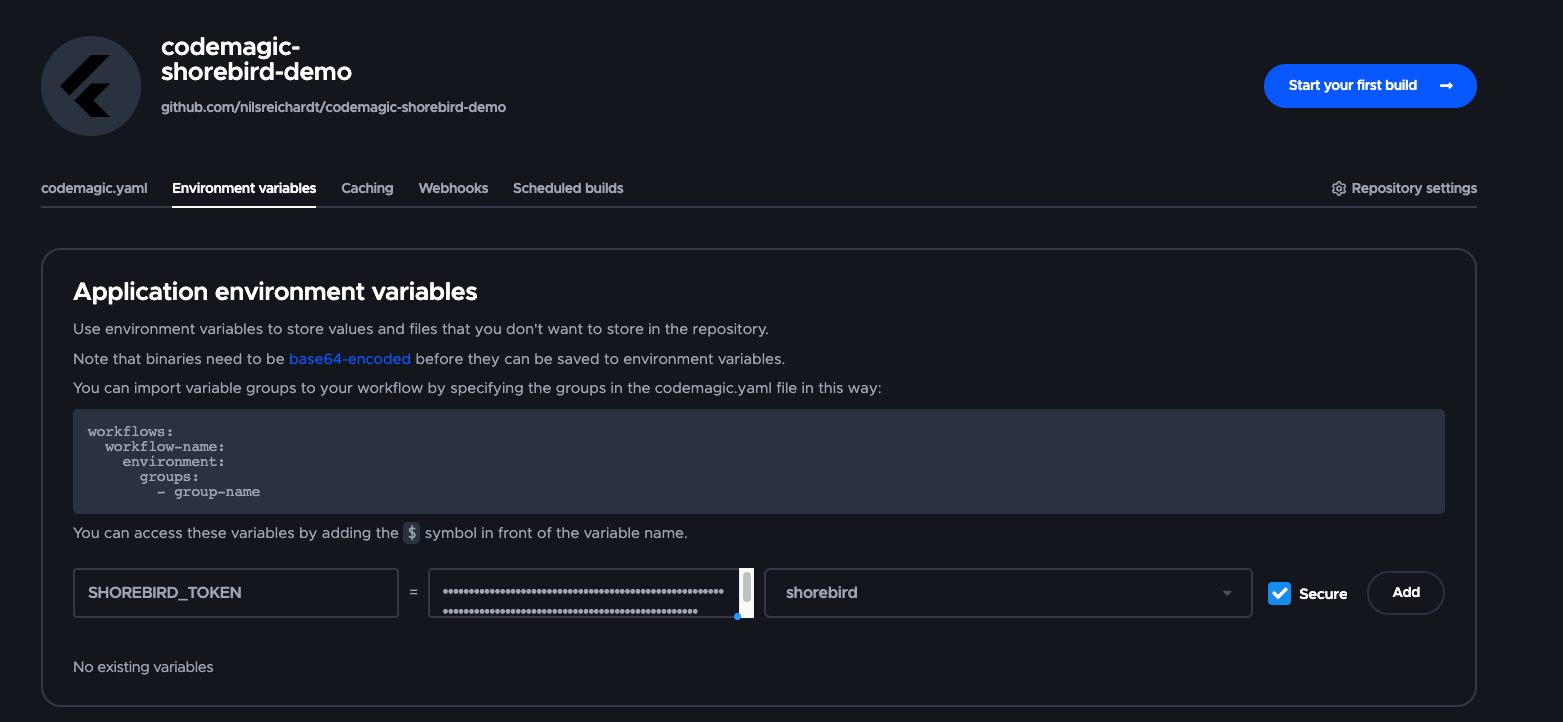
Next, copy the generated `SHOREBIRD_TOKEN` and navigate to your Codemagic secrets:
1. Select the “teams” tab on the left sidebar.
2. Select the team you want to add the secret to.
3. Select the “Global Variables and Secrets” tab.
4. Enter `SHOREBIRD_TOKEN` as variable name.
5. Paste the token into the variable value field.
6. Add it to a group named `shorebird`.
7. Ensure “Secure” is checked.
## Set up an Android workflow
This section shows you how to set up a Codemagic workflow to create Android releases, distribute them to the Play Store, and patch them once they’ve been distributed.
Note
This workflow uses the Codemagic YAML file. The Workflow Editor is not supported, as it does not allow changing the build command.
If you don’t know how to use the Codemagic YAML, please refer to the [Codemagic YAML documentation](https://docs.codemagic.io/yaml-basic-configuration/yaml-getting-started/).
As a preview, the finished `codemagic.yaml` file will look like this:
```
definitions:
environment:
shared_env: &shared_env
flutter: 3.47.5
groups:
- shorebird
- play_store
vars:
FLUTTER_VERSION: 3.47.5
scripts:
- &shorebird_install
name: Install Shorebird
script: |
# Install Shorebird
curl --proto '=https' --tlsv1.2 https://raw.githubusercontent.com/shorebirdtech/install/main/install.sh -sSf | bash
# Add Shorebird to PATH
echo PATH="$HOME/.shorebird/bin:$PATH" >> $CM_ENV
- &fetch_dependencies
name: Fetch Dependencies
script: |
flutter pub get
workflows:
release-android-workflow:
name: Release Android
instance_type: mac_mini_m1
environment:
<<: *shared_env
android_signing:
- android_keystore
scripts:
- *shorebird_install
- *fetch_dependencies
- name: Shorebird Release
script: |
shorebird release android \
--flutter-version="$FLUTTER_VERSION"
artifacts:
- build/**/outputs/**/*.aab
- build/**/outputs/**/mapping.txt
- flutter_drive.log
publishing:
google_play:
credentials: $GCLOUD_SERVICE_ACCOUNT_CREDENTIALS
track: internal
patch-android-workflow:
name: Patch Android
instance_type: mac_mini_m1
environment:
<<: *shared_env
android_signing:
- android_keystore
inputs:
release_version:
description: The release version to patch
scripts:
- *shorebird_install
- *fetch_dependencies
- name: Shorebird Patch
script: |
shorebird patch android \
--release-version=${{ inputs.release_version }}
```
### Prerequisites
#### Give Codemagic permission to publish to the Play Store
You can follow the Codemagic guide [here](https://docs.codemagic.io/yaml-code-signing/signing-android/#google-play-store-credentials) to set this up. This example places the `GCLOUD_SERVICE_ACCOUNT_CREDENTIALS` variable in a group named `play_store`.
#### Set up your Android keystore in Codemagic
You can follow the Codemagic guide [here](https://docs.codemagic.io/yaml-code-signing/signing-android/) to create a keystore and upload it to Codemagic. This example uses `android_keystore` as the name of the uploaded keystore.
You will also also need to update your `android/app/build.gradle` file to use this keystore in the Codemagic CI environment:
```
signingConfigs {
release {
if (System.getenv()['CI']) { // CI=true is exported by Codemagic
storeFile file(System.getenv()['CM_KEYSTORE_PATH'])
storePassword System.getenv()['CM_KEYSTORE_PASSWORD']
keyAlias System.getenv()['CM_KEY_ALIAS']
keyPassword System.getenv()['CM_KEY_PASSWORD']
} else {
keyAlias keystoreProperties['keyAlias']
keyPassword keystoreProperties['keyPassword']
storeFile keystoreProperties['storeFile'] ? file(keystoreProperties['storeFile']) : null
storePassword keystoreProperties['storePassword']
}
}
}
```
### Create shared configuration
At the top of the `codemagic.yaml` file, define shared environment variables and scripts that will be used by multiple workflows. This has been annotated to explain what each part does.
```
definitions:
environment:
# Use &shared_env to allow us to reference this environment in other
# parts of the file
shared_env: &shared_env
flutter: 3.47.5
groups:
# Add the shorebird group to make $SHOREBIRD_TOKEN available to
# the Shorebird CLI.
- shorebird
# Add the play_store group to make $GCLOUD_SERVICE_ACCOUNT_CREDENTIALS
# available to the Google Play Publishing step.
- play_store
vars:
FLUTTER_VERSION: 3.47.5
scripts:
# A step to install Shorebird and add it to the host machine's PATH
- &shorebird_install
name: Install Shorebird
script: |
# Install Shorebird
curl --proto '=https' --tlsv1.2 https://raw.githubusercontent.com/shorebirdtech/install/main/install.sh -sSf | bash
# Add Shorebird to PATH
echo PATH="$HOME/.shorebird/bin:$PATH" >> $CM_ENV
- &fetch_dependencies
name: Fetch Dependencies
script: |
flutter pub get
```
### Add the Android release workflow
Add the following workflow to your `codemagic.yaml` file. This has been annotated to explain what each part does.
```
workflows:
release-android-workflow:
name: Release Android
# This can run on any instance type.
instance_type: mac_mini_m1
environment:
# Add the shared_env we defined in the definitions section.
<<: *shared_env
# Make the keystore available so we can use release signing.
android_signing:
# "android_keystore" is the name of the keystore we uploaded
# to Codemagic.
- android_keystore
scripts:
- *shorebird_install
- *fetch_dependencies
# Run `shorebird release android` to create a release.
# This will upload the release to Shorebird and generate
# the artifacts listed below.
- name: Shorebird Release
script: |
shorebird release android \
--flutter-version="$FLUTTER_VERSION"
# Tell Codemagic where to find the artifacts to publish.
artifacts:
- build/**/outputs/**/*.aab
- build/**/outputs/**/mapping.txt
- flutter_drive.log
publishing:
# Publish to the Google Play Store on the internal track.
google_play:
credentials: $GCLOUD_SERVICE_ACCOUNT_CREDENTIALS
track: internal
```
With this, you should be able to create a release in Shorebird and publish it to the Google Play Store via Codemagic.
### Add the Android patch workflow
Add the following workflow to your `codemagic.yaml` file. This has been annotated to explain what each part does.
```
workflows:
patch-android-workflow:
name: Patch Android
# As with the release workflow, this can run on any instance type.
instance_type: mac_mini_m1
environment:
# Add the shared_env we defined in the definitions section.
<<: *shared_env
# Make the keystore available so we can use release signing.
android_signing:
# "android_keystore" is the name of the keystore we uploaded
# to Codemagic.
- android_keystore
# Add an input to allow us to specify the release version to patch.
# This will make this workflow reusable across releases.
inputs:
release_version:
description: The release version to patch
scripts:
- *shorebird_install
- *fetch_dependencies
- name: Shorebird Patch
# Run `shorebird patch android` to patch the specified release.
script: |
shorebird patch android \
--release-version=${{ inputs.release_version }}
```
With this, you should be able to patch a release in Shorebird via Codemagic.
## Set up an iOS workflow
This section shows you how to set up a Codemagic workflow to create iOS releases, distribute them to TestFlight, and patch them once they’ve been distributed.
Note
This workflow uses the Codemagic YAML file. The Workflow Editor is not supported, as it does not allow changing the build command.
If you don’t know how to use the Codemagic YAML, please refer to the [Codemagic YAML documentation](https://docs.codemagic.io/yaml-basic-configuration/yaml-getting-started/).
### Prerequisites
#### Prepare your iOS code signing
Codemagic has a guide on how to set up code signing for iOS [here](https://docs.codemagic.io/yaml-quick-start/building-a-flutter-app/). This guide will help you generate the necessary keys, certificates, and provisioning profiles and load them into Codemagic.
Once you’ve done that, you will need to make these available to your `codemagic.yaml` scripts. You will end up with four environment variables to support this:
* `KEY_ID`: This will be copied directly from App Store Connect.
* `ISSUER_ID`: This will be copied directly from App Store Connect.
* `APP_STORE_CONNECT_PRIVATE_KEY`: This will be the contents of the private key file you downloaded from App Store Connect. An easy way to get this into Codemagic is to run `cat /path/to/AuthKey_12345678.p8 | pbcopy` which will copy the contents of the file to your clipboard. You can then paste this into Codemagic.
* `CERTIFICATE_PRIVATE_KEY`: Follow [this guide](https://docs.codemagic.io/partials/code-signing-ios-obtain-certificate/) to obtain `ios_distribution_private_key` file. You can then paste the contents of this file into Codemagic. `cat ios_distribution_private_key | pbcopy` works well for this.
This example places all of these variables into a group named `app_store`.
### Create a shared configuration
At the top of the `codemagic.yaml` file, define shared environment variables and scripts that will be used by multiple workflows. This has been annotated to explain what each part does.
Note
Many of these scripts use the [Codemagic CLI tools](https://docs.codemagic.io/knowledge-codemagic/codemagic-cli-tools/). You don’t need to install these, but they can be helpful if you want to debug locally.
```
definitions:
environment:
shared_env: &shared_env
flutter: 3.47.5
groups:
# Export the shorebird group to make $SHOREBIRD_TOKEN available to
# the Shorebird CLI.
- shorebird
# Export the app_store group to make the iOS code signing variables
# available the scripts below.
- app_store
vars:
# The bundle ID of this example app.
# Replace this with your app's bundle id.
BUNDLE_ID: dev.shorebird.codemagic-demo
FLUTTER_VERSION: 3.47.5
scripts:
# Download the Shorebird CLI and add it to the PATH.
- &shorebird_install
name: Install Shorebird
script: |
# Install Shorebird
curl --proto '=https' --tlsv1.2 https://raw.githubusercontent.com/shorebirdtech/install/main/install.sh -sSf | bash
# Add Shorebird to PATH
echo PATH="$HOME/.shorebird/bin:$PATH" >> $CM_ENV
- &ios_initialize_keychain
# Set up the keychain to be used for code signing. Create the keychain
# at specified path with specified password with given timeout.
# Make it default and unlock it for upcoming use.
name:
Set up keychain to be used for codesigning using Codemagic CLI
'keychain' command
script: |
keychain initialize
- &fetch_signing_files
# Fetch provisioning profiles and code signing certificates for
# the Bundle ID with given identifier.
name: Fetch signing files
script: |
app-store-connect fetch-signing-files "$BUNDLE_ID" \
--type IOS_APP_STORE --create \
--issuer-id "$ISSUER_ID" \
--key-id "$KEY_ID" \
--private-key="$APP_STORE_CONNECT_PRIVATE_KEY"
- &add_certs_to_keychain
name: Add certs to keychain
script: |
keychain add-certificates
- &use_profiles
# This generates an export_options.plist file that tells Xcode
# how to package the app. This explicitly sets
# manageAppVersionAndBuildNumber to control which
# version and build number are used for releasing and patching.
name: Set up code signing settings on Xcode project
script: |
xcode-project use-profiles --custom-export-options={\"manageAppVersionAndBuildNumber\":false}
- &fetch_dependencies
name: Fetch Dependencies
script: |
flutter pub get
```
### Add the iOS release workflow
Add the following workflow to your `codemagic.yaml` file. This has been annotated to explain what each part does.
```
workflows:
release-ios-workflow:
name: Release iOS
# This needs to run on a Mac instance.
instance_type: mac_mini_m1
integrations:
# "Codemagic" is the name of the App Store Connect API key.
app_store_connect: Codemagic
environment:
<<: *shared_env
# Tell Codemagic that this app is being signed for App Store distribution
# and to use the bundle ID we defined above.
ios_signing:
distribution_type: app_store
bundle_identifier: '$BUNDLE_ID'
scripts:
# Use the scripts we defined in the definitions section.
- *shorebird_install
- *fetch_dependencies
- *fetch_signing_files
- *ios_initialize_keychain
- *add_certs_to_keychain
- *use_profiles
- name: Shorebird Release
# Run `shorebird release ios` to create a release.
script: |
shorebird release ios \
--flutter-version="$FLUTTER_VERSION" \
--export-options-plist=/Users/builder/export_options.plist
# Tell Codemagic where to find the artifacts generated by
# the `shorebird release ios` command.
artifacts:
- build/ios/ipa/*.ipa
publishing:
app_store_connect:
# Use referenced App Store Connect API key to authenticate binary upload.
auth: integration
# Submit the release to TestFlight, where it can be downloaded by beta
# users and later patched by Shorebird.
submit_to_testflight: true
```
With this, you should be able to create a release in Shorebird and publish it to TestFlight via Codemagic.
### Add the iOS patch workflow
Add the following workflow to your `codemagic.yaml` file:
```
workflows:
patch-ios-workflow:
name: Patch iOS
# This needs to run on a Mac instance.
instance_type: mac_mini_m1
environment:
<<: *shared_env
# Tell Codemagic that this app is being signed for App Store distribution
# and to use the bundle ID defined above.
ios_signing:
distribution_type: app_store
bundle_identifier: '$BUNDLE_ID'
# Add an input to allow us to specify the release version to patch.
# This will make this workflow reusable across releases.
inputs:
release_version:
description: The release version to patch
scripts:
- *shorebird_install
- *fetch_dependencies
- *fetch_signing_files
- *ios_initialize_keychain
- *add_certs_to_keychain
- *use_profiles
- name: Shorebird Patch
# Run `shorebird patch ios` to patch the specified release.
script: |
shorebird patch ios \
--release-version=${{ inputs.release_version }} \
--export-options-plist=/Users/builder/export_options.plist
```
With this, you should be able to patch a release in Shorebird via Codemagic.
# Fastlane
> Using fastlane with Shorebird
Fastlane is a popular tool for automating the build and release process for iOS and Android apps. Shorebird can be integrated with fastlane to automate releasing and patching.
## Installation
Follow the setup instructions on the fastlane website to install fastlane ([ios](https://docs.fastlane.tools/getting-started/ios/setup/), [android](https://docs.fastlane.tools/getting-started/android/setup/)).
## Using Fastlane on CI
This section assumes that you are using fastlane on CI to release your app. If you are running fastlane locally (on your development machine), you can skip to the [Using fastlane locally](#using-fastlane-locally).
A working example of this setup can be found in the [fastlane\_demo](https://github.com/shorebirdtech/fastlane_demo) repository.
To get started, follow [this guide](https://medium.com/revelo-tech/setting-up-automatic-ios-release-with-fastlane-and-match-on-ci-cd-server-16c3f1d79bc5) to set up fastlane with certificate management, code signing, and submitting to the App Store/TestFlight.
Notice that the demo app’s [`Fastfile`](https://github.com/shorebirdtech/fastlane_demo/blob/main/ios/fastlane/Fastfile) has both `deploy` and `release_shorebird` lanes. The `deploy` lane comes from the guide linked to above. The `release_shorebird` lane is a custom lane that uses the `shorebird_release` action **in place of** `build_app` to build an ipa, create a Shorebird release, and submit it to the App Store/TestFlight.
Note that this change from `build_app` to `release_shorebird` is the only change needed to add Shorebird to your fastlane workflow.
### Patching
To patch your app, you can use the `shorebird_patch` action. You can see an example of this in the `patch_shorebird` lane in the [`Fastfile`](https://github.com/shorebirdtech/fastlane_demo/blob/main/ios/fastlane/Fastfile#L92-L98).
## Using Fastlane locally
### Setup
Follow this section if you have Shorebird installed on the machine that will be running fastlane. This section assumes that you have Shorebird installed on the machine that will be running the fastlane commands. If you have not already installed Shorebird, you can do so by following the [Getting Started instructions](/getting-started).
If you are not already using fastlane with your project, navigate to your app’s `ios` directory in your project and run `fastlane init`. You will be prompted to answer several questions. For this guide, choose to manually add lanes to the `Fastfile`.
### Use the Shorebird plugin
Run the following command to install the `shorebird` fastlane plugin, which exposes the `shorebird_release` and `shorebird_patch` actions.
```
bundle exec fastlane add_plugin shorebird
```
### Update Fastfile to release
Open the `Fastfile` in the `fastlane` directory and add the following lane:
```
lane :release_shorebird do
shorebird_release(platform: "ios")
upload_to_testflight
end
```
To run this, execute the following command:
```
bundle exec fastlane release_shorebird
```
Note
To upload to TestFlight, you will need to create an Apple app-specific password. You can do this at . Once you have created the password, create a `.env` file in your fastlane directory and add `FASTLANE_APPLE_APPLICATION_SPECIFIC_PASSWORD=your_password_here`.
If you would like to provide additional arguments to the release command, you can do so using the `args` parameter. For example:
```
shorebird_release(platform: "ios", args: "--no-codesign -- --build-name=1.0.0")
```
### Update Fastfile to patch
Open the `Fastfile` in the `fastlane` directory and add the following lane:
```
lane :patch_shorebird do
shorebird_patch(platform: "ios")
end
```
This will patch the iOS release with the version number detected in the compiled app and patch the release with that version.
As with `shorebird_release`, you can provide additional arguments to the patch command using the `args` parameter.
```
shorebird_patch(platform: "ios", args: "--allow-native-diffs -- --build-name=1.0.0")
```
# CI Integration
> Integrate Shorebird in CI
Building with Shorebird in CI should be a very small change from your existing Flutter CI builds. Changes required:
1. Installing Shorebird on the builder.
2. Getting Shorebird credentials onto the builder.
3. Replacing `flutter build --release` with `shorebird release` or `shorebird patch`.
## Prerequisites
Shorebird installs its own copy of Flutter in `~/.shorebird`. It does not install native platform toolchains. `shorebird release` and `shorebird patch` run `flutter build`, so a builder needs the same toolchain Flutter requires for your target platforms: a JDK and the Android SDK for Android, Xcode and CocoaPods for Apple platforms. See Flutter’s [install requirements](https://docs.flutter.dev/get-started/install) for the full list.
`shorebird doctor --verbose` lists the Android Studio, Android SDK, ADB, `JAVA_HOME`, Java version, and Gradle it detects on the builder.
```
shorebird doctor --verbose
```
## Supported CI providers
Detailed instructions are available for integrating into these providers:
[GitHub](/code-push/ci/github)Integrate Shorebird into your GitHub Actions workflows.
[Codemagic](/code-push/ci/codemagic)Integrate Shorebird into your Codemagic CI/CD pipelines.
If you do not use these providers, generic instructions are provided below:
## Installing Shorebird
Installing Shorebird is identical to how you install it locally. Most builders use Linux or Mac, which means running:
```
curl --proto '=https' --tlsv1.2 https://raw.githubusercontent.com/shorebirdtech/install/main/install.sh -sSf | bash
```
for more details, see [Getting Started](/).
## Getting Shorebird credentials onto the builder
Most Shorebird functionality, like creating releases and patches, requires authentication. To authenticate in your CI, create an API key from the [Shorebird Console](https://console.shorebird.dev):
[Create Shorebird API Key](https://demo.arcade.software/TQUMnX2QwuCRzEV1e8kN?embed\&embed_mobile=tab\&embed_desktop=inline\&show_copy_link=true)
1. Go to **Account → API Keys**.
2. Click **Create API Key**.
3. Give the key a name (e.g., “GitHub Actions — Flutter app”), choose an expiration, and select a permission level.
4. Copy the key value — it is only shown once.
Use this key as your `SHOREBIRD_TOKEN` in CI. The environment variable name is unchanged from previous versions.
Caution
`SHOREBIRD_TOKEN` is a secret. Do not check it into source control or share it publicly. Store it in your CI platform’s secrets manager.
See [API Keys](/account/api-keys/#permissions) for details on permission levels and other key management options.
Migrating from `shorebird login:ci`
The `shorebird login:ci` command is deprecated. Existing tokens generated by `login:ci` will continue to work until September 2026, but new tokens should be created from the console. The `SHOREBIRD_TOKEN` environment variable name has not changed, so your CI workflow files need only a new key value.
Now that you have a token, it is important to keep that token secure. Using a secrets manager for the token, or secure environment variables, is recommended, depending on your CI setup. `shorebird` commands will look for the token to be in a `SHOREBIRD_TOKEN` environment variable.
## Replacing `flutter build --release` with `shorebird`.
### Releasing
If you’re already building with Flutter in CI, you should see a line similar to `flutter build aab` or `flutter build ipa` in your CI config.
To move to Shorebird, you need only replace the `flutter build` line with `shorebird release`. For example:
```
flutter build ipa --dart-define=HERO=Mario
```
Would become:
```
shorebird release ios --dart-define=HERO=Mario
```
`shorebird release` supports almost all of the same arguments that `flutter build` does. If you ever see an error with `shorebird release` not supporting an argument that `flutter build` does, you can use `--` to tell `shorebird` to pass any argument after `--` down to `flutter build` separately, e.g.
```
flutter build ipa --dart-define=HERO=Mario --enable-impeller
```
Would become:
```
shorebird release ios --dart-define=HERO=Mario -- --enable-impeller
```
`shorebird` can support building with different versions of Flutter. By default `shorebird` will use whatever the most recent Flutter stable is, which can change. If you’d like to pin your CI to a specific Flutter version you can do this by adding `--flutter-version` to your command, e.g.
```
shorebird release ios --flutter-version=3.47.5 --dart-define=HERO=Mario -- --enable-impeller
```
### Patching
Patching is identical to releasing, just use `shorebird patch` instead of `shorebird release`.
Patches with Shorebird can only ever apply to an existing Release. By definition a patch is a set of changes to apply to a Release.
`shorebird patch` does not take a `--flutter-version` argument, instead takes a `--release-version` argument, to specify which release version of your app you’re trying to patch. `shorebird` will look up the exact version of Flutter used to build the release and use that exact version to build the patch.
## CI best practices
When integrating Shorebird into a continuous integration pipeline, following these best practices is recommended to ensure reliable and efficient builds:
### Pin the Flutter version for releases
By default, `shorebird release` builds with the latest stable version of Flutter. Because the stable version of Flutter is periodically updated, your CI builds could use a different version of Flutter than what you developed and tested with.
To ensure consistent builds, pin the Flutter version using the `--flutter-version` flag:
```
shorebird release ios --flutter-version=3.47.5
```
Note
You do not need to pass `--flutter-version` to `shorebird patch`. Shorebird automatically detects the exact Flutter version used to build the original release and uses it to compile the patch.
### Verify PR builds with `--dry-run`
To verify that code changes do not break your release or patch builds, you can add a CI check that runs `shorebird release` or `shorebird patch` on every pull request.
To prevent these validation builds from uploading artifacts or creating actual releases/patches in the Shorebird Console, add the `--dry-run` (or `-n`) flag to the command:
```
shorebird patch android --dry-run
```
### Build without code signing in restricted environments
If your CI runners do not have access to Apple distribution certificates or provisioning profiles, you can still build and package Shorebird releases and patches for iOS by passing the `--no-codesign` flag:
```
shorebird release ios --no-codesign
```
Releases built with `--no-codesign` cannot be launched via `shorebird preview` or installed directly on devices. You must manually codesign the generated `.xcarchive` in Xcode or through your signing pipeline before distribution.
### Run CLI commands non-interactively
The Shorebird CLI detects CI environments, for example when the `CI` environment variable is set, and runs in non-interactive mode. In this mode it never waits for input. Some prompts use a default instead, and others fail with an error that names the flag to pass. For example, `shorebird patch` fails on native code changes unless you pass `--allow-native-diffs`, and without `--release-version` it builds first to work out which release to patch.
Set the `SHOREBIRD_TOKEN` environment variable so the CLI never needs to log in interactively. See [Scripting the Shorebird CLI](/code-push/ci/scripting) for the full rules and for JSON output.
Thank you for reading this guide. If you have any questions or suggestions, feel free to reach out on [Discord](https://discord.gg/shorebird).
# GitHub Integration
> Integrate Shorebird into your GitHub workflow
The [Setup Shorebird](https://github.com/shorebirdtech/setup-shorebird) GitHub Action allows you to integrate Shorebird into your existing GitHub Workflows.
## Prerequisites
✅ Shorebird CLI is installed on your machine
✅ You are logged into a Shorebird account.
Note
Refer to the [getting started](/) instructions for more information.
## Quick start
To integrate Shorebird into your CI, use the `setup-shorebird` action. The `setup-shorebird` action downloads Shorebird and adds it to the system path.
```
name: Shorebird Workflow Example
on:
workflow_dispatch:
jobs:
example:
defaults:
run:
shell: bash
runs-on: ubuntu-latest
steps:
# Use the setup-shorebird action to configure Shorebird
- name: 🐦 Setup Shorebird
uses: shorebirdtech/setup-shorebird@v1
with:
cache: true # Optionally cache your Shorebird installation
# Now we're able to use Shorebird CLI in our workflow
- name: 🚀 Use Shorebird
run: shorebird --version
```
In the above workflow, the `setup-shorebird` action is used to configure Shorebird in CI, and subsequent steps can execute any Shorebird commands.
Note
Currently `setup-shorebird` only supports the latest stable version of Shorebird.
## Authentication
Most Shorebird functionality, like creating releases and patches, requires authentication. To authenticate in your CI, create an API key from the [Shorebird Console](https://console.shorebird.dev):
[Create Shorebird API Key](https://demo.arcade.software/TQUMnX2QwuCRzEV1e8kN?embed\&embed_mobile=tab\&embed_desktop=inline\&show_copy_link=true)
1. Go to **Account → API Keys**.
2. Click **Create API Key**.
3. Give the key a name (e.g., “GitHub Actions — Flutter app”), choose an expiration, and select a permission level.
4. Copy the key value — it is only shown once.
Use this key as your `SHOREBIRD_TOKEN` in CI. The environment variable name is unchanged from previous versions.
Caution
`SHOREBIRD_TOKEN` is a secret. Do not check it into source control or share it publicly. Store it in your CI platform’s secrets manager.
See [API Keys](/account/api-keys/#permissions) for details on permission levels and other key management options.
Migrating from `shorebird login:ci`
The `shorebird login:ci` command is deprecated. Existing tokens generated by `login:ci` will continue to work until September 2026, but new tokens should be created from the console. The `SHOREBIRD_TOKEN` environment variable name has not changed, so your CI workflow files need only a new key value.
Next, copy the generated `SHOREBIRD_TOKEN` and navigate to your GitHub repository secrets via:
`"Settings" -> "Secrets and variables" -> "Actions"`.
Then, click `"New repository secret"` and paste your `SHOREBIRD_TOKEN`:
```
name: SHOREBIRD_TOKEN
secret:
```
Now the `SHOREBIRD_TOKEN` can be used in the GitHub workflow to perform authenticated functions such as creating patches 🎉
## Android code signing
`shorebird release android` and `shorebird patch android` run `flutter build`, so signing works exactly as it does for any Flutter app. Follow [Flutter’s Android signing instructions](https://docs.flutter.dev/deployment/android#sign-the-app), or the [Shorebird version of them](/flutter-concepts/releasing-flutter-apps/android#step-3-configure-signing-in-gradle).
The only difference on CI is that the keystore is not already on the machine. Store it as a base64-encoded repository secret, decode it to a path outside your checkout, and point `key.properties` at that path before the Shorebird step runs.
Without it, Gradle falls back to the debug key. The Play Console rejects those builds, and they fail to install over an existing copy of your app with `INSTALL_PARSE_FAILED_NO_CERTIFICATES`.
## Create releases
The simplest way to create a release is using the official Shorebird GitHub Actions:
* [Setup Shorebird GitHub Action](https://github.com/marketplace/actions/setup-shorebird).
* [Shorebird Release GitHub Action](https://github.com/marketplace/actions/shorebird-release).
```
name: Shorebird Release
on:
workflow_dispatch:
env:
SHOREBIRD_TOKEN: ${{ secrets.SHOREBIRD_TOKEN }}
jobs:
release:
defaults:
run:
shell: bash
# Use 'macos-latest' if you are building for iOS
runs-on: ubuntu-latest
steps:
- name: 📚 Git Checkout
uses: actions/checkout@v7
- name: 🐦 Setup Shorebird
uses: shorebirdtech/setup-shorebird@v1
with:
cache: true
- name: Set up Java
uses: actions/setup-java@v4
with:
distribution: 'temurin'
java-version: '17'
- name: 🚀 Shorebird Release
uses: shorebirdtech/shorebird-release@v1
with:
platform: android # Use 'ios' (requires runs-on: macos-latest)
```
Tip
The `shorebird-release` action also outputs the release version:
```
- name: 🚀 Shorebird Release
id: shorebird-release
uses: shorebirdtech/shorebird-release@v1
with:
platform: android # or 'ios'
- name: 📝 Output Release Version
run: echo ${{ steps.shorebird-release.outputs.release-version }}
```
## Create patches
```
name: Shorebird Patch
on:
workflow_dispatch:
env:
SHOREBIRD_TOKEN: ${{ secrets.SHOREBIRD_TOKEN }}
jobs:
patch:
defaults:
run:
shell: bash
# Use 'macos-latest' if you are patching for iOS
runs-on: ubuntu-latest
steps:
- name: 📚 Git Checkout
uses: actions/checkout@v7
- name: 🐦 Setup Shorebird
uses: shorebirdtech/setup-shorebird@v1
with:
cache: true
- name: Set up Java
uses: actions/setup-java@v4
with:
distribution: 'temurin'
java-version: '17'
# Note: all signing information (key.properties, etc.) must be set up on
# this runner for `shorebird patch android` to work.
- name: 🚀 Shorebird Patch
uses: shorebirdtech/shorebird-patch@v1
with:
platform: android # Use 'ios' (requires runs-on: macos-latest)
```
Tip
The `shorebird-patch` action also outputs the patch number:
```
- name: 🚀 Shorebird Patch
id: shorebird-patch
uses: shorebirdtech/shorebird-patch@v1
with:
platform: android # or 'ios'
- name: 📝 Output Patch Version
run: echo ${{ steps.shorebird-patch.outputs.patch-number }}
```
For an example of a fully automated development workflow, see the Development Workflow Guide.
[Development Workflow Guide](/code-push/guides/development-workflow)Learn how to set up a fully automated development workflow with Shorebird.
# Scripting the Shorebird CLI
> Run Shorebird commands unattended in CI or from coding agents, and read their results as JSON.
The Shorebird CLI can run without a person at the keyboard, in a CI job, a script, or a coding agent. This page covers how it behaves there, how to get machine-readable output, and how to run destructive commands safely.
## Non-interactive mode
Shorebird stops asking questions when any of these is true:
* The global `--json` flag is passed.
* stdout or stdin isn’t a terminal, for example when output is piped to a file.
* A CI environment variable is set, such as `CI` (with any value), `BOT=true`, or the variables set by GitHub Actions, Azure Pipelines, Travis, AppVeyor, Cirrus CI, AWS CodeBuild, or Jenkins.
In non-interactive mode, nothing waits for input:
* **Some prompts use a default.** `shorebird init` uses your pubspec name as the app’s display name. `shorebird patch` without `--release-version` builds the patch with the latest Flutter version to work out which release it belongs to, which can pick the wrong release or Flutter version.
* **Other prompts fail.** When there’s no safe default, the command exits with an error and a hint, usually naming the flag that provides the answer. For example, `shorebird patch` fails on native code changes unless you pass `--allow-native-diffs`, and `shorebird init` fails if you belong to several organizations and don’t pass `--organization-id`.
* **Progress spinners become plain lines** when stdout isn’t a terminal or `--json` is passed. Each step prints `Starting ...` and then `Done ...` or `Failed ...` to stderr.
To keep a job from failing or guessing, pass every input as a flag: the app with `--app-id` or `--flavor`, and the release with `--release-version`. For `shorebird patch`, `--release-version=latest` targets the most recently updated release. Authenticate with an [API key](/account/api-keys) in the `SHOREBIRD_TOKEN` environment variable, since `shorebird login` needs a browser.
## JSON output
Pass the global `--json` flag to get one JSON object on stdout instead of human-readable text. `--json` also turns on non-interactive mode and removes color codes.
These commands return structured JSON:
| Group | Commands |
| ---------------------------------------------------------------------- | ---------------------------------------------------------------------------- |
| [`shorebird account`](/account/cli#account-management-commands) | `whoami`, `apps`, `orgs` |
| [`shorebird apps`](/account/cli#app-management-commands) | `list`, `rename`, `delete`, `transfer` |
| [`shorebird channels`](/code-push/tracks#managing-tracks-from-the-cli) | `list`, `create`, `delete` |
| [`shorebird patches`](/code-push/patch#manage-patches) | `list`, `info`, `set-track`, `rollback`, `rollforward` |
| [`shorebird releases`](/code-push/release) | `list`, `info` |
| Other | `shorebird doctor`, `shorebird flutter versions list`, `shorebird --version` |
Other commands, such as `shorebird release` and `shorebird patch`, accept `--json` and run non-interactively, but still print human-readable logs. Check their exit code rather than parsing their output.
### Success
A successful command prints an object with `status` set to `success`. The command’s result is in `data`, and `meta` says which CLI version and command produced it:
```
shorebird --version --json
```
```
{
"status": "success",
"data": {
"shorebird_version": "1.6.123",
"flutter_version": "3.47.5",
"flutter_revision": "ff900e7fbab20fdeb40905ee631baa8d49bd0fa1",
"engine_revision": "c663a2682e6adfc60a1aaff99ff62baa891dcf87"
},
"meta": { "version": "1.6.123", "command": "version" }
}
```
The fields inside `data` depend on the command.
### Errors
A failed command prints an object with `status` set to `error` and exits with a non-zero code:
```
{
"status": "error",
"error": {
"code": "fetch_failed",
"message": "Failed to fetch channels for app \"\"."
},
"meta": { "version": "1.6.123", "command": "channels list" }
}
```
`error.code` is one of:
| Code | Meaning |
| ----------------------------- | ---------------------------------------------------------------- |
| `usage_error` | Invalid or missing arguments. Exit code 64. |
| `interactive_prompt_required` | The command needed an answer to a prompt. Exit code 64. |
| `fetch_failed` | Shorebird couldn’t retrieve something it needed, such as an app. |
| `software_error` | The command failed unexpectedly. |
| `process_exit` | The command stopped with a non-zero exit code. |
When there’s a way to recover, `error.hint` says what to do, such as the flag to add.
Caution
Check the exit code before parsing stdout. A non-zero exit code always means the command failed, but not every failure prints a JSON object. Some checks that run before a command starts, such as looking for `shorebird.yaml`, print plain text.
## Destructive commands
Commands that delete something, `shorebird apps delete` and `shorebird channels delete`, never prompt. Instead, they require `--confirm-name` set to the exact name of what you’re deleting:
```
shorebird apps delete --app-id --confirm-name "Acme Mobile"
```
If the name doesn’t match, nothing is deleted and the command exits with a usage error. Look the name up first, with `shorebird apps list` or `shorebird channels list`, rather than hard-coding it.
## Retrying rollbacks
`shorebird patches rollback` and `shorebird patches rollforward` succeed when the patch is already in the requested state, so a retried job doesn’t fail. Pass `--require-change` to make the command exit with a usage error when nothing changed, if your script needs to know. With `--json`, the `data.changed` field reports the same thing:
```
shorebird patches rollback --release-version 1.0.0+1 --patch-number 2 --json
```
See [Roll back from the CLI](/code-push/rollback#roll-back-from-the-cli) for the command’s options, and [What happens when a patch is rolled back?](/code-push/rollback#what-happens-when-a-patch-is-rolled-back) for what it does on devices.
# Crashlytics Integration
> Integrate Shorebird into your Crashlytics crash reporting
If you’re using Crashlytics for crash reporting, it will work out-of-the-box with Shorebird releases and patches. However, if you have multiple patches, it can be unclear which patch caused the crash. This document shows how you can use Crashlytics to differentiate between patches.
To see readable native engine frames, upload Shorebird’s engine symbols to Crashlytics (on Android, this also requires NDK crash reporting). If you build with `--obfuscate` or `--split-debug-info`, Dart frames also need the Dart symbols from that build. These are separate uploads. See [Uploading Symbols](/code-push/crash-reporting/uploading-symbols).
## Add the `shorebird_code_push` package to your project.
[shorebird\_code\_push](https://pub.dev/packages/shorebird_code_push) is available on pub.dev and lets you programmatically determine your app’s current patch number. To add it to your project, follow the instructions on the package’s pub.dev page.
## Configure Crashlytics
If you haven’t already, follow the Crashlytics [getting started with Flutter](https://firebase.google.com/docs/crashlytics/get-started?platform=flutter) guide.
Update the Firebase init code to include the patch number as a custom key. This will look something like:
```
Future main() async {
WidgetsFlutterBinding.ensureInitialized();
await Firebase.initializeApp(
options: DefaultFirebaseOptions.currentPlatform,
);
final patch = await ShorebirdUpdater().readCurrentPatch();
// Add the patch number as a tag. You can use whatever name you would like
// as the key. `$patch` will be "null" if there is no patch. You may
// wish to handle this case differently.
FirebaseCrashlytics.instance.setCustomKey(
'shorebird_patch_number',
'${patch?.number}',
);
runApp(const MyApp());
}
```
# Sentry Integration
> Integrate Shorebird into your Sentry crash reporting
If you’re using Sentry for crash reporting, it will work out-of-the-box with Shorebird releases and patches. However, if you have multiple patches, it can be unclear which patch caused the crash. This document shows how to include the Shorebird patch number in your Sentry events so you can differentiate between patches.
## Add the `shorebird_code_push` package to your project.
[shorebird\_code\_push](https://pub.dev/packages/shorebird_code_push) is available on pub.dev and lets you programmatically determine your app’s current patch number. To add it to your project, follow the instructions on the package’s pub.dev page.
## Configure Sentry
If you haven’t already, follow the Sentry [getting started with Flutter](https://docs.sentry.io/platforms/dart/guides/flutter/) guide.
Update the Sentry init code to include the patch number as a tag. This will look something like:
```
Future main() async {
// Get the current patch number. This will be null if no patch is installed.
final patch = await ShorebirdUpdater().readCurrentPatch();
await SentryFlutter.init(
(options) {
options.dsn = 'YOUR_DSN';
},
appRunner: () {
// Add the patch number as a tag. You can use whatever name you would like
// as the key. `$patch` will be "null" if there is no patch. You may
// wish to handle this case differently.
Sentry.configureScope((scope) {
scope.setTag('shorebird_patch_number', '${patch?.number}');
});
return runApp(const MyApp());
},
);
}
```
# Uploading Symbols
> Locating and uploading symbols for crash reporting
Shorebird uses a fork of Flutter to build your app. This means Shorebird has built its own copy of Flutter’s engine, which means that the symbols included in the Flutter.framework or libflutter.so are slightly different from the upstream Flutter engine.
To see C++ symbols from Shorebird’s fork of Flutter’s engine in your crash reports, upload the symbols to your crash reporting tool.
Engine symbols and Dart symbols are separate uploads
There are two kinds of symbols:
* **Shorebird engine symbols** cover native engine frames from `libflutter.so` on Android and `Flutter.framework` on iOS. On iOS, get them from the console or the [download URL](#symbols-for-ios). On Android, use the [download URLs](#symbols-for-android).
* **Dart symbols** cover Dart frames. You only need them if you build with `--obfuscate` or `--split-debug-info`. See [Dart symbols for obfuscated builds](#dart-symbols-for-obfuscated-builds).
A mistake to avoid is uploading only the `--split-debug-info` output with `firebase crashlytics:symbols:upload`. Those files don’t contain Shorebird’s engine symbols, so native engine crashes stay unsymbolicated. To make both Dart and native crashes readable, upload both kinds of symbols. See [Uploading engine symbols to Crashlytics](#uploading-engine-symbols-to-crashlytics).
Upload Dart symbols as part of each build. Some tools only symbolicate crashes reported after the upload. For example, Crashlytics needs Dart symbols uploaded before an obfuscated build reports a crash.
Google provides instructions for how to integrate various crash reporting tools into your Flutter app:
# Getting symbols from the console
For iOS and macOS releases, the “Artifacts” tab of the release page in Shorebird’s console links to the Flutter engine’s dSYM, next to your release’s build artifacts. To see this tab, you need the [Developer role](/account/orgs#developer) or higher, either in the organization or as a [collaborator](/account/orgs#managing-per-app-collaborators) on the app. The console doesn’t link to Android engine symbols. Use the [download URLs](#symbols-for-android) instead.
The current URL format for this tab is:
```
https://console.shorebird.dev/orgs//apps//releases//artifacts
```
# Manual instructions (only needed for CI or scripts)
If you need a way to download symbols as part of a CI pipeline it’s possible with the following information:
For a given Flutter version you will need the Flutter engine hash to download the symbols. This hash is displayed in `shorebird doctor` output:
```
$ shorebird doctor
Shorebird 1.6.49 • git@github.com:shorebirdtech/shorebird.git
Flutter 3.32.5 • revision 44a8ada33bdbe7f25a49e7dcf13c5c1f648129fd
Engine • revision f275acddf709f94ef38af54adb2c1a0a0a90b5c6
```
In this case, `f275acddf709f94ef38af54adb2c1a0a0a90b5c6` is the engine hash.
## Symbols for iOS
Assuming engine hash `f275acddf709f94ef38af54adb2c1a0a0a90b5c6`, the iOS symbols can be downloaded from the following URL:
For some older Flutter versions, the file is named `Flutter.dSYM.zip` instead of `Flutter.framework.dSYM.zip`.
## Symbols for Android
Assuming engine hash `f275acddf709f94ef38af54adb2c1a0a0a90b5c6`, the Android symbols can be downloaded from the following URLs:
# Uploading engine symbols to Crashlytics
On Android, Crashlytics only reports native crashes if you set up [NDK crash reporting](https://firebase.google.com/docs/crashlytics/android/get-started-ndk), which the FlutterFire plugin doesn’t add for you. Unzip each architecture’s `symbols.zip` into its own subdirectory of one folder, because every zip contains a file named `libflutter.so`. Then pass that folder to the Firebase CLI, which searches it recursively for `.so` files:
```
firebase crashlytics:symbols:upload --app=FIREBASE_APP_ID PATH/TO/SYMBOLS
```
On iOS, upload the engine’s dSYM zip in the dSYMs tab of the Crashlytics dashboard, or pass it to Crashlytics’ `upload-symbols` script, which accepts zip archives of dSYMs. See [Get readable crash reports](https://firebase.google.com/docs/crashlytics/ios/get-deobfuscated-reports) for how to run the script, or run it with `--help` for its options.
# Dart symbols for obfuscated builds
The engine symbols above cover Flutter’s C++ code. If you build with `--obfuscate` or `--split-debug-info`, your Dart code’s debug information is also removed from the app, and your crash reporting tool needs it to show readable Dart stack traces.
`--split-debug-info` writes that debug information to a directory, one file per architecture, such as `app.android-arm64.symbols` or `app.ios-arm64.symbols`:
```
shorebird release android --obfuscate --split-debug-info=build/symbols
```
If you pass `--obfuscate` without `--split-debug-info`, Shorebird writes the files to `build/shorebird/symbols`.
Upload the files in that directory by following your tool’s guide:
* [Sentry: Debug Symbols](https://docs.sentry.io/platforms/dart/guides/flutter/debug-symbols/)
* [Crashlytics: Get readable crash reports](https://firebase.google.com/docs/crashlytics/flutter/get-deobfuscated-reports)
iOS
On iOS, the symbol files are only usable by crash reporting tools for releases built with Flutter 3.47.5 or newer, the default Flutter version since Shorebird 1.6.123. What counts is the Flutter version the release was built with, so a release that pins an older version with `--flutter-version` still gets the old files. With those, tools such as `sentry-cli` report finding no debug information files, even though the upload command succeeds. Release again with Flutter 3.47.5 or newer to get readable Dart stack traces on iOS.
`shorebird patch` accepts the same flags, and an obfuscated release’s patches are obfuscated too. When a patch writes to the same directory as an earlier build, whether the default or a path you pass again, it replaces that build’s files, because the file names are the same. Upload or copy the files after every build, before you run the next one.
# Create a new Shorebird App
> Learn how to create a new Shorebird app.
Note
If you have an existing project, you can use [`shorebird init`](/code-push/initialize) to add Shorebird to your Flutter app.
To create a new Flutter project with Shorebird, use `shorebird create`:
```
shorebird create my_app
```
[Create a new flutter project with Shorebird](https://app.arcade.software/share/iw81avmZ8dfoqfNzQN2P)
This does several things:
1. Runs [`flutter create`](https://docs.flutter.dev/reference/create-new-app#terminal) which generates a new Flutter project.
2. Runs [`shorebird init`](/code-push/initialize) which initializes Shorebird.
Note
Refer to the official [Flutter Create Documentation](https://docs.flutter.dev/reference/create-new-app#terminal) for more information on how to customize your new Flutter project.
# Delete Apps, Releases, and Patches
> What deleting an app, release, or patch in Shorebird removes, and the options to consider first.
Note
Deleting is permanent and cannot be undone. Shorebird is unable to restore deleted apps, releases, or patches once deleted.
## Before you delete
People usually reach for delete when a patch has a problem, but deleting is rarely the right fix. Think about why you want to delete, and whether one of these options fits better:
* **A patch has a bug.** [Roll it back](/code-push/rollback) instead of deleting its release. A rollback removes the patch from end users’ devices, and you can roll it forward again later if the patch turns out to be fine.
* **You want to test a patch before users get it.** Publish it to a [staging track](/code-push/guides/staging-patches).
* **You want to move an app to another organization.** Transfer ownership of the app instead of deleting it.
Delete only when you no longer need an app or release at all. If you’re not sure which option is right, [reach out](mailto:contact@shorebird.dev) and the Shorebird team can help you decide.
## Delete a patch
Individual patches can’t be deleted. A patch is removed along with the release it belongs to, or the app that owns that release.
If you want to stop serving a patch, you can roll it back. A rollback remotely uninstalls the patch from end users’ devices and falls back to the previous patch or the base release. You can undo a rollback later if you need to.
[Roll back a Patch](/code-push/rollback)Remotely uninstall a patch. You can undo a rollback later.
## Delete a release
Releases are deleted per platform. When you delete a release, the dialog asks which platforms to delete, and your choice determines what is removed:
* **All** deletes the release itself, along with its artifacts and every patch published to it. Devices will no longer receive patches for that release version.
* **A single platform** deletes that platform’s release and patch binaries. The release itself remains, and the other platforms are untouched.
In both cases, the deleted binaries can’t be restored.
See [Delete releases](/code-push/release#delete-releases) for the steps and for the platform selection dialog.
## Delete an app
Deleting an app also deletes every release, patch, and artifact associated with it. Copies of the app that are already installed on end users’ devices keep working normally, but they won’t receive new patches.
If you want to move an app to another organization, use **Transfer Ownership** in the same Danger Zone instead of deleting it.
1. Navigate to the app in the [Shorebird console](https://console.shorebird.dev/).
2. Go to the **Settings** tab.
3. In the **Danger Zone**, select **Delete**.
4. Confirm in the dialog that appears.
You can also delete an app from the command line with [`shorebird apps delete`](/account/cli#delete-an-app).
## Delete an account
Deleting your account removes your personal organization and everything in it. If you own any team organizations, transfer or delete those first.
[Delete Account](/account/delete-account)Permanently delete your Shorebird account and all associated data.
# FAQ
> Frequently asked questions for Code Push
Still have a question about Shorebird Code Push that the docs didn’t cover? You’re in the right place. This page covers the most common questions. If you have a question not answered here or elsewhere in the docs, reach out on [Discord](https://discord.gg/shorebird) or [file an issue](https://github.com/shorebirdtech/shorebird/issues). The Shorebird team is happy to help.
## Getting started
### What is the difference between a patch and a release?
The term “release” means preparing a binary for the stores. In order to later generate a patch Shorebird needs to know the exact binary that was shipped to the stores. The `shorebird release` command is used to prepare a binary for the stores which includes the Shorebird updater.
The term “patch” means a binary that can be applied to a release to update it to new code. The `shorebird patch` command is used to generate a patch from your new local code which is then diffed with the release binary to generate a patch which is then shipped to your users.
These terms are explained further in [Overview](/code-push).
### When should you create a patch vs a release?
Because patching and releasing are independent operations, it is possible to create both a patch and a release with the same code changes.
Note
A “release” gets a unique release version, while a “patch” does not change the release version, just the “patch number”. The “release version” is a store concept, where as “patch number” is a Shorebird concept. Apps can read the current patch version at runtime via the [package:shorebird\_code\_push](https://pub.dev/packages/shorebird_code_push).
Different customers have used different policies to decide whether to create a release, a patch, or both. Some of these polices include:
1. Push a patch immediately to update all existing users, while also simultaneously submitting a release to the stores so that new users to their product will get the latest code on first launch after a store install.
2. Use patching as a mechanism to ship changes on a high frequency (e.g. daily or weekly) and only go through a full release process on a lower cadence (e.g. monthly).
3. Continue to only use releases for shipping code changes, and only patch to fix critical bugs or make other emergency changes.
In the end, it comes down to what works for your business. Most current customers choose option 2.
Note
Changes which involve native code cannot be patched and thus must use a release for distribution.
### Can you use Shorebird in your CI system?
Yes. Create an API key in the [Shorebird Console](https://console.shorebird.dev) under **Account → API Keys**, then add it to your CI environment as `SHOREBIRD_TOKEN`. See the [CI setup guide](/code-push/ci/generic/) for detailed instructions.
### Can you use Dart defines with Shorebird?
Yes. The `shorebird` command line tool passes through all Dart defines to the `flutter` tool. For example, `shorebird release android -- --dart-define=MY_DEFINE=foo` and `shorebird release android -- --dart-define-from-file=config.json` will both work as expected. Because Dart defines are compiled into your app’s Dart code, they can be updated via patches.
### How do you target different API environments (e.g., staging vs. production backend) for patches?
You should use Flutter flavors (or `--dart-define` config variables). Shorebird fully supports flavors.
When you initialize and release flavored builds (e.g., running `shorebird release android --flavor development`), Shorebird creates separate releases for each flavor in your Shorebird console. When you subsequently run a patch command (e.g., `shorebird patch android --flavor development`), the Shorebird servers will route that patch *only* to the release matching that specific flavor. This guarantees that patches targeting development/staging environments never affect production users.
For more details on setting up flavors, see the [Android Flavor Guide](/code-push/guides/flavors/android) and [iOS Flavor Guide](/code-push/guides/flavors/ios).
### How does Shorebird relate to Flutter?
Shorebird is a fork of Flutter that adds Code Push. Shorebird is not a replacement for Flutter, but rather a replacement for the Flutter engine. You can continue to use the Flutter tooling you already know and love.
`shorebird` uses a fork of Flutter that includes the Shorebird updater. Shorebird tracks the latest stable release of Flutter and replaces a few of the Flutter engine files with its modified copies.
To implement its fork, Shorebird uses `FLUTTER_STORAGE_BASE_URL` to point to `https://download.shorebird.dev` instead of download.flutter.dev. Unmodified output from the `flutter` tool passes through, so you will see a warning from Flutter:
```
Flutter assets will be downloaded from http://download.shorebird.dev. Make sure you trust this source!
```
For more information about why Shorebird had to fork Flutter, see [System Architecture](/code-push/system-architecture).
### What platforms does Shorebird support?
Shorebird supports [Android, iOS](https://shorebird.dev/blog/1.0/)[, Mac, Windows, and Linux](https://shorebird.dev/blog/desktop-in-production/).
Use of Shorebird on each platform is an independent decision. For example, you can use `shorebird release` to ship to Google Play and an ipa built with `flutter build` to the App Store or vice versa.
### Does Shorebird work on iOS Simulators?
No. Shorebird patches are not supported on iOS Simulators.
Shorebird’s iOS engine uses a custom interpreter designed specifically for physical arm64 iOS devices to execute updated Dart code over-the-air while remaining fully compliant with Apple’s security sandbox guidelines. Because of this, Shorebird updates cannot run on iOS Simulators (which run on x86\_64 or arm64 macOS JIT/interpreter architectures). You must use a physical iOS device to test iOS patches.
*Note: Android emulators are fully supported.*
### Does Shorebird work in debug or profile mode?
No. Shorebird is only compiled into and active in **Release builds** of your application.
When you run your application in Debug or Profile mode (e.g., via `flutter run`), the Shorebird engine is completely disabled, and the standard Flutter JIT or AOT engine is used. This ensures that standard development workflows (such as Hot Reload, Hot Restart, and DevTools debugging) are entirely unaffected. To test patch updates, you must build and run your application in Release mode.
### What OS versions does Shorebird support?
Shorebird supports the same versions of platforms that Flutter supports. You can find the details of this on the [Flutter Docs site](https://docs.flutter.dev/reference/supported-platforms).
### What versions of Flutter does Shorebird support?
For specific versions by platform, please consult the [Flutter Version Management](/getting-started/flutter-version/) page.
Shorebird tracks Flutter stable. Quarterly minor releases are updated within 5 business days of release. Patches are updated within 1 business day. This process is automated, with an extra manual verification step before publishing to Shorebird’s servers.
### Can you use Shorebird with Flutter pre-release channels (Beta, Master)?
No. Shorebird only supports the **stable** channel of Flutter.
Shorebird’s custom engines and automated patch-generation tests are built and verified specifically against stable Flutter releases. If you try to run Shorebird commands while using a Beta, Dev, or Master/Main branch of Flutter, the Shorebird CLI will display an error.
### How do you upgrade the Flutter version of your app?
To upgrade your application’s Flutter version, you must create a new store release. You cannot upgrade the Flutter version of an existing release via a patch.
Steps to upgrade:
1. Upgrade your local Flutter SDK (e.g., via `flutter upgrade` or by switching channels/version toolings).
2. Run `shorebird release [platform] --flutter-version=` (which will build the new release binary using the specified Flutter version).
3. Upload the new binary to Google Play and the App Store.
Any future patches created for this new release version will automatically be built using the upgraded Flutter version.
## Store compliance
### Does Shorebird comply with Play Store guidelines?
Yes.
The Play Store offers two restrictions relating to update tools.
1. Updates must use an interpreter or virtual machine (Shorebird uses the Dart Virtual Machine).
```
An app distributed via Google Play may not modify, replace, or update itself
using any method other than Google Play's update mechanism. Likewise, an app
may not download executable code (such as dex, JAR, .so files) from a
source other than Google Play. *This restriction does not apply to code
that runs in a virtual machine or an interpreter* where either provides
indirect access to Android APIs (such as JavaScript in a webview or
browser).
Apps or third-party code, like SDKs, with interpreted languages (JavaScript,
Python, Lua, etc.) loaded at run time (for example, not packaged with the
app) must not allow potential violations of Google Play policies.
```
2. Changes to the app must not be deceptive (e.g. changing the purpose of the app via update). Please be clear with your users about what you are providing with your application and do not violate their expectations with significant behavioral changes through the use of Shorebird.
Shorebird is designed to be compatible with the Play Store guidelines. However Shorebird is a tool, and as with any tool, can be abused. Deliberately abusing Shorebird to violate Play Store guidelines is in violation of the Shorebird [Terms of Service](https://shorebird.dev/terms) and can result in termination of your account.
Code Push services are widely used in the industry (many large, well-known apps use them) and there are multiple other Code Push services publicly available (e.g. expo.dev & appcenter.ms). This is a well trodden path.
Microsoft also publishes a guide on how their React Native “codepush” library complies with the app stores:
### Does Shorebird comply with App Store guidelines?
Yes.
Similar to the Play Store, the App Store offers both technical and policy restrictions.
```
3.3.1b
... interpreted code may be downloaded to an Application but only so long as
such code:
(a) does not change the primary purpose of the Application by providing
features or functionality that are inconsistent with the intended and
advertised purpose of the Application as submitted to the App Store,
(b) does not create a store or storefront for other code or applications, and
(c) does not bypass signing, sandbox, or other security features of the OS.
```
Shorebird uses a custom Dart interpreter to comply with the interpreter-only restriction for updates on iOS. So as long as your application is not engaging in deceptive behavior via updates (e.g. changing the purpose of the app via update), updating via Shorebird (or any other Code Push solution) is standard industry practice and compliant with [App Store guidelines](https://developer.apple.com/support/terms/apple-developer-program-license-agreement/#b331).
Deliberately abusing Shorebird to violate App Store guidelines is in violation of the Shorebird [Terms of Service](https://shorebird.dev/terms) and can result in termination of your account.
Microsoft also publishes a guide on how their react native “codepush” library complies with the app stores:
### Now that you’re using Shorebird, do you still need to send your app to the stores?
Yes. Continuing to release your app through the stores in addition to using Shorebird is recommended, even though there can now be less pressure on your app release process.
This is for two reasons:
1. Stores have policy restrictions that “major new features” go through store review to avoid “deceiving users”. Since apps are likely to change over time, periodic releases (to update store screenshots, etc.) is still good practice.
2. New users install from the stores, not Shorebird. Shorebird can only update your application after launch, so periodic releases to the stores are still recommended for the best first-launch experience.
### Does Shorebird submit to the stores for me?
No. Shorebird does not submit your app to the App Store or Play Store.
**The release workflow is two separate steps:**
1. **`shorebird release [platform]`** — builds your app and uploads the compiled Dart artifacts to Shorebird’s servers. This creates the baseline snapshot that future patches will be diffed against.
2. **Upload to the store yourself** — take the `.aab` (Android) or `.ipa` (iOS) output and submit it to Google Play or App Store Connect through your normal process (Fastlane, Transporter, the Play Console, etc.).
Once users install the app from the store, Shorebird can push patches to them over the air.
## Use cases & limitations
### What can you use Shorebird Code Push for?
Common uses include:
* Shipping emergency fixes to production apps, decoupling your deployment cadence from store review cycles.
* Shipping bug fixes to users on older versions of your app.
* Shipping Dart-level improvements continuously (e.g. daily, every commit to `main`, etc).
Note that most app stores prohibit shipping code that changes the behavior of the app in a significant way. Please see the [Store Compliance section](#store-compliance) for more information.
### What can’t Shorebird Code Push be used for?
Shorebird does not support changing native code (e.g. Java/Kotlin on Android or Objective-C/Swift on iOS). The tool will warn you during an attempted patch if you have changed native code.
Shorebird should not be used to violate app store polices. Please see the [Store Compliance section](#store-compliance) for more information.
### How does Shorebird check for native code or asset changes?
Before creating a patch, Shorebird automatically checks for native code and asset differences against the stored release, and warns you (or blocks the upload by default) if it detects them.
You can bypass these checks with `--allow-native-diffs` or `--allow-asset-diffs`, but this is strongly discouraged for routine use — those flags exist for advanced edge cases only.
### Is there a limit to how many patches I can ship per release?
No. There is no technical limit on the number of patches you can publish against a single release. You can ship patches daily, per-commit, or as frequently as your workflow demands.
Each patch receives an auto-incrementing patch number. Only one patch is “active” at a time — when you publish a new patch it automatically becomes the current one, and users receive it on their next app launch (no action required on your part or theirs).
Tip
Even though you can patch indefinitely, consider publishing a new **store release** periodically (e.g. monthly or each time you ship native/asset changes). New users install your app from the store — Shorebird can only update them *after* their first launch. A periodic release ensures new users always get a recent baseline on first install, rather than receiving a large accumulated patch shortly after.
### Can you restore a deleted app, release, or patch?
No. Deleting an app, a release, or a patch is permanent, and Shorebird support isn’t able to restore it afterwards. The same is true of [deleting your account](/account/delete-account). The Shorebird console shows a confirmation dialog before any of these deletions, so you can review what’s about to be removed first.
If you want to stop serving a bad patch, you can [roll it back](/code-push/rollback) instead, and undo the rollback later if you need to. See [Delete Apps, Releases, and Patches](/code-push/delete) for details.
### Is Shorebird suitable for enterprise or production apps?
Yes. Engineering teams at companies of all sizes ship with Shorebird. See [Shorebird Success Stories](https://shorebird.dev/success-stories) for examples. See the [Enterprise plan](/enterprise/) for security, compliance, and procurement features.
### Can Shorebird be used for all Dart changes?
Shorebird can be used to update any Dart code including pure Dart packages. Note that depending on how you distribute your apps, some store agreements expect feature changes to go through store review. Notably Apple’s App Store requires that an update “does not change the primary purpose of the Application by providing features or functionality that are inconsistent with the intended and advertised purpose of the Application.” Also note that patch sizes correlate with the total amount of Dart changed from the original released app. Each patch is a diff against the released dart code, not a diff to the previous patch.
### Can new packages or plugins be added in a patch?
It depends on whether the package contains native code:
* **Pure Dart Packages**: Yes. You can add or update pure Dart dependencies (e.g., helper libraries, state management utilities) in a patch, and they will compile and run correctly.
* **Packages with Native Code**: Yes, but only if they were already included in the release binary. If a package contains native code (e.g., Swift, Kotlin, Java, Objective-C, like `camera` or `path_provider`) and was **not** present in the base store release, adding it in a patch will compile, but the app will crash or fail on user devices because the native components of that package are missing from the store-installed binary.
How to check if a package has native code
The easiest way to determine if a package uses native code is to check its `pubspec.yaml` on pub.dev. If the `flutter` section contains a `plugin` definition, it relies on native code:
```
flutter:
plugin: # <-- Indicates this package uses native code
platforms:
android:
package: com.example.plugin
```
Alternatively, you can look at its source repository. If it contains platform-specific folders like `android/`, `ios/`, `macos/`, or `windows/`, it contains native code.
If you need to add a new package with native code, you must push a new store release.
### How does this relate to Firebase Remote Config or Launch Darkly?
Code Push allows adding new code / replacing code on the device. Firebase Remote Config and Launch Darkly are both configuration systems. They allow you to change the configuration of your app without having to ship a new version. They are not intended to replace code.
### How does this relate to Flutter Hot Reload?
Flutter’s Hot reload is a development-time-only feature. Code Push is for production.
Hot reload is a feature of Flutter that allows you to change code on the device during development. It requires building the Flutter engine with a debug-mode Dart VM which includes a just-in-time (JIT) Dart compiler.
Code Push is a feature that allows you to change code on the device in production. A variety of different techniques are used to make this possible depending on the platform. Current demos execute ahead-of-time compiled Dart code and do not require a JIT Dart compiler.
### Does Shorebird support Flutter Web?
Code Push isn’t needed for Flutter web. When a user opens a web app it downloads the latest version from the server if needed.
If you have a use case for Code Push with Flutter web, [reach out](mailto:contact@shorebird.dev) to let the Shorebird team know.
## Technical details
### What does the Shorebird updater store on disk?
The Shorebird updater (included in your application when you build your app with Shorebird) caches the latest downloaded patch in the same cache directory that Flutter uses for caching compiled shaders or compiled Dart code. On Android, this is located in `/data/user/0/com.example.app/code_cache/shorebird_updater` although the base of that path is provided by the Android system and can change dynamically at runtime. On iOS devices, data is stored under `Library/Application Support/shorebird`.
Shorebird stores only a few files, one is `state.json` which contains the state information for the updater. When a patch is downloaded a directory will be created for that patch. These directories contain the inflated copies of the patches, which will be about the same size as the compiled Dart code in your application (e.g. \~10 mb each). There will only be at most 2 patches downloaded on the device at a given time. When a new patch is successfully installed and launched, the previous patch is deleted.
### What do the Shorebird tools store on disk?
The Shorebird command line tools (e.g. `shorebird patch`) are installed on disk in `$HOME/.shorebird`, including bringing a copy of Flutter and Dart as well as the Shorebird release tools themselves. This is similar to how the `flutter` command works.
These copies of Flutter can be 100s of megabytes each. Shorebird will keep a copy of Flutter `$HOME/.shorebird/bin/cache/` for each version of Flutter you have used. Currently this number is unbounded. These can be removed at any time with `shorebird cache clear`.
[Uninstall](/code-push/uninstall) has details on how to remove Shorebird from your system should you choose.
### How big of a dependency footprint does this add?
Shorebird ships its own build of the Flutter engine with the patching runtime included, which is where the overhead comes from. The table below compares Shorebird’s engine against stock Flutter for the same engine version, measured on the stripped binaries that actually ship to users:
| Platform | Shorebird (on-disk / download) | Flutter (on-disk / download) | Shorebird overhead |
| ------------------- | ------------------------------ | ---------------------------- | ------------------- |
| iOS (arm64) | 13.25 MB / 5.68 MB | 8.58 MB / 3.67 MB | +4.67 MB / +2.01 MB |
| Android (arm64-v8a) | 13.38 MB / 6.40 MB | 10.79 MB / 5.06 MB | +2.58 MB / +1.35 MB |
“On-disk” is the uncompressed size installed on the device. “Download” is the approximate size shipped over the store — APKs and IPAs use DEFLATE compression, which `gzip -9` closely mimics, so the gzipped size is a good proxy for what a user’s device actually pulls down.
These numbers are for Flutter 3.41.7 (April 2026). Earlier Shorebird engines were meaningfully larger — iOS overhead alone came down by roughly 2 MB on-disk in the preceding month, and the overhead continues to shrink; progress is tracked in [shorebird#3715](https://github.com/shorebirdtech/shorebird/issues/3715). You can reproduce a rough measurement on your own app by comparing the output of `flutter build apk --release` against `shorebird build apk --release`.
### How do you build a smaller APK for a single Android architecture?
Use `--target-platform` on `shorebird release android` to declare which architectures to build. A Gradle NDK ABI filter that drops an ABI still listed in `--target-platform` is skipped, not treated as an error. See [Build a smaller APK for one architecture](/code-push/release/#build-a-smaller-apk-for-one-architecture).
### When do updates happen?
By default, the Shorebird updater checks for updates on app startup. It runs on a background thread and does not block the UI thread. Any updates will be installed while the user is using the app and will be applied the next time the process restarts. See [How do you use Shorebird with a long-running Android background process?](#how-do-you-use-shorebird-with-a-long-running-android-background-process) if a background process keeps the app alive.
It is also possible to run the Shorebird updater manually using [package:shorebird\_code\_push](https://pub.dev/packages/shorebird_code_push), through which it is possible to trigger updates at any time, including via a push notification.
See [Update Strategies](/code-push/update-strategies) for more information about how to configure this behavior.
### How do you use Shorebird with a long-running Android background process?
Shorebird applies a downloaded patch the next time the process starts, not when an Activity is recreated.
A foreground service (for example [flutter\_background\_geolocation](https://github.com/transistorsoft/flutter_background_geolocation)) keeps the process alive after the user swipes the app out of the recent-apps list. That swipe is not a process restart, so bringing the UI back still runs the previous Dart code.
To receive patches while the process stays alive:
1. Check for and download patches while the process is running with [package:shorebird\_code\_push](https://pub.dev/packages/shorebird_code_push). Default automatic updates only run on process start.
2. Detect the staged patch. `checkForUpdate()` returns `UpdateStatus.restartRequired` once a patch is downloaded and waiting, and `readNextPatch()` returns it. Use that to prompt the user to restart at a point that suits your app.
3. Apply the patch with a real process restart. Stopping the foreground service and then swiping the app away is enough, as is waiting until the OS kills the process.
While testing, you can force a restart with **Settings → Apps → Force stop**.
Recreating the Flutter engine without killing the process is not a supported way to apply a patch. See [Update Strategies](/code-push/update-strategies).
### What information is sent to Shorebird servers?
Although Shorebird connects to the network, it does not send any personally identifiable information (PII). Including Shorebird should not affect your declarations for the Play Store or App Store.
Requests sent from the app to Shorebird servers include:
* app\_id (specified in `shorebird.yaml`)
* channel (optional in `shorebird.yaml`)
* release\_version (`versionName` from `AndroidManifest.xml`)
* patch\_number (generated as part of `shorebird patch android`)
* arch (e.g. `aarch64`, needed to send down the right patch)
* platform (e.g. `android`, needed to send down the right patch)
* client\_id (the anonymous install identifier, used to count active users, see [What is the anonymous install identifier?](#what-is-the-anonymous-install-identifier))
The code for this is public in the [updater package](https://github.com/shorebirdtech/updater/blob/main/library/src/network.rs) and can be reviewed at any time.
### Do you need to keep your app\_id secret?
No. The `app_id` is included in your app and is safe to be public. You can check it into version control (even publicly) and not worry about someone else accessing it.
Someone who has your `app_id` can fetch the latest version of your app from Shorebird servers, but they cannot push updates to your app or access any other aspect of your Shorebird account.
### Does Code Push require the internet to work?
Yes. Some form of network connectivity is required to transport updates to the devices.
### How is Shorebird affected by lack of network connectivity?
The Shorebird updater is designed to be resilient to network connectivity issues.
In the default update behavior, when the application launches it alerts the Shorebird updater, which spawns a separate thread to make a network request to Shorebird’s servers and ask for an update. A separate thread is used intentionally to avoid blocking anything else the application might be doing. If the network request fails or times out, the updater will simply try to check again next time the application launches.
Shorebird command line tools (e.g. `shorebird patch`) require network connectivity to function. If you are using Shorebird to distribute your app, you should ensure that your CI system has network connectivity.
### What happens if a user doesn’t update for a long time?
A user will always get the latest patch available for their version of the app, regardless of which patch (if any) they currently have installed. A patch will always reflect the state of the codebase at the time when the patch was built so as long as newer patches also contain the changes from older patches, users will always be up to date and there is no need to worry about users “missing” patches.
## Teams, access, and privacy
### Can you use Shorebird with your team?
Yes. The Shorebird free “Hobby” tier only supports a single developer, but all other plans support unlimited developers.
See [Organizations](/account/orgs) for more information.
### Can you self-host Shorebird?
No. Shorebird has no current plans to offer on-prem, self-host or cloud-prem offerings. The Shorebird team is happy to discuss ways to improve the centrally hosted solution to best match your needs.
### Does Code Push work with large applications?
Yes. There is no limit on the size of the application that can be patched with Code Push. As noted in [Overview](/code-push/#what-types-of-changes-can-be-included-in-a-patch), Shorebird can change any Dart code in your application no matter of size.
### Does Shorebird store your source code?
No. Shorebird servers never see or store your source code. When you run `shorebird release` or `shorebird patch` the `shorebird` tool only uploads the same compiled app binary that you send to the app stores.
### What is the anonymous install identifier?
It is a random ID that Shorebird creates and stores inside your app, to allow Shorebird to count how many copies of your app are active in a given month. That count is the number Shorebird bills you on and reports back to you.
Shorebird is designed to never know anything about *your* users. It sends back only what it needs in order to deliver patches and to bill for them, and this identifier is the piece that makes the monthly count possible.
You will see other names for the same value. Shorebird’s [privacy policy](https://shorebird.dev/privacy/) calls it an anonymous device identifier, and in Shorebird’s source code the field is named `client_id`. Shorebird has referred to it in the past, in issues and support threads, as the device ID or the install ID. These are all the same thing, and this page uses “anonymous install identifier” throughout, because that is the most accurate description of what it is.
Shorebird creates the value the first time your app runs, as a random v4 UUID, and stores it in `state.json` inside your app’s own storage (see [What does the Shorebird updater store on disk?](#what-does-the-shorebird-updater-store-on-disk)). It is sent each time your app checks for a new patch.
It does not identify a device, and it does not identify a person. It identifies a single install of your app. Shorebird does not read the IDFA, IDFV, Android advertising ID, or any other identifier that has meaning outside of Shorebird. Because Shorebird creates the value itself:
* It is per-install, not per-device. Two Shorebird apps on the same phone get two unrelated identifiers, and Shorebird has no mechanism to link them.
* It survives release and patch updates, and goes away when the user uninstalls your app or clears its app data. The next launch generates a new one.
* It carries no information about the user. It is not derived from anything on the device, and Shorebird never correlates it with any other data, in keeping with Shorebird’s [privacy policy](https://shorebird.dev/privacy/).
Shorebird therefore cannot tell one of your users from another, identify a person, or link an install back to an account in your app.
What Shorebird can do with it is count. It can tell how many unique installs of your app were active in a given month, which is the number your bill is based on and the number behind the monthly active users shown in the [Shorebird console](https://console.shorebird.dev).
### What does Shorebird do with the anonymous install identifier?
Shorebird counts with it, and nothing else. It goes into counts of how many unique installs of your app were active, daily as well as monthly. Those counts are what Shorebird shows you in the [Shorebird console](https://console.shorebird.dev) and what your bill is based on, and they are all that comes back out.
Shorebird collects nothing the identifier could be correlated against. Your app sends no location, no device fingerprint, and no advertising identifier — the [full list of what is sent](#what-information-is-sent-to-shorebird-servers) is a short set of fields identifying the app, its build, and the architecture it is running on. Shorebird records nothing else about the request alongside it.
As with any service on the internet, the infrastructure Shorebird runs on produces its own operational logs, and those can include network details such as the IP address a request arrived from. Shorebird does not collect these deliberately, keeps them only for a limited period for traffic management and abuse prevention, and never joins them to the anonymous install identifier or to anything else. They are covered by Shorebird’s [privacy policy](https://shorebird.dev/privacy/).
The numbers you see are computed as aggregates. Active user counts are produced as HyperLogLog sketches, a statistical structure that estimates how many distinct installs were seen without the sketch itself containing any of the identifiers that produced the count. That aggregate is what reaches your console and your invoice.
What Shorebird can say about the identifier in every case:
* It is never shown to you or to anyone else. No Shorebird API returns it, and there is no way to set, query, or look up an individual identifier. What Shorebird surfaces, in the console and on your invoice, is aggregate counts.
* It is never correlated with anything else. It is not joined against your account data, against other apps, or against any third-party data set.
* It is never sold, and never shared for advertising.
How long Shorebird retains what it collects is described in Shorebird’s [privacy policy](https://shorebird.dev/privacy/), which is the authoritative statement. If you need these commitments as a signed agreement rather than a policy, Shorebird offers a [Data Processing Agreement](https://shorebird.dev/dpa/). And if you need more specific detail for a security review or a procurement questionnaire, reach out to Shorebird’s [privacy team](mailto:privacy@shorebird.dev) and Shorebird will answer directly.
The code that creates the identifier and the code that sends it are both public and can be reviewed at any time:
* `generate_client_id` in [`updater_state.rs`](https://github.com/shorebirdtech/updater/blob/main/library/src/cache/updater_state.rs), which generates and stores the value
* `PatchCheckRequest` in [`network.rs`](https://github.com/shorebirdtech/updater/blob/main/library/src/network.rs), which is the full payload sent to Shorebird servers
### Will your app still work if you cancel your Shorebird subscription?
Yes. Apps built with Shorebird will continue to function normally (as if they had been built without Shorebird), including those that have had patches installed.
### Can you use Shorebird in your country?
Shorebird has not attempted to restrict access from any country.
Some countries have restrictions on what urls can be accessed from within the country. Shorebird currently uses Google Cloud for hosting, including Google Cloud Storage and Google Cloud Run.
The following URLs are used by Shorebird:
* — used to interact with Shorebird’s services via the web.
* — used to authenticate with Shorebird
* — used by the `shorebird` command line tools to interact with the Shorebird servers as well as the Shorebird updater on users’ devices to check for updates.
* — used by the `shorebird` command line tool to download Flutter artifacts for building releases and patches.
* — used by the `shorebird` command line tool to upload and download release and patch artifacts, and by the Shorebird updater on user’s devices to download the patches.
* — used by the Shorebird updater when downloading patches to a user’s device.
Shorebird also uses Microsoft or Google OAuth login, which have their own required urls for login (e.g. login.microsoftonline.com or oauth.google.com).
All traffic to and from Shorebird servers travels over https (port 443) and is encrypted using standard Transport Security Layer / Secure Sockets Layer (TSL/SSL) protocols.
You can use the [Endpoint Reachability](/system/endpoint-reachability/) checker to test whether all of these URLs are accessible from your current device or network.
If all of those URLs are accessible from your country, then Shorebird should work.
If your region requires use of [FLUTTER\_STORAGE\_BASE\_URL](https://docs.flutter.dev/community/china) Shorebird may not work for you at this time since it also uses that environment variable as part of its implementation. There are plans to [remove this restriction](https://github.com/shorebirdtech/shorebird/issues/435) in the future.
### Do you need to distribute your app through a store?
No. Shorebird can be used with any app distribution method, including side-loading or carrier provided stores.
Shorebird is not itself a store. Your users will need to install your app initially through some method other than Shorebird, but Shorebird can then be used to patch (update) your app after that initial install.
### How does Shorebird interact with Play testing tracks or Apple TestFlight?
Each of the app stores have separate mechanisms for distributing apps to limited groups of users (e.g. “internal testing”, “closed beta”, etc.). These are all mechanisms for segmenting your users into groups and distributing specific versions of your apps to each.
Unfortunately, not all of these mechanisms allow 3rd parties to detect when apps are installed in any specific Test Track or via TestFlight. Thus, there is not reliable visibility into composition of these groups, and Shorebird cannot reliably gate access to patches based on these groups. You can read a bit more about this on Stack Overflow discussions specifically about [Android](https://stackoverflow.com/questions/53291007/can-an-android-application-identify-the-test-track-within-google-play) and [iOS](https://stackoverflow.com/questions/26081543/how-to-tell-at-runtime-whether-an-ios-app-is-running-through-a-testflight-beta-i).
If you’d like to segment availability of Shorebird patches, there are some potential options:
* Use separate binaries / bundle ids for each group. This is the most straightforward approach, but requires you to manage multiple binaries. On Android the easy way to accomplish this is through flavors. You may already have a dev flavor and prod flavor with different availability. You can thus patch your dev flavor, verify it and then separately patch your prod flavor. Using branches / tags in your version control is recommended to help keep track of the sources associated with each release.
* Track your own set of opt-in users, disable automatic updates, and trigger updates only for certain users via [package:shorebird\_code\_push](https://pub.dev/packages/shorebird_code_push). This requires you to manage your own opt-in list.
## Billing
### What counts as a “patch install” for Shorebird?
For more details on this, please refer to the [How Shorebird Bills](/account/billing/#how-shorebird-bills) section of the [Billing page](/account/billing/).
### How do you upgrade or downgrade your plan?
From the [Plan page](https://console.shorebird.dev/account/plan) in the Shorebird Console. Upgrades take effect immediately; downgrades are scheduled for the end of your current billing period. See [Plans & Upgrading](/account/plans/) for step-by-step instructions, including switching between monthly and annual billing.
### When does your billing period reset?
Billing periods are reset automatically every month on the day you first subscribed to Shorebird. For example, if you subscribed on the 15th of the month, your billing period will reset on the 15th of every month.
### How do you cancel your subscription?
To cancel your subscription, open the [Plan page](https://console.shorebird.dev/account/plan) in the Shorebird Console and click “Cancel plan”. See [Plans & Upgrading](/account/plans/#cancel-your-plan) for details.
You will continue to have all the features of a paid account until the end of your billing period.
### Can you pay for a year in advance?
Yes. Self-service yearly plans launched in April 2025. You can read more about this in the [announcement blog post](https://shorebird.dev/blog/yearly-plans/).
# Code Push for Android add-to-app
> Use Code Push in an add-to-app scenario with an Android app
This guide explains how to use Shorebird in an Android add-to-app scenario (that is, your app embeds Flutter UI in non-Flutter UI). If you are new to this pattern, see the [Add Flutter to an existing app](/flutter-concepts/add-to-app/) Flutter Concepts article first.
Note
If your app is a pure Flutter app, follow the [standard Code Push guide](/code-push/initialize) instead.
## Prerequisites
This guide assumes you have already have an Android app and a Flutter module. The Android app will be named `android_app` and the Flutter module will be named `flutter_module`.
This guide also assumes that you have created a Shorebird account. If you have not, see the [Code Push guide](/code-push/initialize) for instructions.
The reference code for this guide is available at .
## Add Shorebird to your Flutter module
First, run `shorebird init` in your Flutter module:
```
shorebird init
```
## Create a Shorebird release
Create a Shorebird release for your Flutter module:
```
shorebird release aar --release-version 1.2.3+1
```
The `release-version` parameter needs to match the version of the Android app that uses this module (i.e., `versionName+versionCode` from the app’s `app/build.gradle` file).
Note
Because Shorebird only works with release builds, this will only produce a release version of your archive. This is similar to running `flutter build aar --no-debug --no-profile`.
Note
This command creates an `aar` with a build number of `1.0`. As with the `flutter build aar` command, you may optionally provide a different build number using the `--build-number` argument, although this is not necessary. The build number is used to identify the Flutter module in your app’s `build.gradle` file, as you can see [below](#update-your-android-app-to-use-this-version-of-the-flutter-module).
Shorebird does not use the build number, but **it should remain consistent between a release and patches to that release**.
## Update your Android app to use the `download.shorebird.dev` Maven repository
In `settings.gradle`:
```
dependencyResolutionManagement {
repositoriesMode.set(RepositoriesMode.FAIL_ON_PROJECT_REPOS)
repositories {
google()
mavenCentral()
+ maven {
+ // This is a relative path from this settings.gradle file to the
+ // my_flutter_module/build/host/outputs/repo directory.
+ url '../my_flutter_module/release'
+ }
+ maven {
- url 'https://storage.googleapis.com/download.flutter.io'
+ url 'https://download.shorebird.dev/download.flutter.io'
+ }
}
}
```
Note
Even though is replaced with , any Flutter dependencies that are not unique to Shorebird will still be downloaded from . This will only work for versions of Flutter that Shorebird supports.
## Update your Android app to use this version of the Flutter module
In `app/build.gradle`, add the following:
```
buildTypes {
release {
// ...
+ // The Dart compiler builds libapp.so directly (does not use clang),and already strips
+ // symbols. However when llvm-strip is run on libapp.so, the symbols are re-sorted
+ // causing the hash of the library to change (which can confuse Shorebird tools).
+ // This line tells gradle to skip the unnecessary llvm-strip step for libapp.so
+ // thus ensuring that the libapp.so that Shorebird sees is byte-identical to the one
+ // which ends up in the APK/AAR/AAB.
+ packaging.jniLibs.keepDebugSymbols.add("**/libapp.so")
// ...
}
}
dependencies {
// ...
+ releaseImplementation 'com.example.my_flutter_module:flutter_release:1.0'
// ...
}
```
## Verify that your app runs
In Android Studio, update the active build variant to release and run your app. Your app should work as before with no differences.
To set the active build variant to release, click on the “Build Variants” tab in the lower left corner of Android Studio. Then select “release” from the “Active Build Variant” dropdown.
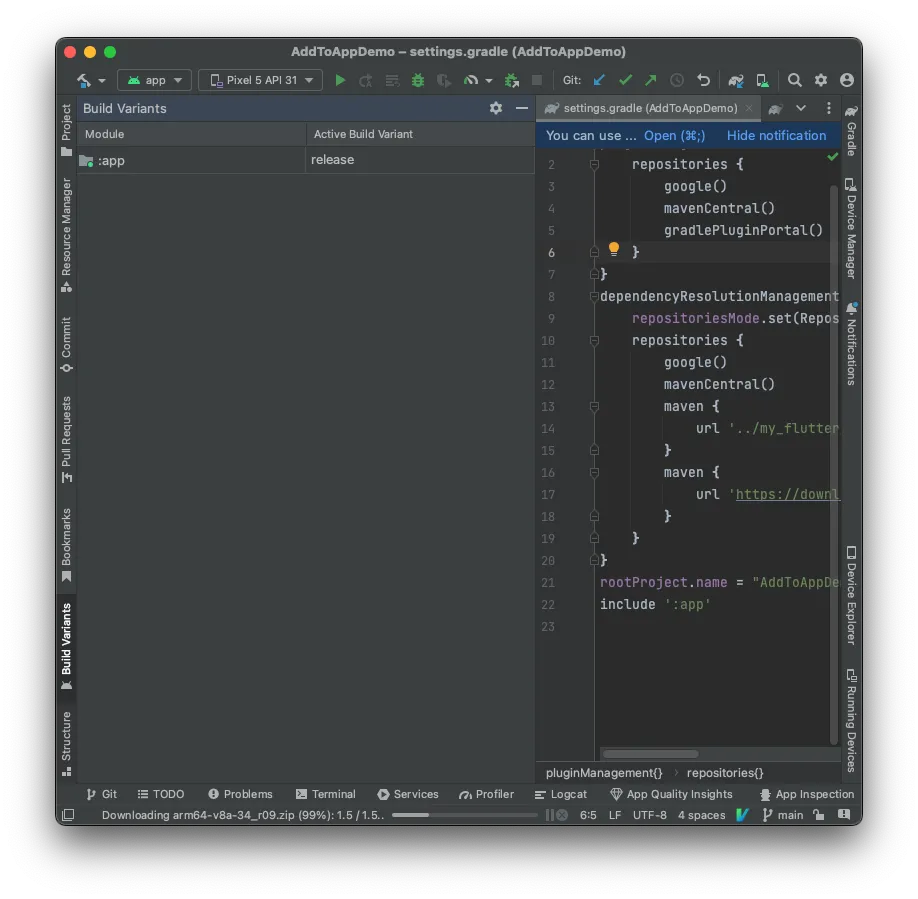
Attempting to build with a non-release build variant will not be able to resolve Flutter symbols in your app.
## Submit your app to the Play Store
This step isn’t covered in detail here, but this is where you would submit your app to the Play Store. For Code Push to work, it is important that you submit *with the same `aar` generated by the release command above*.
## Verify that Shorebird is working with a patch
Make an edit to the code in your Flutter module. Then run:
```
shorebird patch aar --release-version 1.2.3+1
```
Note
If you provided a build number to the `shorebird release aar` command using the `--build-number` argument, you must also provide that same build number to the `shorebird patch aar` command.
As with the `release` command, the release version should be the version of the Android app that uses this module.
Now relaunch the app, navigate to the Flutter screen, and verify that the patch is recognized and applied. In logcat, you should see output like the following:
```
[INFO:shorebird.cc(109)] Shorebird updater: no active patch.
[INFO:shorebird.cc(113)] Starting Shorebird update
updater::network: Sending patch check request: PatchCheckRequest { app_id: "baad0583-6810-44a7-9034-6aadb8127f29", channel: "stable", release_version: "1.0.0+8", patch_number: None, platform: "android", arch: "aarch64" }
updater::updater: Patch 1 successfully installed.
updater::updater: Update thread finished with status: Update installed
```
# Code Push for iOS add-to-app
> Use Code Push in an add-to-app scenario with an iOS app
This guide explains how to use Shorebird in an iOS add-to-app scenario (that is, your app embeds Flutter UI in non-Flutter UI). If you are new to this pattern, see the [Add Flutter to an existing app](/flutter-concepts/add-to-app/) Flutter Concepts article first.
Note
If your app is a pure Flutter app, follow the [standard Code Push guide](/code-push/initialize) instead.
## Prerequisites
This guide assumes you have already have an iOS app and a Flutter module. The example iOS app will be named `IosCodePushDemo` and the example Flutter module will be named `flutter_module`.
This guide also assumes that you have created a Shorebird account. If you have not created a Shorebird account, please see the [Code Push guide](/code-push/initialize) for instructions.
The reference code for this guide is available at .
Note
Shorebird only supports the iOS Framework embedding method of adding Flutter to a native iOS app (see “Use iOS frameworks” in the [official integration docs](https://docs.flutter.dev/add-to-app/ios/project-setup)). There is an open issue to support embedding via CocoaPods ([link](https://github.com/shorebirdtech/shorebird/issues/1198)), but given that [Flutter plans to deprecate CocoaPods support](https://github.com/flutter/flutter/issues/168015), it is unlikely that this will be implemented.
## Add Shorebird to your Flutter module
First, run `shorebird init` in your Flutter module:
```
shorebird init
```
## Create a Shorebird release
First, package the Flutter module for release. This will produce an `.xcframework` that can be embedded in your iOS app and provides Shorebird with the information it needs to apply patches.
To create a release, run the following the root directory of your Flutter module:
```
shorebird release ios-framework --release-version 1.2.3+4
```
The `release-version` parameter needs to match the version of the iOS app that uses this module (i.e., `version+build` from the Xcode settings, or `CFBundleShortVersionString+CFBundleVersion` from your app’s Info.plist).
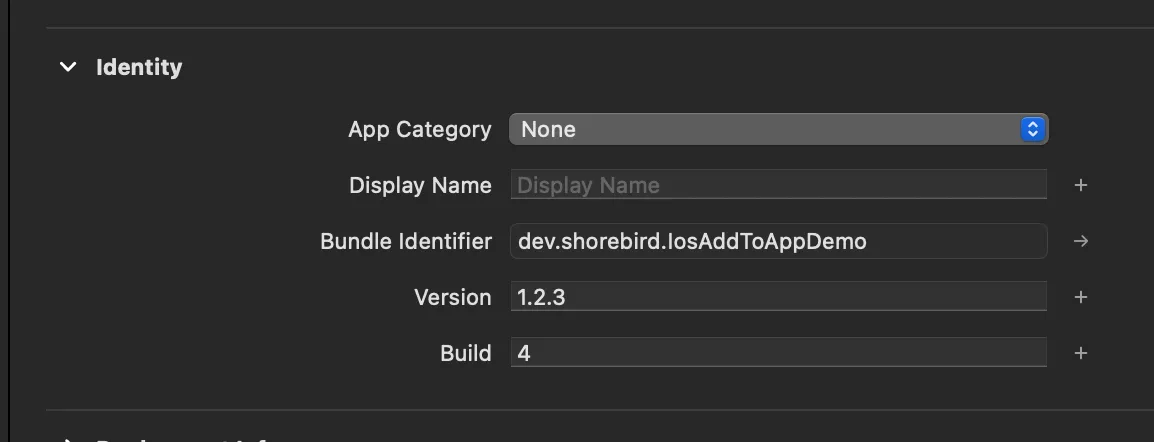
*The version number for this app would be 1.2.3+4*
The `ShorebirdFlutter.xcframework` and `App.xcframework` artifacts produced by the `shorebird release` command will be placed in the `release` directory in the root of your Flutter module.
Note
Because Shorebird only works with release builds, this will only produce a release version of your archive. This is similar to running `flutter build ios-framework --no-debug --no-profile`.
## Embed the Flutter module in your iOS app
While there are multiple ways to embed a Flutter module in an iOS app, Shorebird requires that your Flutter module be embedded in your iOS app as an .xcframework.
Note
The steps to do this are the same as the [option B in the official instructions](https://docs.flutter.dev/add-to-app/ios/project-setup#option-b---embed-frameworks-in-xcode), so in the event of a conflict between the docs here and the official docs, defer to the official docs.
Note
`ShorebirdFlutter.xcframework` is nearly identically to `Flutter.xcframework` from Google, but as part of compliance with Apple’s signing requirements, the framework has been renamed when applying Shorebird’s (legally Code Town, Inc’s) digital signature.
### Add the path to your .xcframeworks to Framework Search Paths
In Xcode:
1. Navigate to your app target’s “Build Settings” tab.
2. Find the “Framework Search Paths” setting (the Filter field on the top right of the build settings tab is helpful for this).
3. Add an entry to the “Framework Search Paths” list. This entry should be the relative path to the directory containing `ShorebirdFlutter.xcframework` and `App.xcframework` artifacts. By default, these artifacts are placed in the `release` directory in the root of your Flutter module, but you should feel free to move them elsewhere if you prefer.
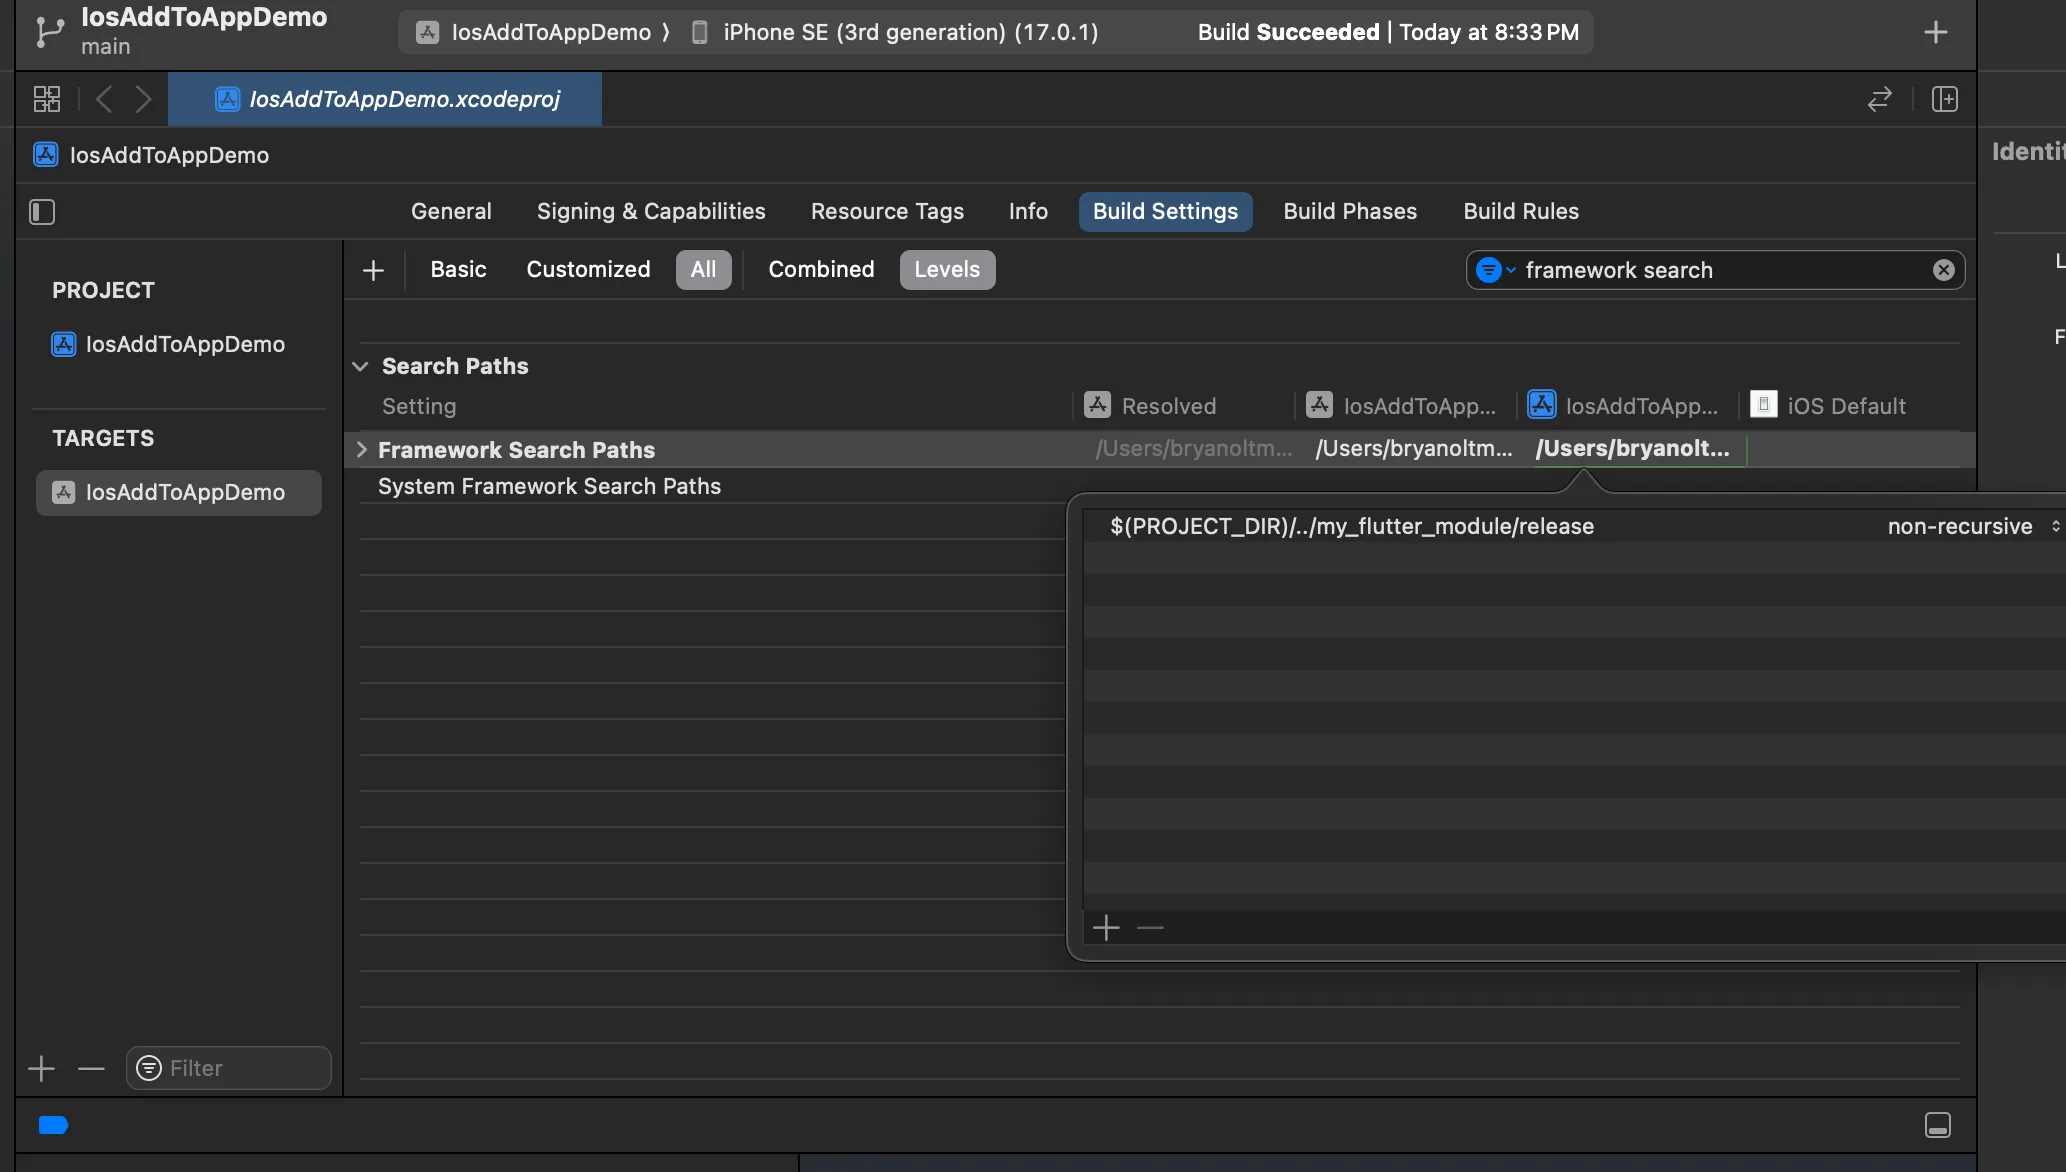
### Embed App.xcframework and Flutter.xcframework in your app
In the “General” tab of your app target, add `App.xcframework` and `ShorebirdFlutter.xcframework` from to the “Frameworks, Libraries, and Embedded Content” section. Make sure to select “Embed & Sign” for both frameworks.
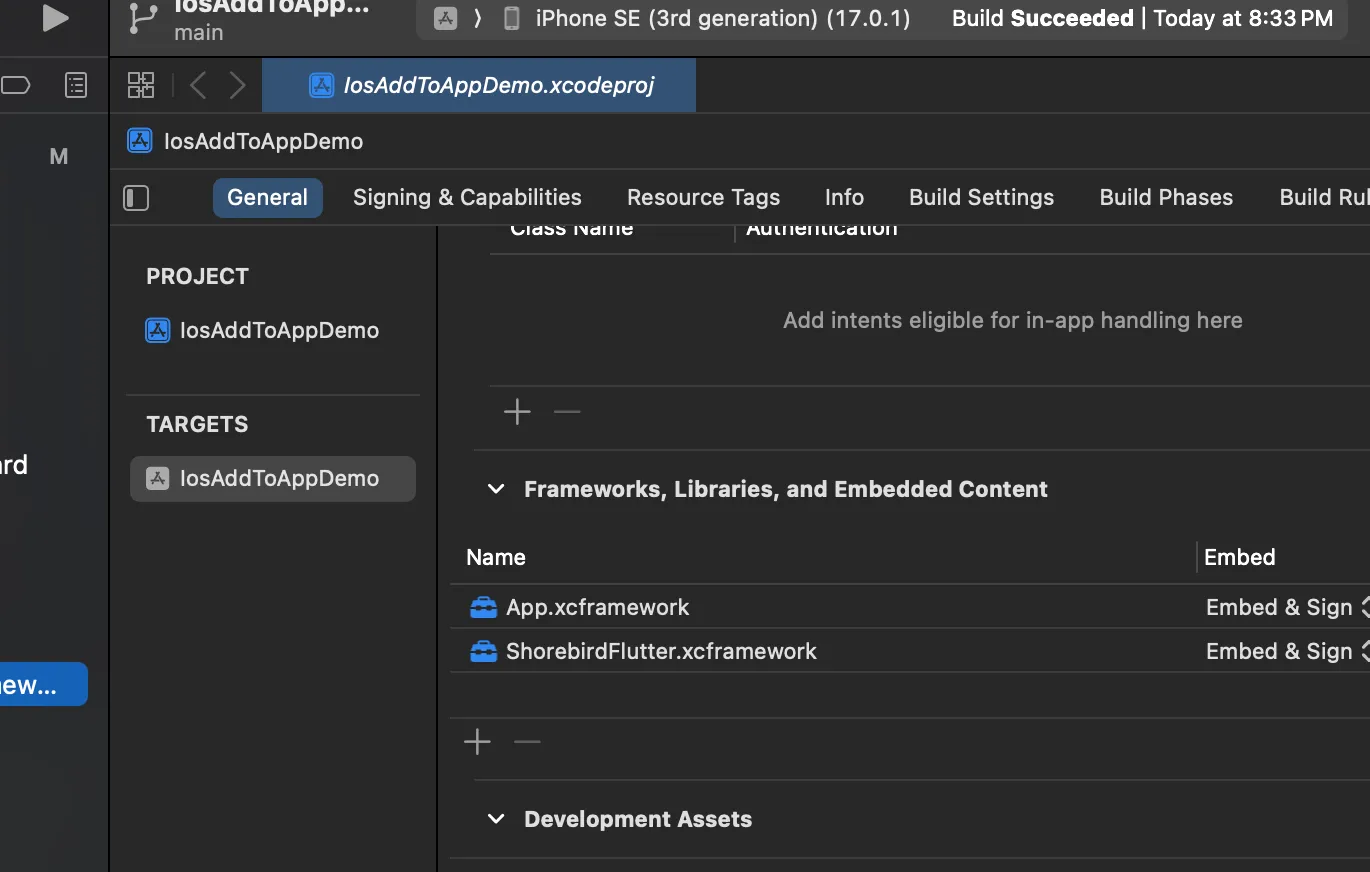
Note
You may also see that `ShorebirdFlutter.xcframework` is signed by Code Town Inc. That’s the Shorebird team 🙂
## Verify that your app runs
In Xcode, update the current scheme’s build configuration to “Release”
 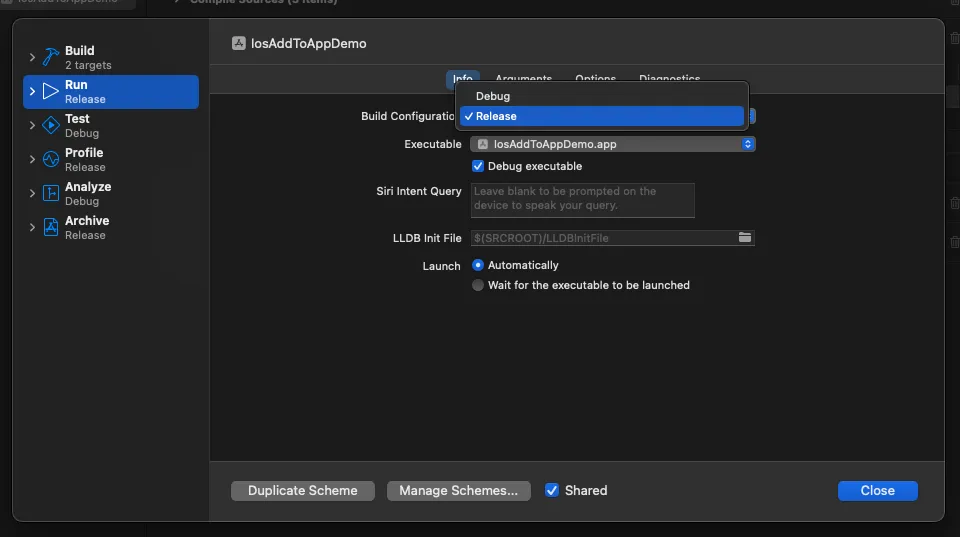
Now run your app on a device (*not* a simulator). Your app should run as normal, and you should see debug logs from Shorebird.
## Submit your app to the App Store
This step isn’t covered in detail here, but this is where you would submit your app to the App Store. For Code Push to work, it is important that you submit *with the same `xcframework` generated by the release command above*.
You can skip this step if you just want to see Code Push working in an app.
## Verify that Shorebird is working with a patch
Make a user-visible change to the code in your Flutter module. Then run:
```
shorebird patch ios-framework --release-version 1.2.3+4
```
`release-version` should be the version of the iOS app you released with the output of the `release` command. As before, this should match your app’s version and build numbers in Xcode. The command above will patch the release created earlier in this guide.
You can now test the patch in your app by running the app from Xcode. After the app launches, you should see a logs from Shorebird informing you that the app is checking for new patches and saying that the patch was installed:
```
Sending patch check request: PatchCheckRequest { app_id: "db32f785-284a-429b-9348-d3ead3485438", channel: "stable", release_version: "1.2.3+4", patch_number: None, platform: "ios", arch: "aarch64" }
/// other logs
Patch 1 successfully installed.
```
For the app to reflect the changes, you will need to close and reopen the app. Do this by stopping the app in Xcode and then running it again.
# Complete Code Push guide
> Ship your first over-the-air fix in under 30 minutes.
# Flutter over-the-air updates: A complete technical guide to Code Push
A critical bug ships to production. Users report crashes in your payment flow. Your team has a fix committed and tested within the hour. Then you file for App Store review and wait. Twenty-four to forty-eight hours on a good day, longer if it lands on a weekend. By the time the fix reaches your users, the damage to retention and app store ratings is already done.
React Native teams sidestep this problem by swapping a JavaScript bundle. Flutter teams have historically had no equivalent option. This guide explains why that’s true, how Shorebird’s Code Push solves it at the runtime level, and how to get the full implementation running in your production pipeline.
## Why Flutter can’t do what React Native does
Flutter compiles Dart code to native ARM machine code at build time using [ahead-of-time (AOT) compilation](https://flutter.dev/docs/resources/faq#how-does-flutter-run-my-code-on-android). The output is a compiled snapshot baked directly into the app binary. At runtime, there’s no interpreter between your Dart logic and the hardware.
React Native works differently. The JavaScript logic runs inside a JS engine (Hermes or JSC), loaded from a bundle file at startup. Expo’s EAS Update ships a new bundle to devices over the air because swapping the JS file at the path the runtime reads from is all it takes. The app’s logic layer is just a file on disk.
Flutter has no equivalent file to swap. The `libapp.so` on Android (and its iOS counterpart) is compiled Dart code in binary form. You can’t diff a `.dill` snapshot against a new one and swap it at runtime the way you’d replace a JavaScript bundle. The runtime isn’t built to load updated compiled code dynamically.
This isn’t a missing feature waiting to be added. It’s a direct consequence of AOT compilation, which is also what gives Flutter its consistent frame rate, fast startup, and predictable performance. The same property that makes Flutter fast is what makes swapping code hard.
Solving this requires modifying the Dart runtime to support some form of dynamic code execution, which is what Shorebird does. They [modified both the Dart VM and the Flutter engine](https://shorebird.dev/blog/how-we-built-code-push/) to make genuine diff-based OTA code updates possible on Android and iOS.
## How Shorebird Code Push works
When you build a release with Shorebird, the resulting binary contains two components: the standard AOT-compiled Dart snapshot and a modified Dart interpreter that Shorebird built and maintains. On startup, the Shorebird runtime checks Shorebird’s servers for a patch scoped to that specific release version. If no patch exists, the AOT snapshot runs exactly as it would in a standard Flutter build. If a patch is available, the runtime executes the updated Dart code through the interpreter instead, while the AOT snapshot remains in place as the fallback.
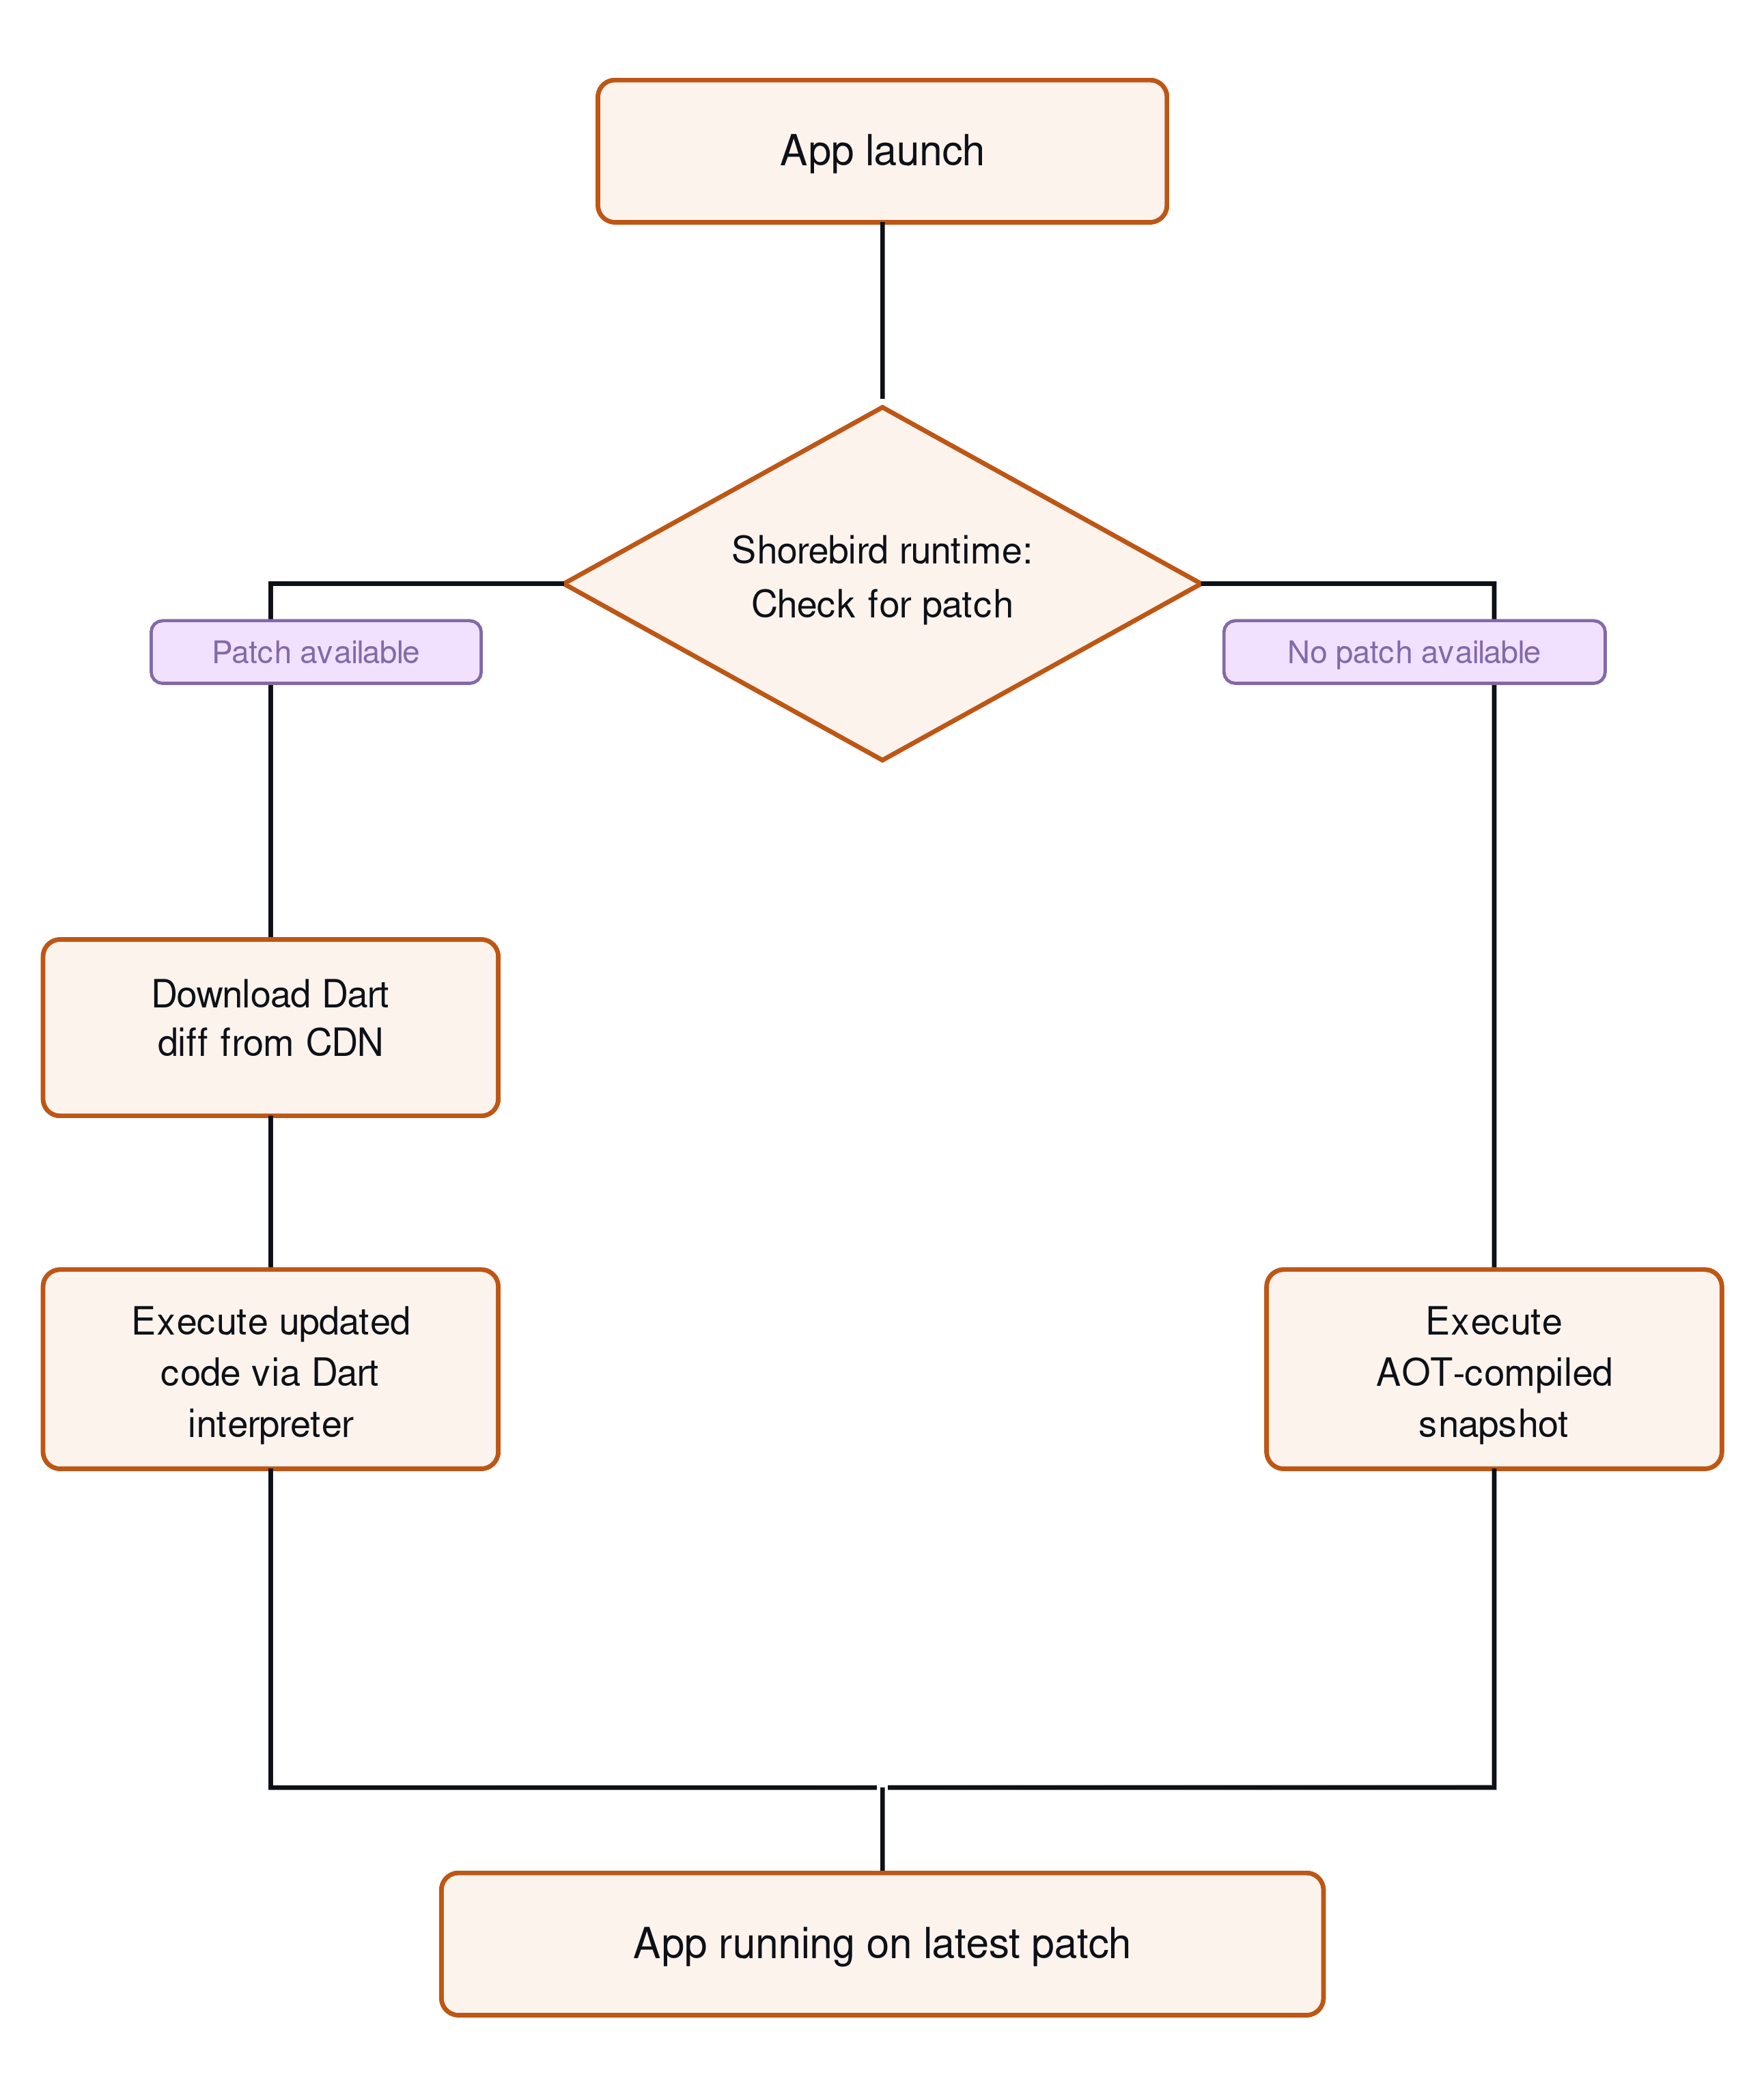
The [system architecture documentation](https://docs.shorebird.dev/code-push/system-architecture/) describes this in detail, but the operational model comes down to two concepts you need to keep distinct: [releases](https://docs.shorebird.dev/code-push/release/) and [patches](https://docs.shorebird.dev/code-push/patch/).
A release is a full app build that includes the Shorebird runtime. You build it with the Shorebird CLI, register it with Shorebird’s servers, and release the build to your users as you currently do today. Once users install it, that install is tied to a specific release version in Shorebird’s system.
A patch is a Dart code diff computed against that release. Shorebird compares the new Dart snapshot against the original, produces a binary diff, and uploads only the changed bytes to its CDN.
Patches are version-scoped: a patch built against release `1.2.0` only applies to devices running `1.2.0`. Users still on `1.1.0` won’t receive it until you ship a patch targeting that release.
This model has a hard boundary. Here’s what you can and can not do with patches and releases:
| Can update over the air | Requires a new store release |
| ------------------------------------ | ----------------------------------------------- |
| All Dart and Flutter widget code | Native Kotlin, Swift, Java, or Objective-C code |
| UI layout, business logic, routing | Native plugin platform channel implementations |
| Strings, state management, providers | `AndroidManifest.xml` or `Info.plist` changes |
| Dart-layer bug fixes | New runtime permissions |
| Pure-Dart Flutter package upgrades | Native binary assets |
| App configuration managed in Dart | Changes to native dependencies |
If you need a new camera permission, you need a new release. Anything outside pure Dart goes back through the store.
## Setting up Shorebird: From init to first patch
The setup from an existing Flutter project to your first deployed patch takes about 15 minutes.
### Step 1: Install the Shorebird CLI.
Install the Shorebird CLI on your development machine using this command:
```
curl --proto '=https' --tlsv1.2 https://raw.githubusercontent.com/shorebirdtech/install/main/install.sh -sSf | bash
```
Then authenticate with your Shorebird account:
```
shorebird login
```
### Step 2: Initialize Shorebird in your Flutter project.
Run this to set up Shorebird in your Flutter project:
```
shorebird init
```
`shorebird init` adds a `shorebird.yaml` file at the project root containing your `app_id`, and configures the Flutter engine binding to include the Shorebird runtime. Your existing Dart code and project structure stay unchanged. The only new file tracked in version control is `shorebird.yaml`.
### Step 3: Create a release.
In your current build scripts (typically in your CI configuration), all you need to do is update your `flutter build` commands to:
```
shorebird release android
shorebird release ios
```
These commands build your app with the Shorebird engine embedded, save a copy of the release in a private bucket under your Shorebird account, and produce the artifacts you upload to the stores: an `.aab` for Play Console and an `.ipa` for App Store Connect. Your store submission workflow doesn’t change.
### Step 4: Submit to the stores through Play Console and App Store Connect as normal.
You can now use the `.aab` file for Play Console and the `.ipa` file for App Store Connect to publish your app to the store. If you publish to stores other than Google Play and the App Store, or distribute directly to your users for distribution, that’s OK too. You can just use the compiled binaries that Shorebird creates for your distribution process. Once a version of your app built using Shorebird is live, you are ready for over-the-air updates.
### Step 5: Push a patch after fixing a bug in Dart code.
After you have made a change that you need to deliver to your users, you can create and publish *patches* over-the-air. To do that, use the following commands:
```
shorebird patch android
shorebird patch ios
```
Shorebird diffs the new Dart snapshot against the registered release, uploads the delta, and makes it available immediately via its CDN. Users running that release version download the patch in the background on their next update check.
Here’s what that flow looks like: 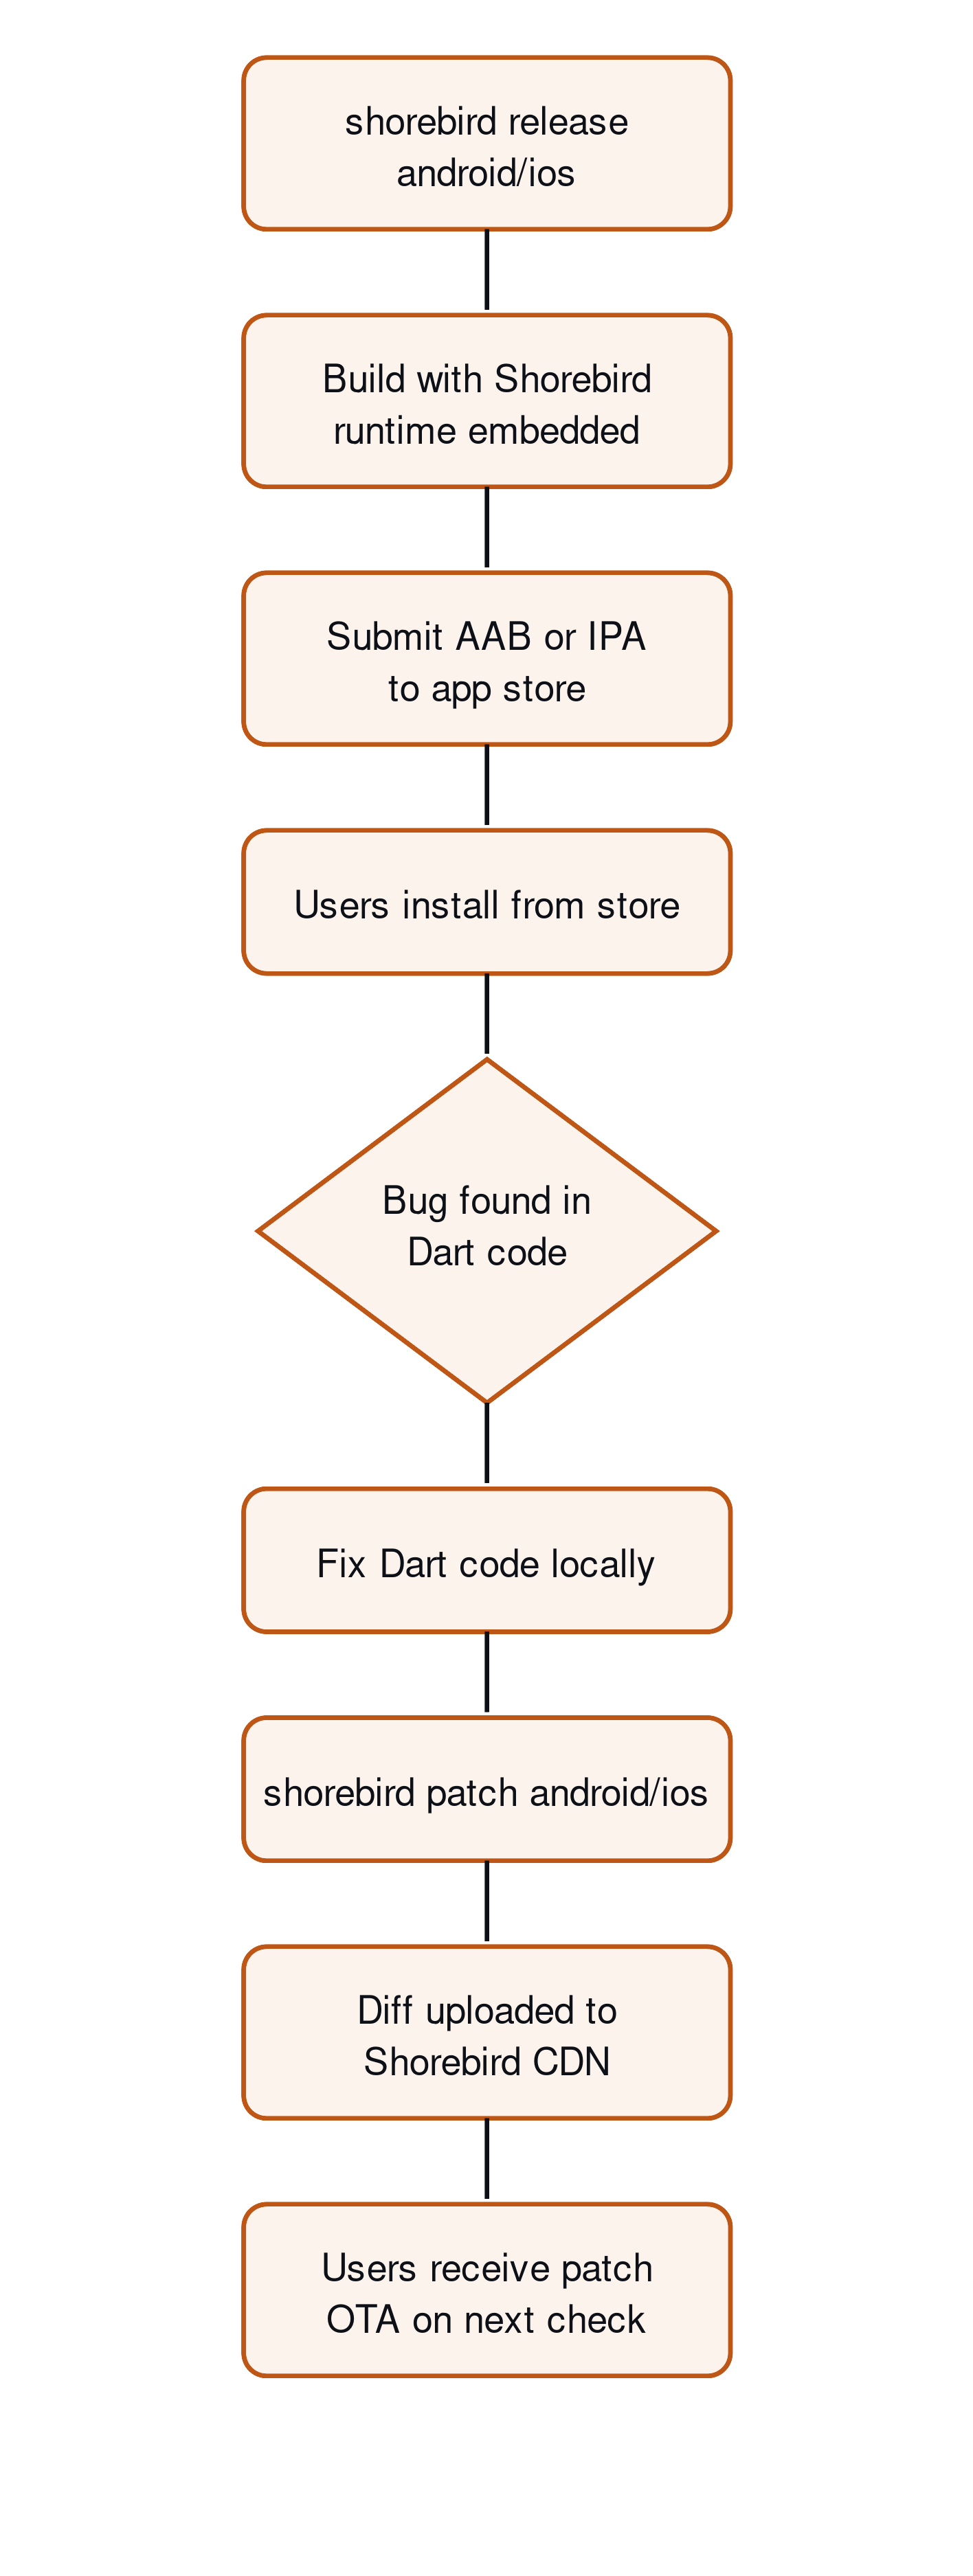
[PushPress](https://shorebird.dev/success-stories/push-press) Senior Mobile Developer Allan Wright described the change in their release cycle: “The speed to release updates has skyrocketed. It used to take four days to two weeks depending on urgency. Now it’s way faster. The reliability of shipping fixes is night and day.”
For teams running GitHub Actions, Shorebird provides [documented CI integration](https://docs.shorebird.dev/code-push/ci/github/) that slots directly into existing workflows. Both `shorebird release` and `shorebird patch` run in CI with standard environment variables for authentication. [Codemagic](https://docs.shorebird.dev/code-push/ci/codemagic/) also has first-class Shorebird support for teams already using it as their build platform.
## Controlling update behavior in-app
By default, patches download in the background and apply on the next cold start. For most bug fixes, this is the right behavior. Users get the fix without any interruption, and you avoid forcing a restart mid-session.
The [`shorebird_code_push`](https://pub.dev/packages/shorebird_code_push) Dart package gives you programmatic control when you need it. Add the dependency:
```
dependencies:
shorebird_code_push: ^latest
```
Then check for and download updates explicitly:
```
import 'package:shorebird_code_push/shorebird_code_push.dart';
Future checkForUpdate() async {
// Create an instance of the updater class
final updater = ShorebirdUpdater();
final status = await updater.checkForUpdate();
if (status == UpdateStatus.outdated) {
try {
// Perform the update
await updater.update();
} on UpdateException catch (error) {
// Handle any errors that occur while updating.
}
}
```
Call `checkForUpdate()` from the `initState` of your root widget, or from an `AppLifecycleListener` callback on app resume. Both are reasonable entry points. The root widget approach catches users on every cold start; the lifecycle callback catches returning sessions.
For a patch addressing a security vulnerability or a crash hitting a significant fraction of your users, you can force a restart immediately after download. Wire this through `TerminateRestart` from the [`terminate_restart`](https://pub.dev/packages/terminate_restart) package or your own restart mechanism. Reserve forced restarts for genuine incidents. Most patches don’t qualify, and your users will notice an unexpected restart.
You’ll also need to set `auto_update` to `false` in your `shorebird.yaml` file:
```
auto_update: false
```
Doing this is not required to use check for and download updated manually, but Shorebird will automatically download and apply updates if your shorebird.yaml file does not contain `auto_update: false`.
## Advanced patterns: Staged rollouts, rollbacks, custom tracks, and patch signing
High-velocity teams don’t ship patches directly to 100% of users. [WAGUS founder Michael Gallego](https://shorebird.dev/success-stories/wagus) described their patching cadence: “Patches ship fast. One release had 60 patches. Most of them are small quality-of-life updates requested by users. With Shorebird, they could ship them the same day.” Shipping that volume safely requires using a pattern from those discussed below.
### Percentage-based rollouts
You can set up [percentage-based rollout controls](https://docs.shorebird.dev/code-push/guides/percentage-based-rollouts/) using Shorebird’s “tracks” feature and a key-value store like Firebase. With this, you can set up a progression that:
* Starts at 5% and monitors crash reporting (Crashlytics, Sentry, or your current stack) for 60 to 90 minutes
* If error rates stay stable, expands to 25% and checks again
* Moves to 100% after your second checkpoint passes cleanly
Starting at 5% limits your blast radius. If a patch introduces a regression your test suite missed, you catch it at 5% user exposure rather than after it’s affected your entire active user base.
### Rollbacks
When a patch causes a regression, you can use the Shorebird Console to [roll it back](https://docs.shorebird.dev/code-push/rollback/#how-to-roll-back-a-patch). Once you roll back a patch, the installed apps learn about the rollback as soon as a patch check occurs, and it is implemented on the next boot, with no app store involvement and no review queue. The [rollback documentation](https://docs.shorebird.dev/code-push/rollback/) covers command syntax and the confirmation flow.
> Rollback takes effect at the infrastructure level immediately. Users receive the previous patch the next time their app checks for updates, with no action required on their end.
### Custom tracks
Shorebird supports named update tracks for staging and beta environments:
```
shorebird patch android --track=beta
```
Beta testers receive the patch immediately while production users remain on the current stable version. This gives you a real staging-to-production pipeline for OTA patches, not just for store submissions.
You can assign users to tracks in your Flutter code, and you can promote a patch from `beta` to `stable` once it’s passed QA. The [custom tracks documentation](https://shorebird.dev/blog/custom-tracks/) covers track configuration in full.
### Patch signing
Patch signing ensures that only code you explicitly authorize can run on your users’ devices. Each patch is signed with a private key that you generate and control. The Shorebird runtime verifies this signature on-device before applying an update. If the signature doesn’t match, the patch is rejected.
This follows the same model used by app stores, where code must be signed by a trusted key before it is allowed to run. In this case, you control that key. Shorebird never has access to it, and neither does any infrastructure involved in delivering the patch.
Because verification happens on the device, a patch cannot be applied unless it was signed by your key. Even in unlikely scenarios, like a compromised CDN, upstream provider, or delivery network, an attacker still wouldn’t be able to ship a valid patch without your signing key.
Transport security like TLS protects how patches are delivered. Patch signing protects what is delivered. Together, they ensure that patches arrive securely and haven’t been tampered with.
For teams in fintech, healthcare, or any regulated industry where code changes require an audit trail, patch signing is the recommended baseline configuration, not an optional extra.
## App Store and Play Store compliance
Shorebird’s approach is compliant with both stores.
[Apple’s App Store Review Guidelines section 2.5.2](https://developer.apple.com/app-store/review/guidelines/#software-requirements) prohibit apps from downloading and executing code that introduces or changes the app’s features or functionality outside of the App Review process. The guideline includes a carve-out: apps may execute code that runs through a built-in interpreter, provided the code doesn’t change the app’s core purpose or add capabilities that would otherwise require App Review.
Shorebird’s mechanism fits within this carve-out. Patched code runs through the Shorebird Dart interpreter, not as loaded native code. Shorebird maintains a [documented compliance position](https://docs.shorebird.dev/code-push/faq/#store-compliance) covering the boundary in detail.
The practical rule: use OTA patches for bug fixes, performance improvements, and iteration on existing features. More broadly, avoid shipping changes that would surprise users or bypass the intent of App Review. That’s not unique to Shorebird; it applies to any interpreted-code OTA mechanism on iOS.
[Google Play’s developer policies](https://play.google.com/about/developer-content-policy/) are more permissive. Play explicitly allows OTA code updates without the same interpreted-code carve-out requirement, because the platform doesn’t impose the same restriction. Standard policy compliance applies (no loading code from untrusted external sources, no violations of content policies), but OTA patching itself carries no special compliance risk on Android.
If your team operates in a regulated industry, document each patch with a short description of what changed. The Shorebird console stores version history and audit logs for every patch across every release. Pair that record with your existing change management process and you have the audit trail most compliance frameworks require.
## Your next step: Push a patch in the next 30 minutes
The full path from a clean Flutter project to your first OTA patch:
1. Install the CLI by running the `curl --proto '=https' --tlsv1.2 https://raw.githubusercontent.com/shorebirdtech/install/main/install.sh -sSf | bash` command.
2. Run `shorebird login` and then `shorebird create my_app` inside your project directory.
3. Run `shorebird release android` or `shorebird release ios` and submit the resulting artifact to your store track of choice.
4. Make a one-line Dart change: update a string constant, fix a null check, or adjust a widget parameter.
5. Run `shorebird patch android` (or `ios`) and confirm the patch appears in the [Shorebird console](https://console.shorebird.dev).
Shorebird’s free tier supports the complete CodePush workflow, including the Shorebird console and patch delivery, up to the free tier patch limit. That’s enough to run a full end-to-end proof of concept without a payment method on file. The [getting started documentation](https://docs.shorebird.dev/getting-started/) walks through account setup and the same sequence above with additional context on each step.
Add Code Push to your Flutter app in under 30 minutes. [Get started with Shorebird](https://docs.shorebird.dev/getting-started/)
## Related
[System Architecture](/code-push/system-architecture)Overview of Shorebird's components and source code.
[Troubleshooting](/code-push/troubleshooting)How to resolve common issues.
# Development Workflow
> Learn how to integrate Shorebird into your development workflow with automated releases and patches.
This guide will walk you through an opinionated development workflow with Shorebird, covering how to automate releasing and patching with Shorebird to streamline the entire development process so that you and your team can focus on shipping high-quality features to customers.
## Prerequisites
This guide assumes you are already familiar with Shorebird and have integrated it into your application. Refer to the [getting started](https://docs.shorebird.dev/getting-started/) instructions for more information. In addition, this guide also assumes that you are familiar with [GitHub Actions](https://docs.github.com/actions) and [Git](https://git-scm.com).
## Overview
Shorebird provides a set of tools that you can use to push over-the-air updates to your customers, but it’s up to you to decide how to integrate it into your development workflow.
While there are many ways to integrate Shorebird, the following workflow is a common recommended approach:
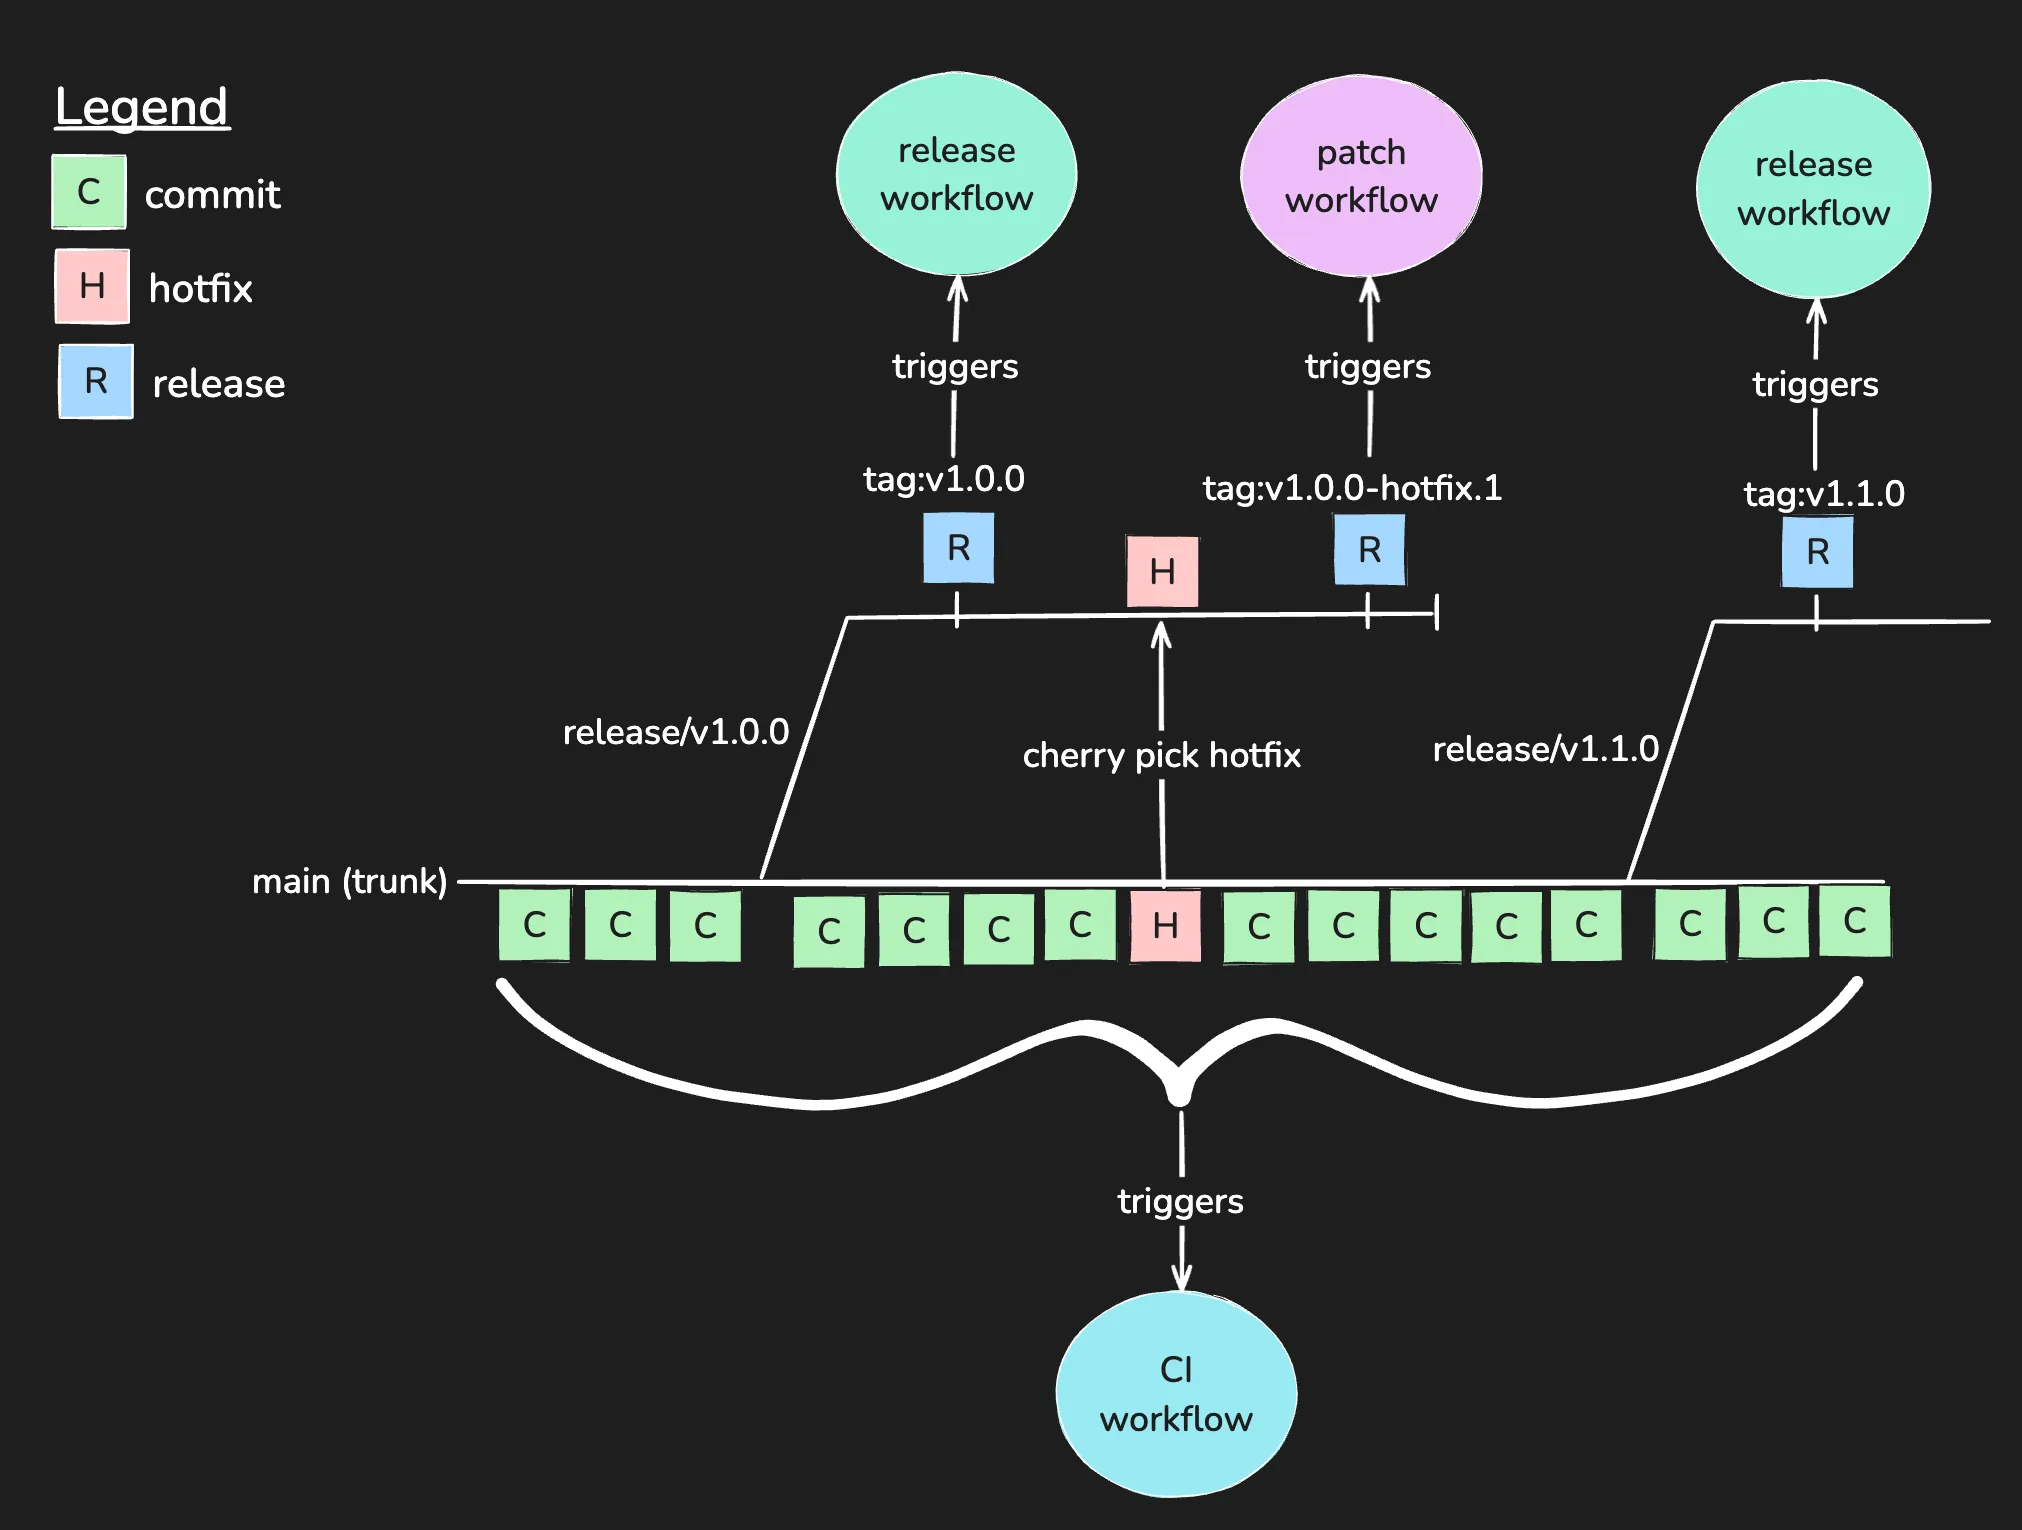
The illustration above uses [trunk-based development](https://trunkbaseddevelopment.com) and tags to trigger automated release and patch workflows.
The workflow consists of three main phases:
1. **Development**: Developers work on features and bug fixes.
2. **Release**: When a feature is ready, a release is created and distributed to customers (typically via stores).
3. **Patch**: If a critical bug is found, a patch is created and distributed to customers immediately via Shorebird.
The following sections walk through each phase in more detail.
## Development phase
During this phase, developers are building features and fixing bugs.
The development workflow can be broken down into the following steps:
1. Create branch from trunk (main).
2. Work on task.
3. Open a pull request to merge changes into trunk.
4. Squash and merge after CI checks & code review. Squashing commits keeps the commit history clean and makes it easier to cherry-pick commits into release branches.
Note that with the described workflow, the trunk (e.g., main) is always in a releasable state. This puts pressure on continuous integration (CI) checks to ensure that the code on the trunk is always in a healthy, deployable state. Checks that would typically run as part of the continuous integration process include linting, formatting, unit tests, and integration tests. CI checks are typically run on every pull request and must be passing before the pull request can be merged.
You can refer to the following GitHub Actions workflow for an example.
```
name: ci
concurrency:
group: ${{ github.workflow }}-${{ github.ref }}
cancel-in-progress: true
on:
pull_request:
branches:
- main
jobs:
ci_checks:
runs-on: ubuntu-latest
steps:
- name: 📚 Git Checkout
uses: actions/checkout@v7
- name: 🐦 Setup Flutter
uses: subosito/flutter-action@v2
- name: 📦 Install Dependencies
run: flutter pub get
- name: ✨ Format
run: dart format --set-exit-if-changed .
- name: 🔍 Analyze
run: dart analyze --fatal-warnings .
- name: 🧪 Test
run: flutter test --coverage
```
## Release phase
When the team is ready to distribute a new version of the app, a release is created. In some cases, releases are created on a regular cadence (e.g., weekly, bi-weekly, monthly) while in other cases, releases are created on an ad-hoc basis.
The release workflow can be broken down into the following steps:
1. Create a release branch (e.g., release/v1.0.0) from trunk (main).
2. Create a new release on GitHub (e.g., v1.0.0). This tags the commit so it is easy to find in the future and triggers the release workflow.
3. The release workflow is triggered by the tag and generates signed artifacts.
4. Distribute the artifacts (e.g., via the App Store, Play Store, etc.).
You can refer to the following GitHub Actions workflow for an example.
.github/workflows/release.yaml
```
name: release
on:
push:
tags:
- 'v[0-9].[0-9]+.[0-9]+' # e.g. v1.0.0
env:
SHOREBIRD_TOKEN: ${{ secrets.SHOREBIRD_TOKEN }}
FLUTTER_VERSION: 3.35.2
jobs:
release-android:
runs-on: ubuntu-latest
name: 🤖 Release Android
steps:
- name: 📚 Git Checkout
uses: actions/checkout@v7
- name: ☕️ Setup Java
uses: actions/setup-java@v4
with:
java-version: '17'
distribution: 'temurin'
cache: gradle
- name: 🐦 Setup Shorebird
uses: shorebirdtech/setup-shorebird@v1
with:
cache: true
- name: 🔐 Decode Keystore
run:
echo ${{ secrets.KEYSTORE }} | base64 --decode > ${{ github.workspace
}}/keystore.jks
- name: ✍️ Assemble Key Properties
run: |
echo "keyAlias=${{ secrets.KEYSTORE_ALIAS }}" >> ${{ github.workspace }}/android/key.properties
echo "keyPassword=${{ secrets.KEYSTORE_PASSWORD }}" >> ${{ github.workspace }}/android/key.properties
echo "storeFile=${{ github.workspace }}/keystore.jks" >> ${{ github.workspace }}/android/key.properties
echo "storePassword=${{ secrets.KEYSTORE_PASSWORD }}" >> ${{ github.workspace }}/android/key.properties
- name: 🚀 Shorebird Release
uses: shorebirdtech/shorebird-release@v1
with:
flutter-version: ${{ env.FLUTTER_VERSION }}
platform: android
args: '--verbose --artifact=apk'
- name: 📦 Upload APK
uses: actions/upload-artifact@v4
with:
name: my_shorebird_app-${{ github.ref_name }}.apk
path: build/app/outputs/apk/release/app-release.apk
- name: 📦 Upload App Bundle
uses: actions/upload-artifact@v4
with:
name: my_shorebird_app-${{ github.ref_name }}.aab
path: build/app/outputs/bundle/release/app-release.aab
release-ios:
runs-on: macos-latest
name: 🍎 Release iOS
steps:
- name: 📚 Git Checkout
uses: actions/checkout@v7
- name: 🐦 Setup Shorebird
uses: shorebirdtech/setup-shorebird@v1
with:
cache: true
- name: 🛠️ Setup Xcode
uses: maxim-lobanov/setup-xcode@v1
with:
xcode-version: latest-stable
- name: ✍️ Setup Xcode Signing
env:
CERTIFICATE: ${{ secrets.CERTIFICATE }}
CERTIFICATE_PASSWORD: ${{ secrets.CERTIFICATE_PASSWORD }}
PROVISIONING_PROFILE: ${{ secrets.PROVISIONING_PROFILE }}
KEYCHAIN_PASSWORD: ${{ secrets.KEYCHAIN_PASSWORD }}
# https://docs.github.com/en/actions/deployment/deploying-xcode-applications/installing-an-apple-certificate-on-macos-runners-for-xcode-development
# Also adds a uuid to the mobile provision so XCode can find it.
run: |
# create variables
CERTIFICATE_PATH=$RUNNER_TEMP/build_certificate.p12
KEYCHAIN_PATH=$RUNNER_TEMP/app-signing.keychain-db
PP_PATH=$RUNNER_TEMP/temp.mobileprovision
# import certificate and provisioning profile from secrets
echo -n "$CERTIFICATE" | base64 --decode -o $CERTIFICATE_PATH
echo -n "$PROVISIONING_PROFILE" | base64 --decode -o $PP_PATH
# create temporary keychain
security create-keychain -p "$KEYCHAIN_PASSWORD" $KEYCHAIN_PATH
security set-keychain-settings -lut 21600 $KEYCHAIN_PATH
security unlock-keychain -p "$KEYCHAIN_PASSWORD" $KEYCHAIN_PATH
# import certificate to keychain
security import $CERTIFICATE_PATH -P "$CERTIFICATE_PASSWORD" -A -t cert -f pkcs12 -k $KEYCHAIN_PATH
security list-keychain -d user -s $KEYCHAIN_PATH
security find-identity -v
# use uuid for the name of provisioning profile
UUID=$(/usr/libexec/PlistBuddy -c "Print UUID" /dev/stdin <<< $(/usr/bin/security cms -D -i $PP_PATH))
# apply provisioning profile
mkdir -p ~/Library/MobileDevice/Provisioning\ Profiles
cp $PP_PATH ~/Library/MobileDevice/Provisioning\ Profiles/$UUID.mobileprovision
- name: 🚀 Shorebird Release
uses: shorebirdtech/shorebird-release@v1
with:
flutter-version: ${{ env.FLUTTER_VERSION }}
platform: ios
args: '--export-options-plist ios/GHAExportOptions.plist --verbose'
- name: 🧹 Clean Up
if: ${{ always() }}
run: |
PP_PATH=$RUNNER_TEMP/temp.mobileprovision
security delete-keychain $RUNNER_TEMP/app-signing.keychain-db
rm $RUNNER_TEMP/temp.mobileprovision
- name: 📦 Upload Artifact
uses: actions/upload-artifact@v4
with:
name: my_shorebird_app-${{ github.ref_name }}.ipa
path: build/ios/ipa/my_shorebird_app.ipa
```
When the release workflow has finished running, the artifacts are ready to be distributed to customers via the appropriate channels.
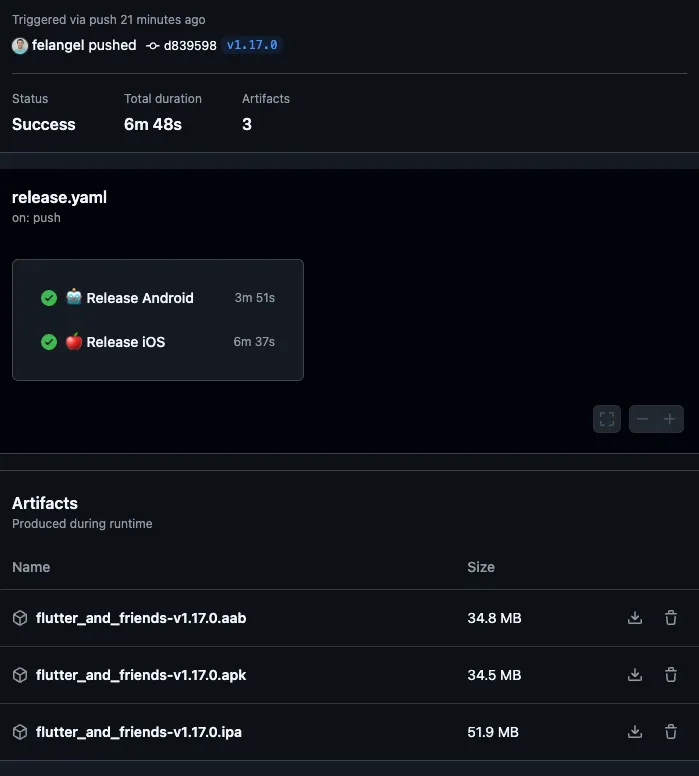
Note
For more information about configuring signing refer to the following links:
* [Create an Upload Keystore (Android)](https://docs.flutter.dev/deployment/android#create-an-upload-keystore)
* [Installing an Apple Certificate on MacOS Runners (iOS)](https://docs.github.com/en/actions/use-cases-and-examples/deploying/installing-an-apple-certificate-on-macos-runners-for-xcode-development)
## Patch phase
Even with great testing, sometimes bugs can creep into the app. Shorebird allows you to fix these bugs and distribute the patches to customers’ devices immediately rather than having to wait for users to update.
The patch workflow can be broken down into the following steps:
1. Fix the bug on the trunk branch using the development workflow described above.
2. Cherry pick the commit into the desired release branch(es)
```
git checkout release/v1.0.0
git cherry-pick
git push
```
3. Create a new “hotfix” release on GitHub (e.g., v1.0.0-hotfix.1). This tags the commit so it is easy to find in the future and triggers the patch workflow.
4. The patch workflow is triggered by the tag and uploads the hotfix to the staging environment.
5. Preview the release in the staging environment using the [Shorebird CLI](https://github.com/shorebirdtech/shorebird) and validate the fix.
```
shorebird preview --track=staging
```
Note
Here and in the GitHub Actions workflow below, a track named `staging` is used to preview the hotfix in the staging environment. The name of the track is arbitrary and can be changed to any name you prefer.
6. Promote the hotfix to production from the [Shorebird Console](https://console.shorebird.dev).
You can refer to the following GitHub Actions workflow for an example.
.github/workflows/patch.yaml
```
name: patch
on:
push:
tags:
- 'v[0-9].[0-9]+.[0-9]+-hotfix.[0-9]+' # e.g. v1.0.0-hotfix.1
env:
SHOREBIRD_TOKEN: ${{ secrets.SHOREBIRD_TOKEN }}
jobs:
patch-android:
runs-on: ubuntu-latest
name: 🤖 Patch Android
steps:
- name: 📚 Git Checkout
uses: actions/checkout@v7
- name: ☕️ Setup Java
uses: actions/setup-java@v4
with:
java-version: '17'
distribution: 'temurin'
cache: gradle
- name: 🐦 Setup Shorebird
uses: shorebirdtech/setup-shorebird@v1
with:
cache: true
- name: 🔐 Decode Keystore
run:
echo ${{ secrets.KEYSTORE }} | base64 --decode > ${{ github.workspace
}}/keystore.jks
- name: ✍️ Assemble Key Properties
run: |
echo "keyAlias=${{ secrets.KEYSTORE_ALIAS }}" >> ${{ github.workspace }}/android/key.properties
echo "keyPassword=${{ secrets.KEYSTORE_PASSWORD }}" >> ${{ github.workspace }}/android/key.properties
echo "storeFile=${{ github.workspace }}/keystore.jks" >> ${{ github.workspace }}/android/key.properties
echo "storePassword=${{ secrets.KEYSTORE_PASSWORD }}" >> ${{ github.workspace }}/android/key.properties
- name: 🧩 Shorebird Patch
uses: shorebirdtech/shorebird-patch@v1
id: shorebird-patch
with:
release-version: latest
platform: android
args: '--verbose --staging'
patch-ios:
runs-on: macos-latest
name: 🍎 Patch iOS
steps:
- name: 📚 Git Checkout
uses: actions/checkout@v7
- name: 🐦 Setup Shorebird
uses: shorebirdtech/setup-shorebird@v1
with:
cache: true
- name: 🛠️ Setup Xcode
uses: maxim-lobanov/setup-xcode@v1
with:
xcode-version: latest-stable
- name: ✍️ Setup Xcode Signing
env:
CERTIFICATE: ${{ secrets.CERTIFICATE }}
CERTIFICATE_PASSWORD: ${{ secrets.CERTIFICATE_PASSWORD }}
PROVISIONING_PROFILE: ${{ secrets.PROVISIONING_PROFILE }}
KEYCHAIN_PASSWORD: ${{ secrets.KEYCHAIN_PASSWORD }}
# https://docs.github.com/en/actions/deployment/deploying-xcode-applications/installing-an-apple-certificate-on-macos-runners-for-xcode-development
# Also adds a uuid to the mobile provision so XCode can find it.
run: |
# create variables
CERTIFICATE_PATH=$RUNNER_TEMP/build_certificate.p12
KEYCHAIN_PATH=$RUNNER_TEMP/app-signing.keychain-db
PP_PATH=$RUNNER_TEMP/temp.mobileprovision
# import certificate and provisioning profile from secrets
echo -n "$CERTIFICATE" | base64 --decode -o $CERTIFICATE_PATH
echo -n "$PROVISIONING_PROFILE" | base64 --decode -o $PP_PATH
# create temporary keychain
security create-keychain -p "$KEYCHAIN_PASSWORD" $KEYCHAIN_PATH
security set-keychain-settings -lut 21600 $KEYCHAIN_PATH
security unlock-keychain -p "$KEYCHAIN_PASSWORD" $KEYCHAIN_PATH
# import certificate to keychain
security import $CERTIFICATE_PATH -P "$CERTIFICATE_PASSWORD" -A -t cert -f pkcs12 -k $KEYCHAIN_PATH
security list-keychain -d user -s $KEYCHAIN_PATH
security find-identity -v
# use uuid for the name of provisioning profile
UUID=$(/usr/libexec/PlistBuddy -c "Print UUID" /dev/stdin <<< $(/usr/bin/security cms -D -i $PP_PATH))
# apply provisioning profile
mkdir -p ~/Library/MobileDevice/Provisioning\ Profiles
cp $PP_PATH ~/Library/MobileDevice/Provisioning\ Profiles/$UUID.mobileprovision
- name: 🧩 Shorebird Patch
uses: shorebirdtech/shorebird-patch@v1
id: shorebird-patch
with:
release-version: latest
platform: ios
args: '--export-options-plist ios/GHAExportOptions.plist --staging'
```
When the patch workflow has finished running, the hotfix is ready to be validated in [Shorebird’s staging environment](/code-push/guides/staging-patches) and promoted to production.
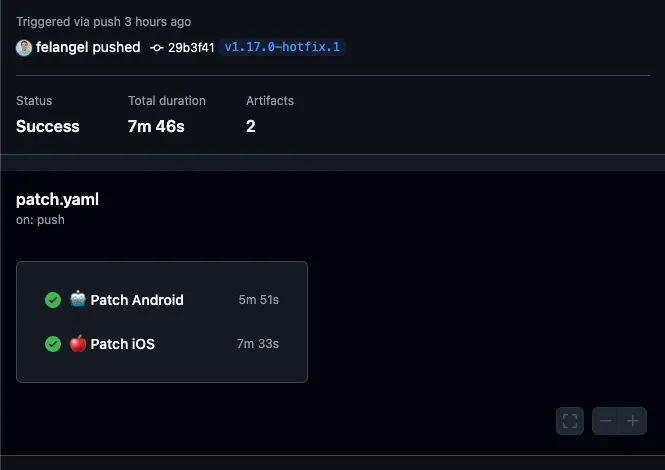
## Recap
This guide covered an opinionated development workflow with Shorebird that allows teams to automate releasing and patching in order to iterate quickly while still delivering a high-quality experience to customers.
To see this workflow in action, check out the [Flutter & Friends Conference App](https://github.com/felangel/flutter_and_friends).
# Android Flavors
> Push patches to multiple flavors on Android
This guide will walk you through how to set up an app in which there are 2 deployment flavors: `internal` and `stable`. It will cover how to validate a patch on the internal flavor and then promote the patch to the stable flavor on Android.
## Prerequisites
This guide assumes the Shorebird command-line is installed on your machine and that you are logged into an account. Refer to the [getting started](https://docs.shorebird.dev/getting-started/) instructions for more information.
## Create a project
Note
This guide walks through the process of creating a new project from scratch. To apply these changes to an existing project, skip this step and read ahead.
Create a new project using `shorebird create flavors`.
## Configure flavors
* Kotlin DSL
Next, edit the `android/app/build.gradle.kts` to contain two productFlavors:
```
defaultConfig {
...
}
+ flavorDimensions += "track"
+ productFlavors {
+ create("internal") {
+ dimension = "track"
+ applicationIdSuffix = ".internal"
+ manifestPlaceholders["applicationLabel"] = "[Internal] Shorebird Example"
+ }
+ create("stable") {
+ dimension = "track"
+ manifestPlaceholders["applicationLabel"] = "Shorebird Example"
+ }
+ }
buildTypes {
...
}
```
* Groovy DSL
Next, edit the `android/app/build.gradle` to contain two productFlavors:
```
defaultConfig {
...
}
+ flavorDimensions "track"
+ productFlavors {
+ internal {
+ dimension "track"
+ applicationIdSuffix ".internal"
+ manifestPlaceholders = [applicationLabel: "[Internal] Shorebird Example"]
+ }
+ stable {
+ dimension "track"
+ manifestPlaceholders = [applicationLabel: "Shorebird Example"]
+ }
+ }
buildTypes {
...
}
```
Caution
The `applicationIdSuffix` property is optional. If you use services that depend on a consistent package name (e.g., Firebase), removing `applicationIdSuffix` may be necessary to avoid configuration issues.
Lastly, edit `android/app/src/main/AndroidManifest.xml` to use the `applicationLabel` to easily differentiate the two apps:
```
-
+
```
Note
To learn more about configuring `productFlavors`, refer to the [Android Developer documentation](https://developer.android.com/build/build-variants#product-flavors).
## Re-initialize Shorebird
Next, re-initialize Shorebird in the current project via `shorebird init --force` to update the YAML file.
```
shorebird init --force
```
The generated `shorebird.yaml` should look something like:
```
# This file is used to configure the Shorebird updater used by your application.
# Learn more at https://shorebird.dev
# This file should be checked into version control.
# This is the unique identifier assigned to your app.
# It is used by your app to request the correct patches from Shorebird servers.
app_id: ee322dc4-3dc2-4324-90a9-04c40a62ae76
flavors:
internal: ee322dc4-3dc2-4324-90a9-04c40a62ae76
stable: 904bd3d5-3526-4c1c-a832-7ac23c95302d
```
Because the project contains flavors, `shorebird init` now generates an app per flavor, and you can validate the release flavor by visiting the [Shorebird console](https://console.shorebird.dev/).
## Create a release
Now that the apps have been created on Shorebird, releases need to be created (one for each flavor), using the `shorebird release android` command.
```
# Create a release for the internal flavor
shorebird release android --flavor internal
# Create a release for the stable flavor
shorebird release android --flavor stable
```
Verify the releases were created successfully by visiting the [Shorebird console](https://console.shorebird.dev/).
## Preview the release
To preview the app release locally on a device or emulator, use `shorebird preview`.
```
# Preview the release for the internal flavor.
shorebird preview --app-id ee322dc4-3dc2-4324-90a9-04c40a62ae76 --release-version 1.0.0+1
# Preview the release for the stable flavor.
shorebird preview --app-id 904bd3d5-3526-4c1c-a832-7ac23c95302d --release-version 1.0.0+1
```
Note
`--app-id` and `--release-version` are optional parameters. If not provided, you will be prompted to select the app and release version interactively.
This will download the releases and run them on your device.
In addition to previewing the releases locally, you should also [submit the generated app bundles to the Play Store](/flutter-concepts/releasing-flutter-apps/android/). In this case, both apps can be part of the internal test flavor and only the stable variant should be promoted to production.
Note
* The `internal` variant should only be used for internal testing/validation.
* The `stable` variant should be shipped to end users in production.
## Creating a patch
Now that the internal and stable releases are on the Play Store, a patch can be created using `shorebird patch android`. For the sake of this example, adjust the app theme to use `deepOrange` as the seed color in `lib/main.dart`:
```
class MyApp extends StatelessWidget {
const MyApp({super.key});
// This widget is the root of your application.
@override
Widget build(BuildContext context) {
return MaterialApp(
title: 'Flutter Demo',
theme: ThemeData(
// This is the theme of your application.
//
// TRY THIS: Try running your application with "flutter run". You'll see
// the application has a blue toolbar. Then, without quitting the app,
// try changing the seedColor in the colorScheme below to Colors.green
// and then invoke "hot reload" (save your changes or press the "hot
// reload" button in a Flutter-supported IDE, or press "r" if you used
// the command line to start the app).
//
// Notice that the counter didn't reset back to zero; the application
// state is not lost during the reload. To reset the state, use hot
// restart instead.
//
// This works for code too, not just values: Most code changes can be
// tested with just a hot reload.
- colorScheme: ColorScheme.fromSeed(seedColor: Colors.deepPurple),
+ colorScheme: ColorScheme.fromSeed(seedColor: Colors.deepOrange),
useMaterial3: true,
),
home: const MyHomePage(title: 'Flutter Demo Home Page'),
);
}
}
```
Note
Typically `shorebird patch` should be used to fix critical bugs.
Now that the changes have been applied, patch the `internal` variant:
```
shorebird patch android --flavor internal
```
Validate the patch by visiting the [Shorebird console](https://console.shorebird.dev/), then selecting the internal release, or by relaunching the internal release.
Note
If you are testing locally, you don’t need to re-run `shorebird preview` – just re-launch the app from the device or emulator directly.
The first time the app is re-launched, the purple theme should still be visible, and Shorebird will detect and install the patch in the background. Kill and re-launch the app a second time to see the applied patch.
If all went well, you should see the patch was applied after re-launching the app a second time. All devices that have the internal variant of the app installed should also receive the patch 🎉
## Promote the patch
Once you have validated the patch internally, you can promote the patch to the stable variant via:
```
shorebird patch android --flavor stable
```
At this point, you have a setup which allows you to push patches to internal testers before promoting them to production 🎉
The full source code for this example can be found [here](https://github.com/shorebirdtech/samples/tree/main/flavors).
## Adding new flavors
If you want to add a new flavor to your project after initializing Shorebird, you can do so by following the same steps as before.
In build.gradle:
```
defaultConfig {
...
}
flavorDimensions "track"
productFlavors {
internal {
dimension "track"
applicationIdSuffix ".internal"
manifestPlaceholders = [applicationLabel: "[Internal] Shorebird Example"]
}
+ beta {
+ dimension "track"
+ applicationIdSuffix ".beta"
+ manifestPlaceholders = [applicationLabel: "[Beta] Shorebird Example"]
+ }
stable {
dimension "track"
manifestPlaceholders = [applicationLabel: "Shorebird Example"]
}
}
buildTypes {
...
}
```
Add this to your `shorebird.yaml` by running `shorebird init`:
```
$ shorebird init
✓ Detecting product flavors (0.6s)
New flavors detected: beta
✓ Fetching apps (0.1s)
✓ Flavors added to shorebird.yaml (0.2s)
```
The resulting shorebird yaml:
```
app_id: ee322dc4-3dc2-4324-90a9-04c40a62ae76
flavors:
internal: ee322dc4-3dc2-4324-90a9-04c40a62ae76
stable: 904bd3d5-3526-4c1c-a832-7ac23c95302d
+ beta: a41f8226-4b46-45d6-9e19-b14d0cf17bdc
```
## Multi-dimensional flavors
For an example that uses multi-dimensional flavors, see the [multi\_dimensional\_flavors](https://github.com/shorebirdtech/samples/tree/main/multi_dimensional_flavors) sample.
# iOS / macOS Flavors
> Push patches to multiple flavors on iOS and macOS
This guide will walk you through how to set up an app in which there are 2 flavors: `internal` and `stable`. It will cover how to validate a patch on the internal flavor and then promote the patch to the stable flavor on iOS.
This guide was originally written for iOS, but the same steps can be applied to macOS.
## Prerequisites
This guide assumes the Shorebird command-line is installed on your machine and that you are logged into an account. Refer to the [getting started](https://docs.shorebird.dev/getting-started/) instructions for more information.
## Create a project
Note
This guide walks through the process of creating a new project from scratch. To apply these changes to an existing project, skip this step and read ahead.
Create a new project using `shorebird create flavors`.
## Configure flavors
Next, edit the iOS project to support two flavors: `internal` and `stable` by following the instructions in the [Flutter documentation](https://docs.flutter.dev/deployment/flavors-ios).
## Re-initialize Shorebird
Next, re-initialize Shorebird in the current project via `shorebird init --force`.
```
shorebird init --force
```
The re-generated `shorebird.yaml` should look something like:
```
# This file is used to configure the Shorebird updater used by your application.
# Learn more at https://shorebird.dev
# This file should be checked into version control.
# This is the unique identifier assigned to your app.
# It is used by your app to request the correct patches from Shorebird servers.
app_id: ee322dc4-3dc2-4324-90a9-04c40a62ae76
flavors:
internal: ee322dc4-3dc2-4324-90a9-04c40a62ae76
stable: 904bd3d5-3526-4c1c-a832-7ac23c95302d
```
Since the project contains flavors, `shorebird init` generates an app per flavor.
Tip
You can view your apps at [console.shorebird.dev](https://console.shorebird.dev).
## Create a release
Now that the apps have been created on Shorebird, releases need to be created (one for each flavor), using the `shorebird release ios` command.
```
# Create a release for the internal flavor
shorebird release ios --flavor internal
# Create a release for the stable flavor
shorebird release ios --flavor stable
```
Verify the releases were created successfully by visiting the [Shorebird console](https://console.shorebird.dev/).
## Preview the release
Next, preview the app release locally on a device or emulator, use `shorebird preview`.
```
# Preview the release for the internal flavor.
shorebird preview --app-id ee322dc4-3dc2-4324-90a9-04c40a62ae76 --release-version 1.0.0+1
# Preview the release for the stable flavor.
shorebird preview --app-id 904bd3d5-3526-4c1c-a832-7ac23c95302d --release-version 1.0.0+1
```
Note
`--app-id` and `--release-version` are optional parameters. If not provided, you will be prompted to select the app and release version interactively.
This will download the releases and run them on your device.
In addition to previewing the releases locally, you should also [submit the generated IPAs to the App Store](/flutter-concepts/releasing-flutter-apps/ios/). In this case, both apps can be part of the internal test flavor and only the stable variant should be promoted to production.
Note
* The `internal` variant should only be used for internal testing/validation.
* The `stable` variant should be shipped to end users in production.
## Creating a patch
Now that the internal and stable releases are on the App Store, a patch can be created using `shorebird patch ios`. For the sake of this example, adjust the app theme to use `deepOrange` as the seed color in `lib/main.dart`:
```
class MyApp extends StatelessWidget {
const MyApp({super.key});
// This widget is the root of your application.
@override
Widget build(BuildContext context) {
return MaterialApp(
title: 'Flutter Demo',
theme: ThemeData(
// This is the theme of your application.
//
// TRY THIS: Try running your application with "flutter run". You'll see
// the application has a blue toolbar. Then, without quitting the app,
// try changing the seedColor in the colorScheme below to Colors.green
// and then invoke "hot reload" (save your changes or press the "hot
// reload" button in a Flutter-supported IDE, or press "r" if you used
// the command line to start the app).
//
// Notice that the counter didn't reset back to zero; the application
// state is not lost during the reload. To reset the state, use hot
// restart instead.
//
// This works for code too, not just values: Most code changes can be
// tested with just a hot reload.
- colorScheme: ColorScheme.fromSeed(seedColor: Colors.deepPurple),
+ colorScheme: ColorScheme.fromSeed(seedColor: Colors.deepOrange),
useMaterial3: true,
),
home: const MyHomePage(title: 'Flutter Demo Home Page'),
);
}
}
```
Now that the changes have been applied, patch the `internal` variant:
```
shorebird patch ios --flavor internal
```
Validate the patch by visiting the [Shorebird console](https://console.shorebird.dev/) then select the internal release or re-launching the internal release.
Note
If you are testing locally, you don’t need to re-run `shorebird preview` — just re-launch the app from the device or emulator directly.
The first time the app is re-launched, the purple theme should still be visible, and Shorebird will detect and install the patch in the background. Kill and re-launch the app a second time to see the applied patch.
If all went well, you should see the patch was applied after re-launching the app a second time. All devices that have the internal variant of the app installed should also receive the patch 🎉
## Promote the patch
Once you have validated the patch internally, you can promote the patch to the stable variant via:
```
shorebird patch ios --flavor stable
```
At this point, you have a setup which allows you to push patches to internal testers before promoting them to production 🎉
The full source code for this example can be found [here](https://github.com/shorebirdtech/samples/tree/main/flavors).
## Adding new flavors
If you want to add a new flavor to your project after initializing Shorebird, you can do so by following the same steps as before.
Edit the iOS project to add a third flavor, `beta`, by following the instructions in the [Flutter documentation](https://docs.flutter.dev/deployment/flavors#creating-flavors-in-ios).
Add this to your `shorebird.yaml` by running `shorebird init`:
```
$ shorebird init
✓ Detecting product flavors (0.6s)
New flavors detected: beta
✓ Fetching apps (0.1s)
✓ Flavors added to shorebird.yaml (0.2s)
```
The resulting shorebird yaml:
```
app_id: ee322dc4-3dc2-4324-90a9-04c40a62ae76
flavors:
internal: ee322dc4-3dc2-4324-90a9-04c40a62ae76
stable: 904bd3d5-3526-4c1c-a832-7ac23c95302d
+ beta: a41f8226-4b46-45d6-9e19-b14d0cf17bdc
```
# Patch Signing
> How to sign patches
In addition to Shorebird’s default security measures, Shorebird also provides patch signing for additional security. This is optional at this time and needs to be set up during your build and patch process.
Patch signing allows developers to cryptographically sign patch updates with their own keys. This ensures that no one (including Shorebird) can change the content of your patches without your private cryptographic keys.
Signing works in two parts. First, `shorebird release` commands can take an optional `--public-key-path` argument to embed a public key in your released application. The [Shorebird updater](https://github.com/shorebirdtech/updater) will enforce that only patches signed with a corresponding private key will be allowed to load for applications that include a public key.
Second, when you build your patch with `shorebird patch`, you can pass `--private-key-path` to have Shorebird sign your patch with your private key. This is required if you created your release with a public key included.
There are no required changes to your code, and you can add or remove this signing requirement at any time by simply making a new release of your application.
## Implementation
You will need an RSA key pair. Shorebird supports RSA keys in PEM format, both PKCS#1 and PKCS#8.
### Generate keys
If you do not already have an RSA key pair you’d like to use, you can generate a pair with `openssl`:
```
# Generate a key pair
openssl genrsa -out private.pem 2048
# Extract the public key
openssl rsa -in private.pem -outform PEM -pubout -out public.pem
```
Note
On Windows, you can use the `openssl` that comes with your git installation at `C:\Program Files\Git\usr\bin\openssl.exe`.
The above operation will generate a public/private key pair in `private.pem` and a public key in `public.pem`. The file containing the private key should be stored securely and kept secret. While the private key is not itself sufficient to make an update to your application (someone would also need access to your Shorebird credentials), it should not be checked into public source control.
### Key storage
Shorebird does not provide a Key Storage solution at this time. If you are using this feature, using a cloud key management service instead of just storing keys on disk is highly recommended. **If for any reason you were to lose your private key, there is no way to create a patch for an application containing the corresponding public key.** Even Shorebird is not able to create a patch for your application without your private key. In such a case, you would need to make and distribute a new release of your application to send patches to it.
Shorebird does support command-based signing for integration with cloud key management services (HashiCorp Vault, GCP Cloud KMS, AWS KMS, Azure Key Vault), hardware security modules (HSMs), and secrets managers (1Password, etc.). Please ensure you are using at least [v1.6.81](https://github.com/shorebirdtech/shorebird/releases/tag/v1.6.81) or greater to use this feature.
See [Cloud KMS Examples](#cloud-kms-examples) below for integration examples with popular services.
### Create a signed release
Note
These examples use Android, but patch signing works on all platforms.
To create a release that requires signed patches, run the following command:
```
# Build Release with local path to key file
shorebird release android --public-key-path /path/to/public.pem
# Build Release with command for cloud-managed public key
# Ensure that the command outputs a PEM-encoded public key to stdout
shorebird release android \
--public-key-cmd="your-command-that-outputs-pem-public-key"
```
This will include the public key in the release artifact produced by `shorebird release` and cause the released app to require signed patches.
### Create a signed patch
To create a signed patch, run the following command:
```
# Build Patch with local path to key files
shorebird patch android --public-key-path /path/to/public.pem \
--private-key-path /path/to/private.pem
# Build Patch with cloud-managed signing
# Ensure that the command outputs a PEM-encoded public key to stdout
# sign-cmd should read data from stdin and output a base64 signature to
# stdout
shorebird patch android \
--public-key-cmd="your-command-that-outputs-pem-public-key" \
--sign-cmd="your-command-that-signs-stdin-and-outputs-base64"
```
This tells Shorebird to sign the patch with the key pair you provided.
### Test and verify signed patch
You can verify that the patch is properly signed using `shorebird preview`. On the first launch, you should see something like the following in your app logs:
```
05-22 23:47:51.645 6963 6994 I flutter : updater::updater: Patch 1 successfully installed.
05-22 23:47:51.645 6963 6994 I flutter : updater::updater: Update thread finished with status: Update installed
```
If you close and relaunch your app, you should see this message telling you that the patch’s signature was verified:
```
05-23 11:32:33.944 7029 7029 I flutter : updater::cache::signing: Verifying patch signature...
05-23 11:32:33.944 7029 7029 I flutter : updater::cache::signing: Patch signature is valid
```
If the patch is missing a signature, or fails signature verification for any reason, Shorebird will not load it, and will instead use any previously installed and verifiable patch (if there is one) or the unpatched release version of your app.
If you’d like to test the missing signature behavior, you can create a patch without a private key and notice that `shorebird preview` rejects it. Similarly, you can create a patch with a different private key to do the same.
## Fallback behavior
Releases that contain a public key will reject all unsigned patches. If a patch is missing a signature or its signature is invalid, Shorebird will reject this patch at boot time. It will instead boot from the last known good patch (if still on disk) or the release build of the app. This will not cause your app to crash.
## Trade-offs
Signature verification does add a small overhead at app launch. During testing this has been observed to be under 50ms with a medium-sized app on a 5-year-old Android phone. This overhead increases with application size. For very large apps, if this overhead shows up on your benchmarks, you can set `patch_verification: install_only` in `shorebird.yaml` to verify signatures only when patches are installed rather than on every launch.
## Cloud KMS examples
The following examples show how to integrate Shorebird patch signing with popular key management services using `--public-key-cmd` and `--sign-cmd`.
Note
Integrating with Cloud KMS requires that the executing environment (your local terminal or CI/CD runner) has sufficient IAM credentials to read keys and sign payloads.
* **GCP Cloud KMS**: Requires the `roles/cloudkms.viewer` (to read the public key) and `roles/cloudkms.signerVerifier` (to sign the patch) roles.
* **AWS KMS**: Requires the `kms:GetPublicKey` and `kms:Sign` IAM policy actions.
* **Azure Key Vault**: Requires Key Vault key permissions for `get` and `sign`.
### HashiCorp Vault
```
# Store your key in Vault Transit
vault write transit/keys/shorebird-signing type=rsa-2048
# Release
shorebird release android \
--public-key-cmd="vault read -field=public_key transit/keys/shorebird-signing"
# Patch
shorebird patch android \
--public-key-cmd="vault read -field=public_key transit/keys/shorebird-signing" \
--sign-cmd="vault write -field=signature transit/sign/shorebird-signing \
hash_algorithm=sha2-256 signature_algorithm=pkcs1v15 input=-"
```
### GCP Cloud KMS
```
# Create a key ring and key
gcloud kms keyrings create shorebird --location=global
gcloud kms keys create signing-key --keyring=shorebird --location=global \
--purpose=asymmetric-signing --default-algorithm=rsa-sign-pkcs1-2048-sha256
# Release
shorebird release android \
--public-key-cmd="gcloud kms keys versions get-public-key 1 \
--key=signing-key --keyring=shorebird --location=global"
# Patch (using a helper script for signing)
shorebird patch android \
--public-key-cmd="gcloud kms keys versions get-public-key 1 \
--key=signing-key --keyring=shorebird --location=global" \
--sign-cmd="gcloud kms asymmetric-sign --version=1 \
--key=signing-key --keyring=shorebird --location=global \
--digest-algorithm=sha256 --input-file=- --signature-file=- | base64"
```
### AWS KMS
```
# Create an RSA signing key
aws kms create-key --key-spec RSA_2048 --key-usage SIGN_VERIFY
# Create a helper script for public key (aws-kms-pubkey.sh).
# Needed to get the format correct from DER to PEM
#!/bin/bash
aws kms get-public-key --key-id alias/shorebird-signing --output text \
--query PublicKey | base64 -d | openssl rsa -pubin -inform DER -outform PEM
# Create a helper script for signing (aws-kms-sign.sh)
#!/bin/bash
HASH=$(cat - | openssl dgst -sha256 -binary | base64)
aws kms sign --key-id alias/shorebird-signing \
--signing-algorithm RSASSA_PKCS1_V1_5_SHA_256 \
--message-type DIGEST --message "$HASH" \
--output text --query Signature
# Release
shorebird release android --public-key-cmd="./aws-kms-pubkey.sh"
# Patch
shorebird patch android \
--public-key-cmd="./aws-kms-pubkey.sh" \
--sign-cmd="./aws-kms-sign.sh"
```
### Azure Key Vault
```
# Create a key in Azure Key Vault
az keyvault key create --vault-name myVault --name shorebird-signing \
--kty RSA --size 2048
# Helper script for public key (azure-kv-pubkey.sh)
#!/bin/bash
az keyvault key download --vault-name myVault --name shorebird-signing \
--encoding PEM --file /dev/stdout
# Helper script for signing (azure-kv-sign.sh)
#!/bin/bash
HASH=$(cat - | openssl dgst -sha256 -binary | base64 -w0)
az keyvault key sign --vault-name myVault --name shorebird-signing \
--algorithm RS256 --digest "$HASH" --query value -o tsv
# Release
shorebird release android --public-key-cmd="./azure-kv-pubkey.sh"
# Patch
shorebird patch android \
--public-key-cmd="./azure-kv-pubkey.sh" \
--sign-cmd="./azure-kv-sign.sh"
```
### 1Password CLI
```
# Store your keys in 1Password
op item create --category="Secure Note" --title="Shorebird Signing" \
"public_key[text]=$(cat public.pem)" \
"private_key[text]=$(cat private.pem)"
# Helper script for signing (1password-sign.sh)
#!/bin/bash
PRIVATE_KEY=$(op item get "Shorebird Signing" --fields private_key)
cat - | openssl dgst -sha256 -sign <(echo "$PRIVATE_KEY") | base64
# Release
shorebird release android \
--public-key-cmd="op item get 'Shorebird Signing' --fields public_key"
# Patch
shorebird patch android \
--public-key-cmd="op item get 'Shorebird Signing' --fields public_key" \
--sign-cmd="./1password-sign.sh"
```
# Percentage-Based Rollouts
> Gradually roll out patches to your users
This guide describes how you can implement a percentage-based patch rollout system using predefined tracks.
The sample code for this guide can by found at
This percentage-based rollout system has three parts:
1. Using Shorebird’s “tracks” feature to publish patches to different sets of users.
2. Using a cloud key-value (KV) store to manage rollout percentages for each release version.
3. Randomly assigning every device a “group number” between 1 and 100. If a device’s group number is less than or equal to the current rollout percentage for the current app version, that user will get the partially rolled-out (“beta”) patch. Otherwise, the user will receive the stable patch.
## Add Shorebird to your app
If you haven’t already, run Shorebird init in your Flutter project to add Shorebird to your app.
# Add the shorebird\_code\_push package
This feature also requires v2.0.0 of [`package:shorebird_code_push`](https://pub.dev/packages/shorebird_code_push). You can add this to your project using `flutter pub add shorebird_code_push` or by adding it to your `pubspec.yaml` manually.
You will need to update your `shorebird.yaml` to tell Shorebird you want to manage your own updates:
```
app_id: your-app-id-here
# Add this line. Setting auto_update to false tells Shorebird not to check
# for stable track updates on app launch
auto_update: false
```
## Add logic to bucket your users
Do this by assigning each user a number between 1 and 100 and saving that value to a local cache using [`package:shared_preferences`](https://pub.dev/packages/shared_preferences):
```
Future getGroupNumber() async {
final prefs = await SharedPreferences.getInstance();
final cachedGroupNumber = prefs.getInt(groupKey);
if (cachedGroupNumber != null) return cachedGroupNumber;
final groupNumber = Random().nextInt(100) + 1;
await prefs.setInt(groupKey, groupNumber);
return groupNumber;
}
Future main() async {
WidgetsFlutterBinding.ensureInitialized();
final groupNumber = await getGroupNumber();
runApp(MyApp(groupNumber: groupNumber));
}
```
## Add logic to determine rollout percentage
This guide uses Firebase’s Cloud Firestore to create a simple key-value pairing of release versions to rollout percentages, although any method of retrieving a rollout percentage from the cloud will work.
```
Future _fetchRolloutPercentage() async {
final collection = await FirebaseFirestore.instance
.collection(firestoreCollectionName)
.get();
if (collection.docs.isEmpty) return null;
final releaseVersion = await _releaseVersion();
return collection.docs.first.data()[releaseVersion] as int?;
}
```
## Use these values to choose a track
Now, tie this all together by using the group number and the rollout percentage to decide whether a user should get patches in the beta track or in the stable track.
```
Future _updateTrack() async {
final rolloutPercentage = await _fetchRolloutPercentage();
// If no rollout percentage is set for this version, default to stable.
if (rolloutPercentage == null) return UpdateTrack.stable;
// If the user's group number is less than or equal to the rollout
// percentage, they are on the beta track. For example:
// - if the rollout percentage is 25%, users with group numbers 1-25
// are on the beta track, and the other 75% are on the stable track.
// - if the rollout percentage is 100%, all users are on the beta track.
return widget.groupNumber <= rolloutPercentage
? UpdateTrack.beta
: UpdateTrack.stable;
}
```
## Seeing it in action
Start by creating a release for Android:
```
shorebird release android
```
This will create a release build of your app (an aab file) that is patchable with Shorebird. You will distribute this build to your users the same way you distribute your apps today.
Now, launch the example using `shorebird preview`, which downloads the release and runs it on a local device:
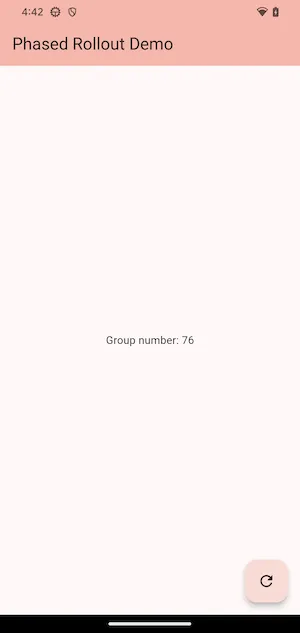
This screenshot shows that the device is in group 76. This means that it will request patches on the stable track until the rollout percentage is >= 76, at which point it will start requesting patches in the beta track.
Because a patch hasn’t been created on the beta track or a rollout percentage set yet, there isn’t much to see yet.
Change the background color from `Colors.deepPurple` to `Colors.red` and create a patch on the beta track using the following command:
```
shorebird patch android --track=beta
```
And update the rollout percentage in Firebase:
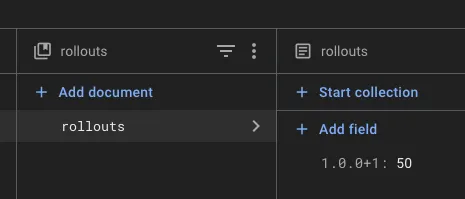
Press the update button, and the Shorebird preview output shows the following (formatted for readability):
```
11-13 15:54:06.188 1854 1943 I flutter : updater::network:
[shorebird] Sending patch check request: PatchCheckRequest {
app_id: "fdd48b3f-0b05-41b0-ac22-464600f739ee",
channel: "stable",
release_version: "1.0.0+1",
platform: "android",
arch: "aarch64"
}
```
Now, change the rollout percentage in Firebase to 76%:
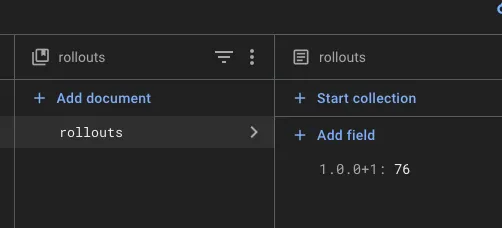
Press the update button again, and you’ll now see:
```
11-13 16:41:42.525 7036 7102 I flutter : updater::network:
[shorebird] Sending patch check request: PatchCheckRequest {
app_id: "fdd48b3f-0b05-41b0-ac22-464600f739ee",
channel: "beta",
release_version: "1.0.0+1",
platform: "android",
arch: "aarch64"
}
11-13 16:41:42.666 7036 7102 I flutter : updater::updater:
[shorebird] Patch check response: PatchCheckResponse {
patch_available: true,
patch: Some(Patch {
number: 1,
hash: "6baa53e40fe1ef0d1230c0ab04ef9dacc7fb5d19368278f2cb2b09a333fdd0c2",
download_url: "https://cdn-dev.shorebird.cloud/api/v1/patches/fdd48b3f-0b05-41b0-ac22-464600f739ee/android/aarch64/3098/dlc.vmcode",
hash_signature: None
}),
rolled_back_patch_numbers: Some([])
}
11-13 16:41:43.279 7036 7102 I flutter : updater::updater:
[shorebird] Patch 1 successfully downloaded. It will be launched when the app next restarts.
```
Note that the channel field in the patch check request has changed from stable to beta, and that the patch has been downloaded.
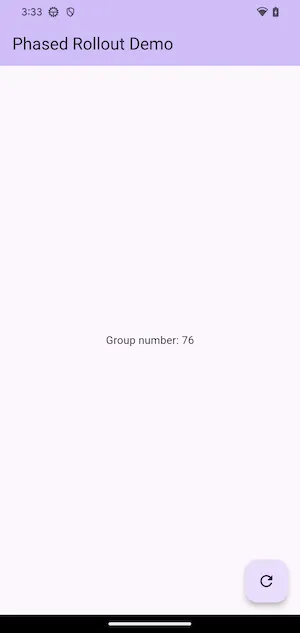
# Obfuscation and Security Tooling
> How Shorebird works with obfuscation and Security Tooling
This article is about how Shorebird interacts with obfuscation and security tooling.
For other Security-related topics:
[Security and Compliance](https://handbook.shorebird.dev/compliance/)Company security policies in our Handbook.
[Patch Signing](/code-push/guides/patch-signing)Cryptographically guarantee only you can change your app.
## Obfuscation
> Obfuscation (noun): *the action of making something obscure, unclear, or unintelligible.*
Obfuscation in software is a mechanism which takes a program and renames internal pieces to hide them and make it harder to understand what the program is doing. For example, if you had a function `placeOrder()`, an obfuscation program might rename all instances of that function to `az5()` as part of compilation to make it harder for someone to “de-compile” and understand what your program was doing.
Obfuscation is also sometimes used for hiding internal company details such as upcoming product names e.g. `connectToSecretNewProduct()` in your app. Although “[secret scanning](https://docs.github.com/en/code-security/secret-scanning/introduction/about-secret-scanning)” may be a more reliable approach for those use-cases since obfuscation tools might not find all the ways in which your company secrets could be encoded in your binary.
## Flutter & Dart built-in obfuscation
Flutter (via Dart) supports basic obfuscation out of the box.
All you have to do is pass `--obfuscate` to your `flutter build` (or `dart compile`) command.
This obfuscation isn’t particularly fancy, but it will rename all library, method and field names in your program to unique identifiers during compilation.
### Using obfuscation with Shorebird
As of Shorebird 1.6.84 with Flutter 3.41.2 and later, Shorebird supports obfuscation on all platforms, including iOS.
To use obfuscation, pass `--obfuscate` to your `shorebird release` command:
```
shorebird release android --obfuscate
shorebird release ios --obfuscate
```
When you create a patch, Shorebird will automatically detect that the release was built with obfuscation and apply the same obfuscation to the patch. No extra flags are needed:
```
shorebird patch android
shorebird patch ios
```
Note
Obfuscation support requires Flutter 3.41.2 or later. If you are using an older version of Flutter, `shorebird release --obfuscate` will display an error asking you to upgrade.
## Third party security programs
There are a variety of third party security programs for mobile. The vast majority of these work fine with Shorebird.
The major consideration when using a 3rd party security program is that it needs to run *during* the build of your application, not after.
Under the covers, `shorebird release` mostly calls `flutter build`. When that build is complete, `shorebird release` takes a copy of the built artifact and stores it securely in your Shorebird account. This is done both for your later reference (e.g. so you can access it via `shorebird preview`) but also to make `shorebird patch` possible. `shorebird patch` works by also calling `flutter build` on your newly patched code, but then comparing that output to the saved release artifacts.
As a result of this, if you run tools *after* the build of your application and thus send a *different* version of your application to users, Shorebird will be unable to create a compatible patch for your users since they will be using a different binary than you stored with Shorebird.
Other than the “it must be during the build” restriction, few issues have been seen with third party security tools and Shorebird.
### GuardSquare on iOS
One issue has been seen with GuardSquare on iOS with Shorebird. GuardSquare (at least in some configurations) will make an attempt to “obfuscate” iOS binaries further, replacing the implementations of some functions with code which is used to provide obscured access to constants/strings/numbers stored within the binary. This may be incompatible with Shorebird’s Dart modifications for iOS. If this is an issue for your product, the Shorebird team is happy to discuss with the GuardSquare support team if there are possible workarounds.
Reach out at .
# Staging Patches
> Stage, validate, and promote patches
[Pushing a patch to staging track](https://app.arcade.software/share/n22dgnzUR0qwvjNciQ2i)
This guide will walk you through how to validate a patch in Shorebird’s staging environment before promoting the patch to production.
New to tracks?
Tracks are named deployment channels that control which devices receive a patch. See the [Tracks](/code-push/tracks) reference page for a full explanation.
## Prerequisites
This guide assumes the Shorebird command-line is installed on your machine and that you are logged into an account. Refer to the [getting started](/) instructions for more information.
## Create a project
Note
This guide walks through the process of creating a new project from scratch. To apply these changes to an existing project, skip this step and read ahead.
Create a new project using `shorebird create example --empty`.
This will create a `shorebird.yaml` file in the root of your project. This file contains your Shorebird `app_id`. Your `app_id` is not secret and can be checked into source control and freely shared.
The generated `shorebird.yaml` should look something like:
```
# Your app_id is not a secret and is just used to identify your app
# when requesting patches from Shorebird's servers.
app_id: ee322dc4-3dc2-4324-90a9-04c40a62ae76
# auto_update controls if Shorebird should automatically update in the background on launch.
# If auto_update: false, you will need to use package:shorebird_code_push to trigger updates.
# https://pub.dev/packages/shorebird_code_push
# Uncomment the following line to disable automatic updates.
# auto_update: false
```
## Create a release
Now that the apps have been created on Shorebird, releases need to be created (one for each platform), using the `shorebird release` command.
* Android
Android
```
shorebird release android
```
* iOS
iOS
```
shorebird release ios
```
* macOS
macOS
```
shorebird release macos
```
Verify the releases were created successfully by visiting the [Shorebird console](https://console.shorebird.dev).
You should also [submit the generated app bundles to the Play Store](/flutter-concepts/releasing-flutter-apps/android/) and [submit the generated IPA to the App Store](/flutter-concepts/releasing-flutter-apps/ios/).
## Creating a patch
Now that the releases are on the Play Store and App Store, a patch can be created using `shorebird patch`. For the sake of this example, set the `backgroundColor` of the `Scaffold` to `Colors.cyan` in `lib/main.dart`:
```
import 'package:flutter/material.dart';
void main() {
runApp(const MainApp());
}
class MainApp extends StatelessWidget {
const MainApp({super.key});
@override
Widget build(BuildContext context) {
return const MaterialApp(
home: Scaffold(
+ backgroundColor: Colors.cyan,
body: Center(
child: Text('Hello World!'),
),
),
);
}
}
```
Now that the changes have been applied, create a patch:
* Android
Android
```
shorebird patch android --track=staging
```
* iOS
iOS
```
shorebird patch ios --track=staging
```
* macOS
macOS
```
shorebird patch macos --track=staging
```
## Preview the release
To preview the app release locally on a device or emulator, use `shorebird preview`.
```
# Preview the release in the staging environment
shorebird preview --track staging --app-id ee322dc4-3dc2-4324-90a9-04c40a62ae76 --release-version 1.0.0+1
```
Shorebird will download the release and run it on your device in the staging environment.
The first time the app is re-launched, the white `Scaffold` should still be visible, and Shorebird will detect and install the patch in the background. Kill and re-launch the app a second time to see the applied patch with the cyan `Scaffold` background.
If all went well, you should see the patch was applied after re-launching the app a second time. Congratulations, you’ve validated your patch in the staging environment 🥳
## Promote the patch
Now that you have validated the patch, you can push the patch to all devices by promoting it to production from the [Shorebird console](https://console.shorebird.dev). Navigate to the release details page, choose “Change Track”, and select “stable” in the dialog that appears.
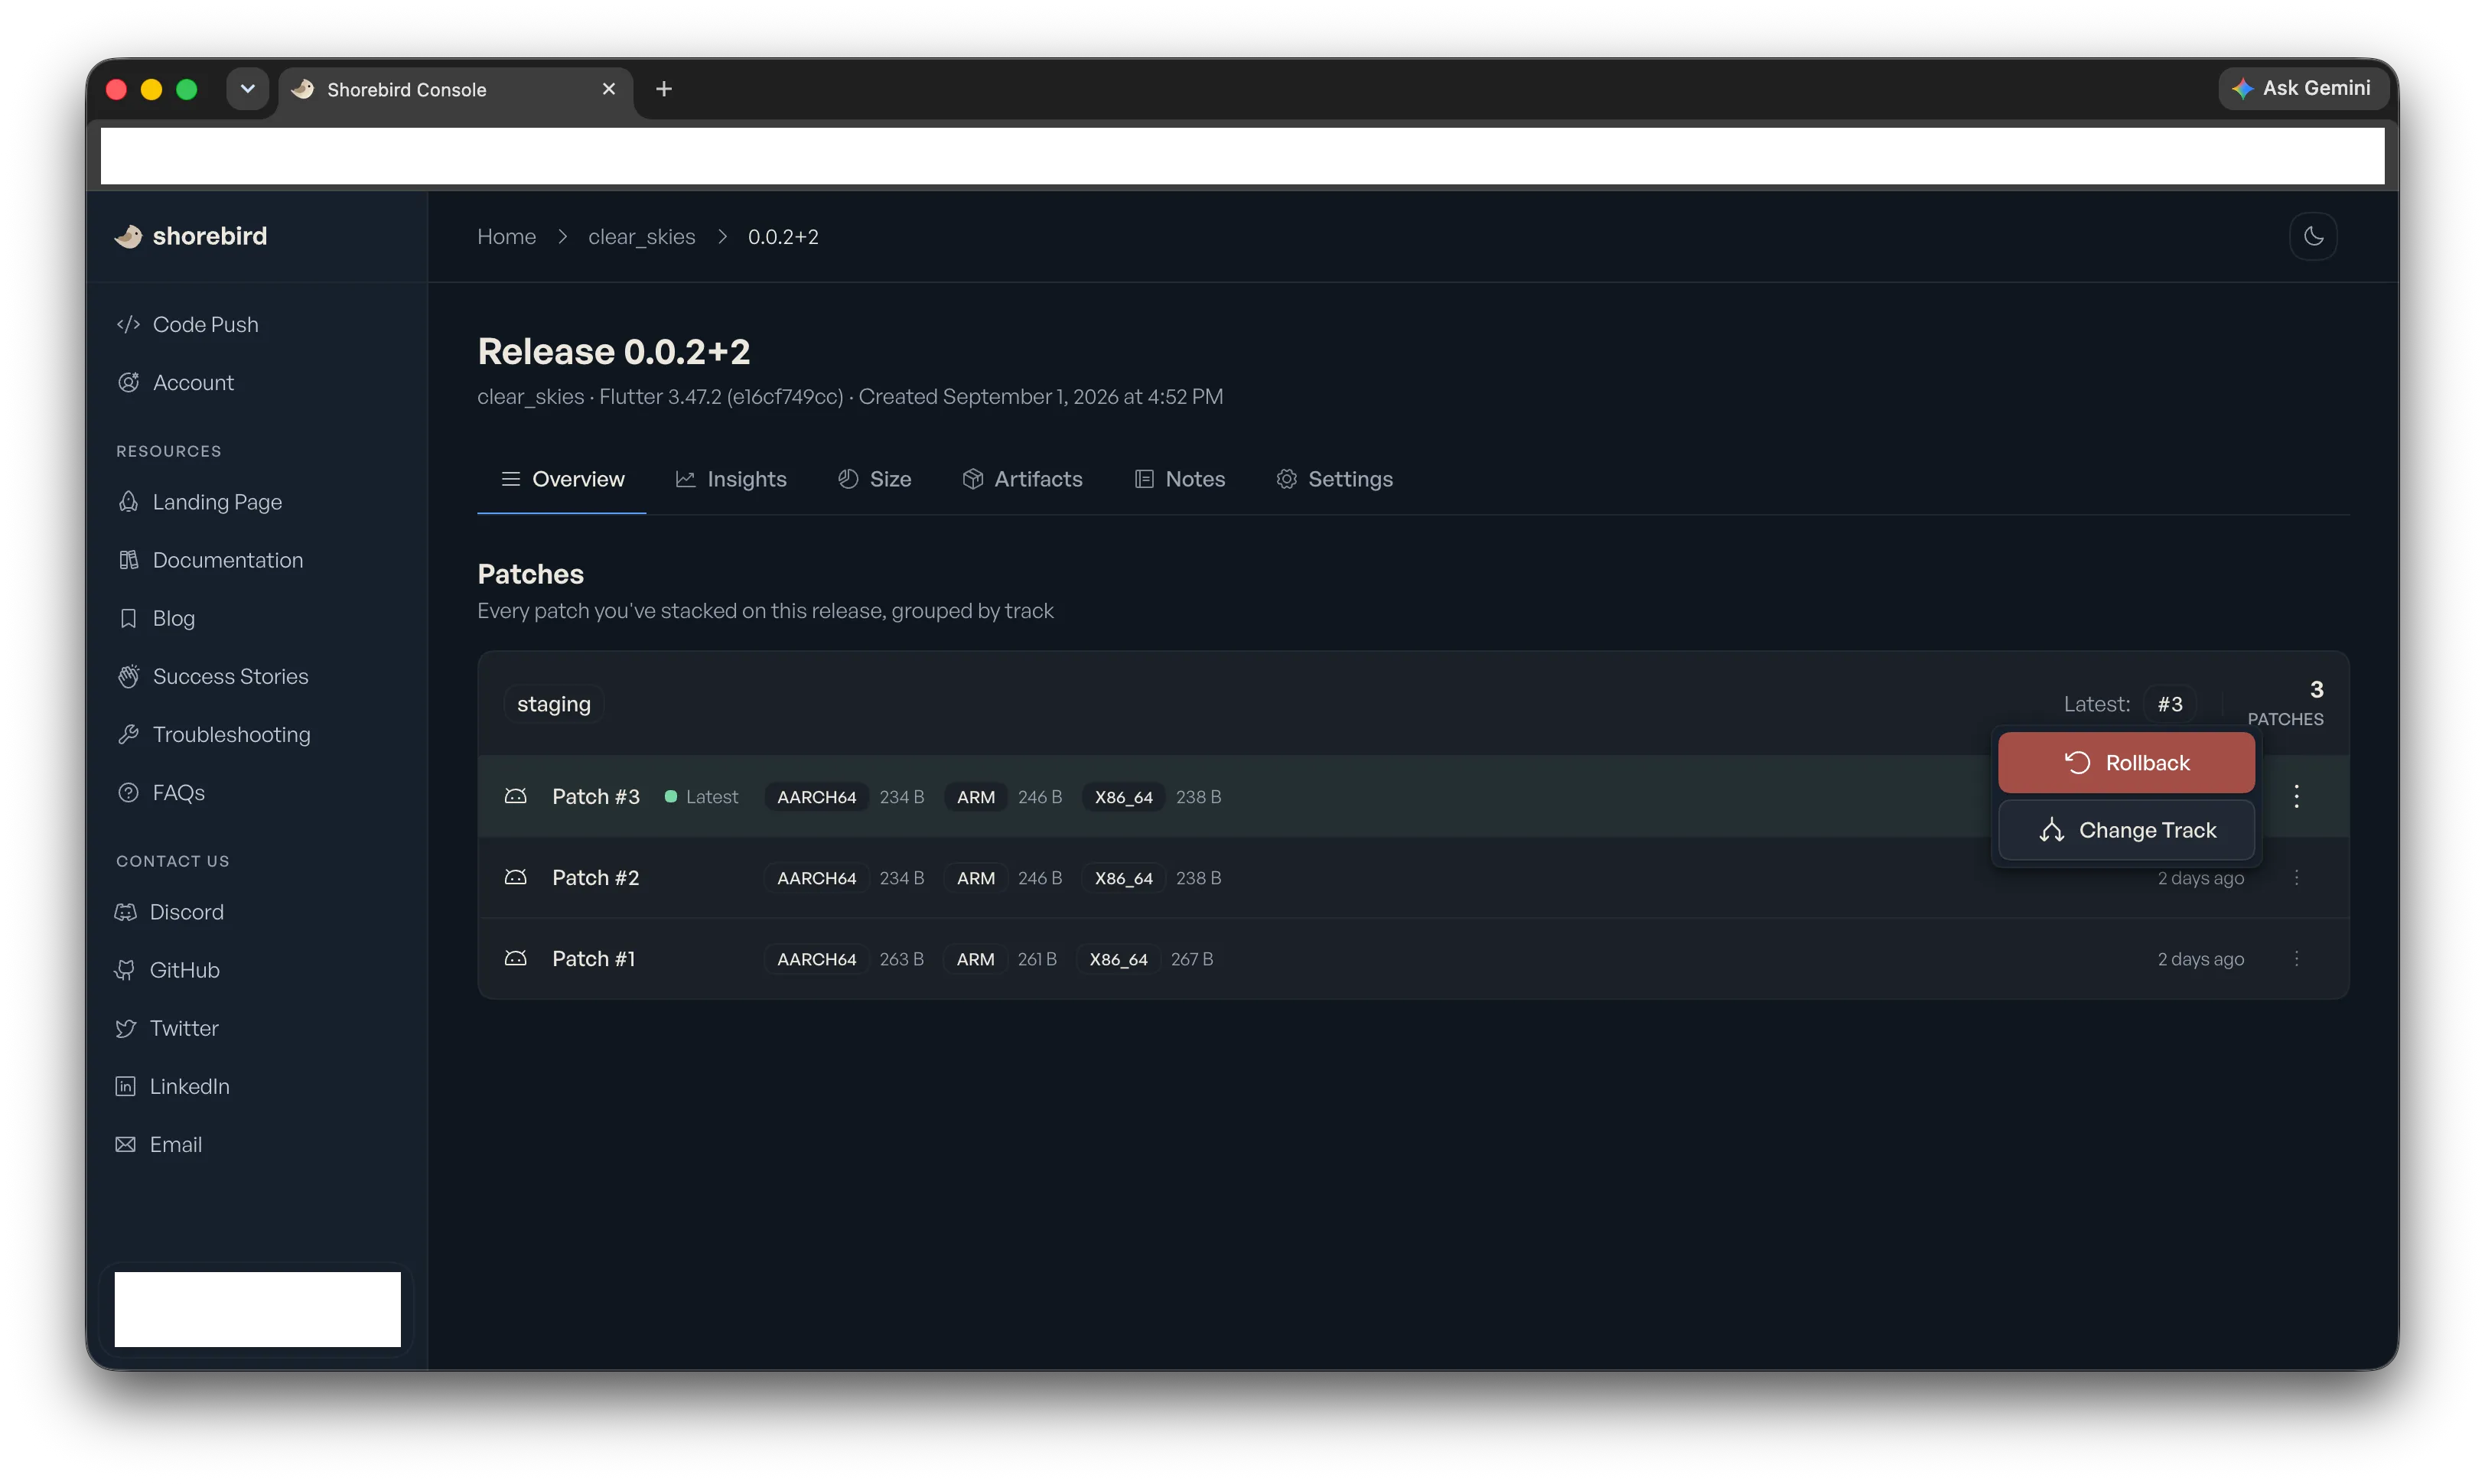 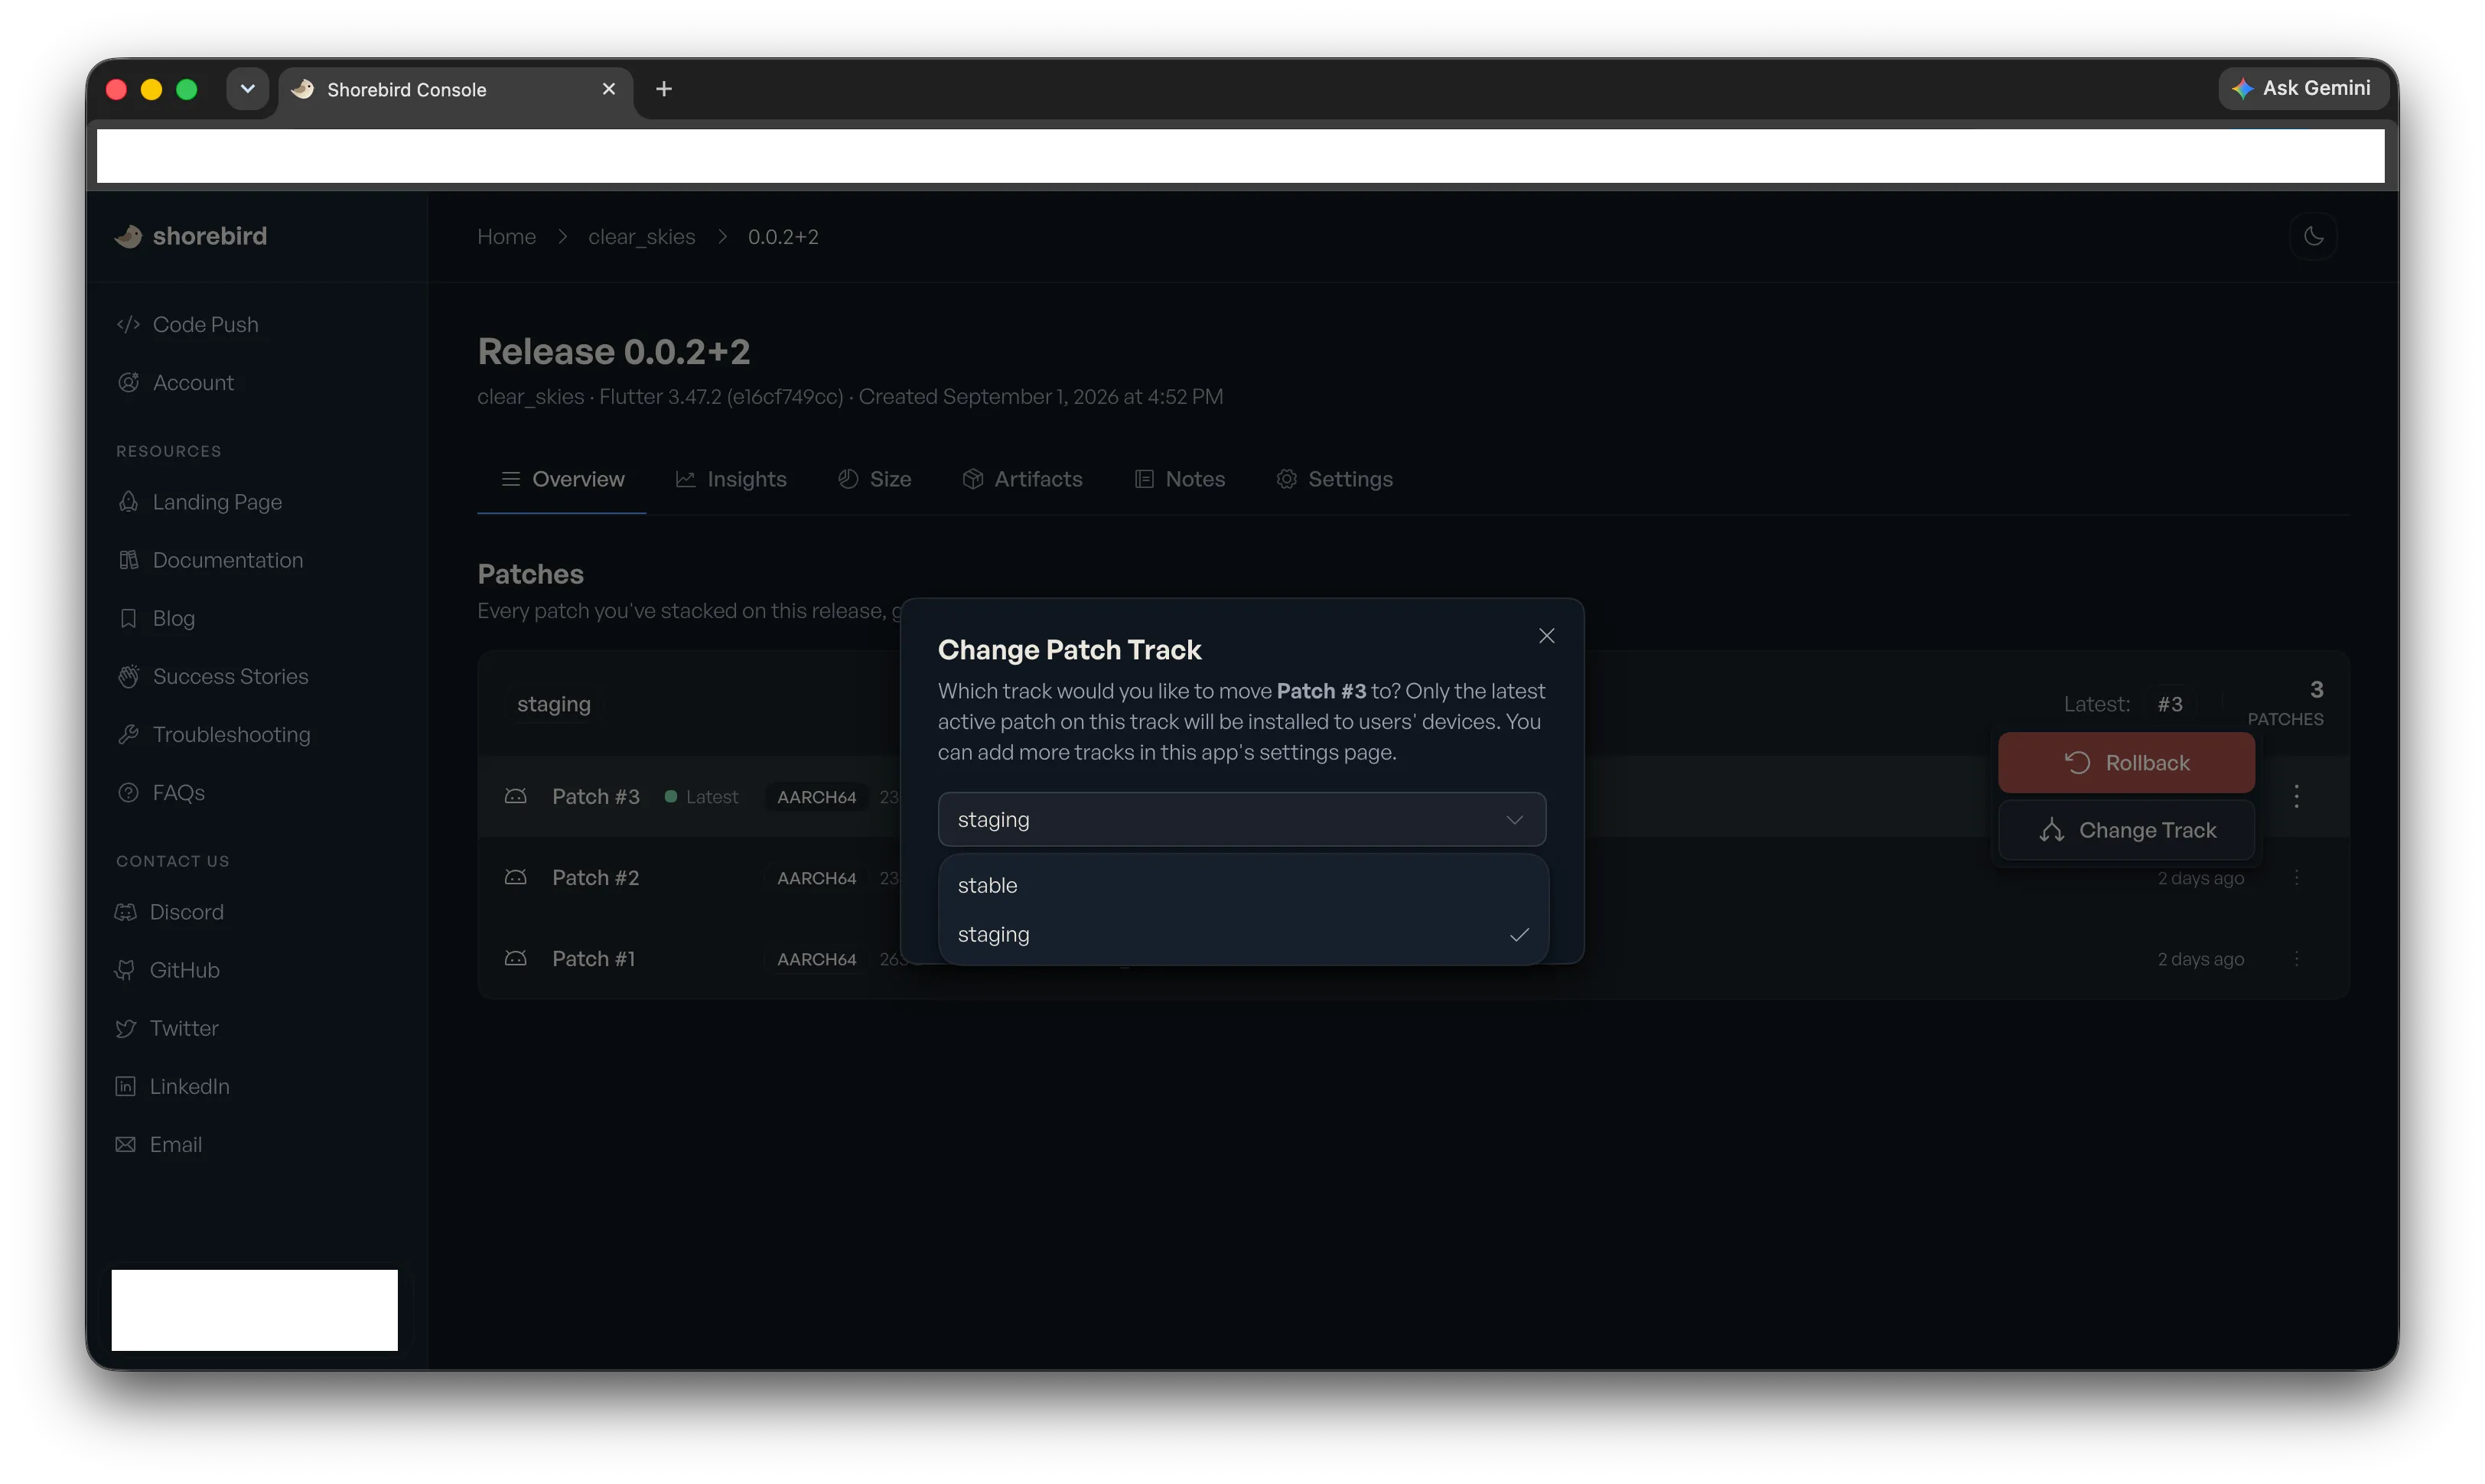
You can also use the Shorebird CLI to promote the patch.
You can promote the patch to the stable channel using the following command:
```
shorebird patches set-track --release 1.0.0+1 --patch 1 --track stable
```
At this point, you have a setup which allows you to preview patches locally before promoting them to production 🎉
# Testing Patches
> Distribute patches to groups of users via Tracks
Testing your patches with a subset of users before distributing to all users is recommended.
Shorebird’s mechanism to release to a subset of users is “tracks”. You can create an unlimited number of tracks with arbitrary names. If no track is specified, patches are distributed to the “stable” track by default.
[What are Tracks?](/code-push/tracks)Learn how Shorebird tracks work, how to publish to them, and how to promote patches between tracks.
Customers typically use “staging” for internal testing (on developers’ machines) and “beta” for wider group testing (e.g. QA teams where `shorebird` commands are not available).
As part of Shorebird’s privacy stance, we *never* know anything about your users, so there is no way to tell users apart or to specify which users should receive a patch from within the product. However, mechanisms are provided for controlling updates via Shorebird with user information you have access to from within your company and your application. See the Percentage Based Rollouts guide for examples.
[Percentage Based Rollouts](/code-push/guides/percentage-based-rollouts)Control which users receive patches using percentage-based distribution.
Using one of the following three approaches is recommended to distribute patches to a subset of users (e.g. your QA team) for testing without affecting your public users in production.
All of these options require disabling `auto_update` support, and using [package:shorebird\_code\_push](https://pub.dev/packages/shorebird_code_push) for more advanced control over the update process.
### Option 1: Control Shorebird track based on the current user’s account.
If your app has a login mechanism, this is your best option. If it does not, option 2 is recommended.
Once your user has logged in, you determine whether the user is a tester and then change your Shorebird update code to use that information when updating, e.g.
```
final track = user.isTester ? UpdateTrack.beta : UpdateTrack.stable;
shorebirdUpdater.update(track: track);
```
### Option 2: Control Shorebird track with a hidden UI.
If your app does not have a login/user-account mechanism, this is your best option. If it does, option 1 is recommended.
Some stores discourage hidden UIs; however, this is a common practice among Shorebird customers. For example, some apps may enable a “QA” mode in their app after a certain series of clicks or special gestures, etc., similar to how Android enables developer mode when [tapping 7 times on the Android version text in the settings app](https://developer.android.com/studio/debug/dev-options) From a QA mode, you could allow testers to switch to the “beta” patch track, even from your production app. They could similarly switch back to “stable” to move back to what production users see today.
### Option 3: Control Shorebird Track based on how the app was installed.
Other companies provide existing mechanisms for testing mobile apps before production. Apple TestFlight, Google Release Tracks, Firebase App Distribution are all examples of this. Shorebird does not have built-in detection of these distribution mechanisms, but it is typically possible to detect the mechanism via which an App was installed on the user’s device.
It is then possible to pick the Shorebird track based on the detected install mechanism, allowing you to thus distribute patches *only* to your TestFlight users, etc.
Because detection of install mechanisms can be unreliable, option 1 or 2 is recommended for most teams, but this option is included for completeness. Most teams who distribute via TestFlight, for example, also have QA-specific accounts and thus option 2 is strictly better.
# White Labeling
> Ship the same update to multiple Apps
Note
This is a placeholder article. Shorebird seems to have many customers using it within a white labeling environment, but the Shorebird team has little personal experience with white labeling and would love to work with someone to update this document to include your best practices.
Shorebird can also be used to send the same patch to multiple apps.
“White labeling” is a practice one sells the same product (in this case, application) to multiple customers, with small per-customer tweaks. This is a common practice for app development, for example you might sell an app to local gyms that allows them to reach their subscribers, handle class scheduling, etc. all with their own branding. You can of course then sell the same app to another gym, just submit it to the stores with a different name, icon and maybe a few other changes.
Submitting the same app update to 1000 apps in the store is something that Shorebird can help with, since updates through Shorebird can be completely automated (which is not always true of the stores). Your agreements with the stores still apply and you should make sure you’re still complying with such of course.
There are different methods for white-labeling applications, Shorebird currently does not offer any automation tooling for any specific method, however it should be straightforward to build on top of what Shorebird does offer.
For example, imagine you use per-customer flavors. You could imagine doing something like this:
1. Make the code change to the dart code.
2. For each application, submit a patch:
`shorebird patch android --flavor customer1`
The above could be turned into a script, or integrated with your existing per-customer automation.
# Initialize Shorebird
> Learn how to add Code Push to an existing Flutter project.
Note
If you are starting a new project, you can use [`shorebird create`](/code-push/create) to generate a new Flutter app with Shorebird.
[Initializing Shorebird in an existing Flutter project](https://app.arcade.software/share/5w5LiD8ODdaGhb6554X9)
To configure an existing Flutter project to use Shorebird, use `shorebird init` at the root of a Flutter project:
```
shorebird init
```
This does three things:
1. Tells Shorebird to create a unique `app_id` for your app. This `app_id` is how Shorebird identifies your app and knows which updates to send to it. It does not need to be kept secret.
2. Creates a `shorebird.yaml` file in your project’s root directory. `shorebird.yaml` contains the `app_id` mentioned above.
3. Adds the `shorebird.yaml` to the assets section of your `pubspec.yaml` file, ensuring `shorebird.yaml` is bundled with your app’s assets and is available to the Shorebird updater at runtime.
You can safely commit these changes; they will have no effect on your app when not using Shorebird.
Example output for an app named `shorebird_test`:
```
$ shorebird init
✓ Detecting product flavors (0.6s)
? How should we refer to this app? (shorebird_test) shorebird_test
✓ Shorebird is up-to-date (0.6s)
✓ Flutter install is correct (4.5s)
✓ AndroidManifest.xml files contain INTERNET permission (23ms)
No issues detected!
🐦 Shorebird initialized successfully!
✅ A shorebird app has been created.
✅ A "shorebird.yaml" has been created.
✅ The "pubspec.yaml" has been updated to include "shorebird.yaml" as an asset.
Reference the following commands to get started:
📦 To create a new release use: "shorebird release".
🚀 To push an update use: "shorebird patch".
👀 To preview a release use: "shorebird preview".
For more information about Shorebird, visit https://shorebird.dev
```
Note
You can supply a display name directly via the command line by passing the `--display-name` flag:
```
shorebird init --display-name "My App"
```
Note
If your account belongs to multiple organizations, `shorebird init` will prompt you to choose one interactively. In non-interactive environments (e.g., CI), you can skip the prompt by passing `--organization-id`:
```
shorebird init --organization-id 42
```
Run `shorebird account orgs` to list your organization IDs.
The generated `shorebird.yaml` should look similar to:
```
# This file is used to configure the Shorebird updater used by your application.
# Learn more at https://shorebird.dev
# This file should be checked into version control.
# This is the unique identifier assigned to your app.
# It is used by your app to request the correct patches from Shorebird servers.
app_id: 8c846e87-1461-4b09-8708-170d78331aca
```
If your application contains flavors, `shorebird init` will create an app per flavor and `shorebird.yaml` will include all flavors and their corresponding `app_ids`:
```
# This file is used to configure the Shorebird updater used by your application.
# Learn more at https://shorebird.dev
# This file should be checked into version control.
# This is the unique identifier assigned to your app.
# It is used by your app to request the correct patches from Shorebird servers.
app_id: 864ab1b0-ba78-4b15-990a-a63cec35a41b
flavors:
development: 864ab1b0-ba78-4b15-990a-a63cec35a41b
production: 6b6e6631-4fbe-4645-8d9d-d5247656d975
```
Note
The `app_id` is a required field in every `shorebird.yaml`. In the case of flavors, `app_id` will default to the first flavor and will be overwritten at build time to the corresponding flavor’s `app_id`.
Disabling automatic updates
By default, Shorebird checks for and downloads patches automatically in the background at app launch. To disable this and control updates programmatically (e.g., show a prompt before updating), add `auto_update: false` to `shorebird.yaml`:
```
app_id: 8c846e87-1461-4b09-8708-170d78331aca
auto_update: false
```
You can then use [package:shorebird\_code\_push](https://pub.dev/packages/shorebird_code_push) to check for updates and trigger them at a time of your choosing. See [Update Strategies](/code-push/update-strategies) for examples.
Note
Shorebird Code Push requires the internet permission to be added to your `AndroidManifest.xml` file (located in `android/app/src/main/AndroidManifest.xml`). This is required for the app to be able to communicate with the Shorebird servers to download patches.
`shorebird init` will add this permission if it is not already present.
```
...
```
Tip
If you already have a `shorebird.yaml` and would like to re-initialize your project, use `shorebird init --force`. This will overwrite your existing `shorebird.yaml` and create a new app/app\_id. Existing apps will not be affected by re-initializing Shorebird.
## What’s next
[Create a Release](/code-push/release)Build and submit your app to Shorebird.
[Preview Locally](/code-push/preview)Test your release on a local device before publishing.
# Create a Patch
> Learn how to push updates to an app with Shorebird.
Once you have published a release of your app, you can push updates using one of the `shorebird patch` commands.
Pre-Patch Checklist
Before running a patch command, review this checklist to ensure your patch compiles and applies cleanly:
* **No Native Code Changes**: Ensure your updates do not touch native platform code (e.g. Kotlin, Swift, or build configurations in `android/` or `ios/`). Native updates cannot be patched.
* **No Asset Changes**: Check that no new images, fonts, or other files have been added or removed in `pubspec.yaml` (asset patching is not yet supported).
* **Match Flutter Versions**: Ensure your local Flutter SDK version is identical to the one vended by Shorebird. You can check this by running `shorebird doctor`.
**What Shorebird checks automatically:** Before creating a patch, Shorebird compares your local build against the stored release artifacts and warns you (or blocks the upload by default) if it detects native code or asset differences. You can bypass these checks with `--allow-native-diffs` or `--allow-asset-diffs`. If you find yourself needing these flags, it is likely a Shorebird bug or you may be running an old version of `shorebird` — please [reach out](mailto:contact@shorebird.dev) for help.
* Android
Android
```
shorebird patch android
```
* iOS
iOS
```
shorebird patch ios
```
* Linux
Linux
```
shorebird patch linux
```
* macOS
macOS
```
shorebird patch macos
```
* Windows
Windows
```
shorebird patch windows
```
### Patching multiple platforms simultaneously
If your app supports multiple platforms, you can build and publish patches for them in a single command using the `--platforms` (or `-p`) option:
```
shorebird patch --platforms=android,ios
```
This will build and promote the patches for the specified platforms to their respective releases in one step.
This will do several things:
1. Builds the artifacts for the update.
2. Downloads the corresponding release artifacts.
3. Generates a patch using the diff between the release and the current changes.
4. Uploads the patch artifacts to the Shorebird backend.
5. Promotes the patch to the stable channel.
Example output:
```
$ shorebird patch android
✓ Building patch (3.0s)
✓ Fetching apps (0.2s)
✓ Detecting release version (0.3s)
✓ Fetching release (77ms)
✓ Fetching Flutter revision (15ms)
✓ Fetching release artifacts (0.3s)
✓ Downloading release artifacts (1.9s)
✓ Creating artifacts (4.1s)
🚀 Ready to publish a new patch!
📱 App: My App (61fc9c16)
📦 Release Version: 0.1.0+1
📺 Channel: stable
🕹️ Platform: android [arm64 (166.20 KB), arm32 (161.78 KB), x86_64 (161.51 KB)]
Would you like to continue? (y/N) Yes
✓ Creating patch (93ms)
✓ Uploading artifacts (1.5s)
✓ Fetching channels (86ms)
✓ Promoting patch to stable (78ms)
✅ Published Patch!
```
Note
There is no limit on the number of patches you can publish. See [Is there a limit to how many patches you can ship?](/code-push/faq#is-there-a-limit-to-how-many-patches-i-can-ship-per-release) for more details.
By default, this uses the release version from the compiled artifact. If you want to target the latest release version, you can use `--release-version latest`. For example:
```
shorebird patch android --release-version latest
```
If you want to patch a different release version, you can use the `--release-version` option. For example:
```
shorebird patch android --release-version 0.1.0+1
```
If your application supports flavors or multiple release targets, you can specify the flavor and target using the `--flavor` and `--target` options:
```
shorebird patch android --target lib/main_development.dart --flavor development
```
Note
`shorebird patch` wraps `flutter build` and can take any argument `flutter build` can. To pass arguments to the underlying `flutter build`, you need to put `flutter build` arguments after a `--` separator. For example: `shorebird patch android -- --dart-define="foo=bar"` will define the `"foo"` environment variable inside Dart as you might have done with `flutter build` directly.
## Options
| Option | Abbreviation | Description |
| ---------------------- | ------------ | ---------------------------------------------------------------------------------------------------------------------------------------------------- |
| `--release-version` | | The release version to patch (e.g., `1.0.0+1`). Use `latest` to target the most recently updated release. |
| `--platforms` | `-p` | Comma-separated list of platforms to patch simultaneously (e.g., `android,ios`). |
| `--flavor` | | The product flavor to use when building. |
| `--target` | `-t` | The main entrypoint file of the application. |
| `--track` | | The deployment track to publish to (default: `stable`). Use `staging` to publish to a staging track first. See [Tracks](/code-push/tracks) for more. |
| `--dry-run` | `-n` | Build and validate the patch but **do not upload** it. Ideal as a CI sanity check. |
| `--allow-asset-diffs` | | Publish even if asset differences are detected. **Not recommended.** |
| `--allow-native-diffs` | | Publish even if native code differences are detected. **Not recommended.** |
### iOS-specific options
| Option | Description |
| ------------------------ | ------------------------------------------------------------------------------------------------ |
| `--no-codesign` | Skip code signing for the iOS build. |
| `--export-options-plist` | Path to a custom `ExportOptions.plist` for the iOS archive export step. |
| `--export-method` | Distribution method: `app-store`, `ad-hoc`, `development`, or `enterprise`. |
| `--min-link-percentage` | Minimum % of Dart code that must be linked (not interpreted) for the patch to publish. iOS only. |
### Patch performance
#### Android
Patching an application on Android has no effect on performance.
#### iOS and macOS
Patching an application on iOS and macOS typically does not affect application performance. However, the patching mechanism on iOS and macOS is different from Android. Unchanged code runs as normal (on the CPU), changed (or added) code will run in a Dart interpreter (slower than the CPU). Typically this change is undetectable, but if you are changing particularly performance-sensitive Dart code (e.g., code for processing images, or large datasets), you may see a performance difference after patching.
You can always test your patches before sending them to users by [staging patches](/code-push/guides/staging-patches). For a detailed look at how iOS and macOS patching works, see [System Architecture](/code-push/system-architecture).
If you ever see unexpected performance changes when patching, please [reach out](mailto:contact@shorebird.dev) for help.
***
## Manage patches
You can manage your patches directly from the command line using the `shorebird patches` commands.
### List patches
To list all patches associated with a specific release version:
```
shorebird patches list --release-version 1.0.0+1
```
This will display a list of all patches published for that release, their patch numbers, active status, and tracks.
### View patch details
To view detailed information for a specific patch number:
```
shorebird patches info --release-version 1.0.0+1 --patch-number 1
```
This command shows the patch’s ID, track, whether it is rolled back, any notes, and the size of each platform and architecture artifact.
### Promote a patch
If you published a patch to a staging track (e.g., `staging`) and verified it works correctly, you can promote it directly to the `stable` track using:
```
shorebird patches promote --release-version 1.0.0+1 --patch-number 1
```
### Set patch track
To assign a patch directly to a specific deployment track (e.g., promoting or routing to a staging beta group):
```
shorebird patches set-track --release 1.0.0+1 --patch 1 --track staging
```
### Roll back or roll forward a patch
To stop serving a patch, roll it back. To serve it again later, roll it forward:
```
shorebird patches rollback --release-version 1.0.0+1 --patch-number 1
shorebird patches rollforward --release-version 1.0.0+1 --patch-number 1
```
See [Roll back a Patch](/code-push/rollback#roll-back-from-the-cli) for what happens on devices and the options these commands take.
### Delete a patch
Individual patches can’t be deleted. A patch is removed along with the release it belongs to, or the app that owns that release. Those deletions are permanent, and the console asks you to confirm before anything is removed.
Tip
To stop serving a patch, use [rollback](/code-push/rollback). It remotely uninstalls the patch from end users’ devices, and you can undo it later.
See [Delete Apps, Releases, and Patches](/code-push/delete) for details.
# Patch Performance
> Information on Patch Performance
Shorebird uses its own fork of Flutter.
Shorebird’s fork works exactly as Google’s does, including passing all the same functionality and performance tests.
Using Shorebird’s fork should not result in any change in your app. If you ever see any change, reach out on [Discord](https://discord.gg/shorebird) so the Shorebird team can help diagnose.
### Patching
Updating a Flutter app in production is unique to Shorebird’s fork.
When using Shorebird your app has two different modes of running, un-patched (“release”) and patched (“patch”). Both release and patch builds of your app should function identically as they would without Shorebird. The only caveat is on iOS where patched builds can sometimes run slower than release builds due to iOS restrictions.
The iOS App Store [requires](https://docs.shorebird.dev/faq/#does-shorebird-comply-with-app-store-guidelines) all app update systems (like Shorebird’s) to use an interpreter. An interpreter is a software program that can run other programs rather than running the program directly on hardware. Interpreters are slow.
To work around the performance limitations of an interpreter, Shorebird’s updating system is designed to avoid using the interpreter as much as possible. When you make a “patch” with Shorebird, Shorebird examines the change and attempts to set up the “patch” to only run the *new* or *changed* code within the interpreter (slow), and thus leave all un-changed code running on the CPU (fast).
### Why iOS patches are sometimes slow
Most of the time when you make a change to a part of your program, only that part of the program is changed. However sometimes small changes to one part of the program can produce large changes in (seemingly) unrelated parts.
This is due to how compilers (programs that turn source code into machine code) optimize their output. Dart’s compiler uses several tricks to optimize programs including “type flow analysis” and “inlining”, both of which can cause these unexpected non-local changes.
As an example, imagine you have a part of your program:
```
bool isEven(T value) => value?.isEven ?? false;
void foo(int x) {
print(isEven(x));
}
```
And you change it to add:
```
bool isEven(T value) => value?.isEven ?? false;
void foo(int x) {
print(isEven(x));
}
+ void bar(int? x) {
+ print(isEven(x));
+ }
```
In that example, `isEven` and `foo` didn’t change. So you would expect Shorebird should be able to run both of those on the CPU (not have to use an interpreter). However this is unfortunately not the case. In the “before” case, because isEven was never called with nullable values Dart optimized away all of the null checks in the compiled `isEven` code. (That’s a good thing.) Unfortunately that means that when the new code now used `isEven` in a nullable context the compiled contents of “isEven” change, to include null checks. Since the contents of isEven changed, Shorebird will conservatively assume that the behavior of all callers of `isEven` might have changed as well and won’t use the CPU versions of those either. Thus if your change (however small) might happen to have caused the Dart compiler to reconsider optimizations for some other critical section of code, tiny changes can sometimes cause large sections of your application to “un-link” and run in the interpreter.
### Avoiding performance changes in iOS patches
Unfortunately there is currently no good way to predict if a patch will cause a performance change to your application.
The good news is that this behavior is relatively rare. 9 out of 10 patches do not run into unexpected non-local changes like this and exhibit no difference after patching. Furthermore, when performance impacting changes occur, Shorebird’s tooling and console will warn you. The bad news is that predicting when a change will trigger the Dart compiler to cause non-local changes to your program is very difficult.
When these non-local changes occur, the best recommendation at this time is to try to make a new, smaller diff, and patch again.
For the vast majority of patches there is no performance difference at all. For those which do see a difference, sometimes that difference may still be worth the trade-off as a stop-gap between now and when a user can get an update via the App Store.
Several approaches exist to remove this limitation on iOS, and Shorebird intends to continue improving this behavior in the future.
# Preview Locally
> Learn how to preview an existing release of your application.
Once you have [created a release](/code-push/release), you can preview your release on an Android device, Android emulator, or iOS device using the `shorebird preview` command.
```
shorebird preview
```
This will download the release artifacts for the selected app release version, install the app on the selected device, and start the application.
Tip
`shorebird preview` can be used on any computer that is configured for Flutter development, not just the computer that was used to create the release. This is useful for verifying releases that were created on a CI/CD server.
## Options
| Option | Abbreviation | Description |
| ------------------- | ------------ | ------------------------------------------------------------------------------------ |
| `--release-version` | | The release version to preview (e.g., `1.0.0+1`). Defaults to an interactive prompt. |
| `--platform` | | Target platform to preview: `android`, `ios`, `macos`, `linux`, or `windows`. |
| `--device-id` | `-d` | The ID of the device or simulator to preview on. Defaults to an interactive prompt. |
| `--track` | | The deployment track to preview (e.g., `stable`, `staging`). Defaults to `stable`. |
| `--app-id` | | The Shorebird app ID. Inferred from `shorebird.yaml` if not specified. |
### Android keystore options
When previewing an Android release with a production keystore (instead of a debug key):
| Option | Description |
| ---------------- | ----------------------------------------------------------------------------------- |
| `--ks` | Path to the deployment keystore used to sign the APKs. |
| `--ks-pass` | Keystore password, prefixed with `pass:` (plain text) or `file:` (path to a file). |
| `--ks-key-pass` | Password for the signing key. Can be omitted if identical to the keystore password. |
| `--ks-key-alias` | Alias of the signing key to use. |
**Example (Android with keystore):**
```
shorebird preview \
--platform android \
--release-version 1.0.0+1 \
--ks /path/to/keystore.jks \
--ks-pass pass:my_keystore_password \
--ks-key-alias my_key_alias
```
## Add-to-app
Because Flutter modules (.aars and .xcframeworks, created with `shorebird release aar` and `shorebird release ios-framework`, respectively) are embedded in apps that Shorebird does not know about, `shorebird preview` does not support them.
To test these releases, you can use your normal development flow with the artifacts that Shorebird creates. For example, if you launch your app normally from Xcode or Android Studio *with a Release configuration*, you will see Shorebird logs in its output. If you have published a patch, it should be downloaded on the first run of your app and visible on subsequent runs.
## Previewing patches
You can also use `shorebird preview` to test patches locally before publishing them to production. This is highly recommended to verify your Dart changes and ensure the update downloads and runs as expected.
To test a patch locally:
1. **Create a release** (if you haven’t already):
```
shorebird release [platform]
```
2. **Run the release on your device**:
```
shorebird preview
```
3. **Make changes to your Dart code**.
4. **Publish the patch to a staging track** (e.g., `staging`):
```
shorebird patch [platform] --track=staging
```
5. **Run the staging patch on your device**:
```
shorebird preview --track=staging
```
6. **Trigger the update**:
* On launch, Shorebird checks for patches in the background and downloads them.
* Close the app completely (kill the process).
* Relaunch the app. The downloaded patch will now be active, and you should see your changes.
Tip
For programmatic checks or showing custom update prompts, see the [Update Strategies](/code-push/update-strategies) guide.
## What’s next
[Create a Patch](/code-push/patch)Push over-the-air updates to your published release.
[Staging Patches](/code-push/guides/staging-patches)Validate patches in a staging environment before promoting to production.
# Create a Release
> Learn how to publish a new app release to Shorebird.
In order to start pushing updates, you will need to create a release.
[Create a Release](https://app.arcade.software/share/h8ywz1NWeFq3dC2iRQBU)
`shorebird release` is a drop-in replacement for `flutter build`. It builds your app and uploads the compiled Dart artifacts to Shorebird’s servers as a baseline for future patches. After running this command, you still need to upload the generated artifact (`.aab` for Android, `.ipa` for iOS) to the respective store.
* Android
Create an Android release by running the following command:
`shorebird release android`
Example output:
```
$ shorebird release android
✓ Building release (9.6s)
✓ Fetching apps (0.2s)
✓ Detecting release version (0.2s)
✓ Fetching releases (68ms)
🚀 Ready to create a new release!
📱 App: new_flutter_app (7a29188a-9363-426a-9a36-74a5e166373d)
📦 Release Version: 1.0.0+1
🕹️ Platform: android (arm64, arm32, x86_64)
Would you like to continue? (y/N) Yes
✓ Fetching Flutter revision (30ms)
✓ Updating release status (67ms)
✓ Creating artifacts (2.8s)
✓ Updating release status (62ms)
✅ Published Release!
Your next step is to upload the app bundle to the Play Store.
build/app/outputs/bundle/release/app-release.aab
See the following link for more information:
https://support.google.com/googleplay/android-developer/answer/9859152?hl=en
```
If your application supports flavors or multiple release targets, you can specify the flavor and target using the `--flavor` and `--target` options:
```
shorebird release android --target ./lib/main_development.dart --flavor development
```
Note
`shorebird release` wraps `flutter build` and can take any argument `flutter build` can. To pass arguments to the underlying `flutter build`, you need to put `flutter build` arguments after a `--` separator. For example: `shorebird release android -- --dart-define="foo=bar"` will define the `"foo"` environment variable inside Dart as you might have done with `flutter build` directly. In PowerShell, the `--` separator must be quoted: `'--'`.
By default, `shorebird release android` builds an AppBundle (`.aab`). If you would like to *also* generate an Android Package Kit (`.apk`), use the following command:
```
shorebird release android --artifact apk
```
### Build a smaller APK for one architecture
By default, `shorebird release android` compiles for three Android ABIs: `android-arm` (32-bit ARM / `armeabi-v7a`), `android-arm64` (`arm64-v8a`), and `android-x64` (`x86_64`). That produces a larger APK than a Flutter build that only packages `arm64-v8a`.
To build for a single architecture, pass `--target-platform` **before** any `--` separator:
```
shorebird release android --artifact apk --target-platform android-arm64
```
Allowed values are `android-arm`, `android-arm64`, and `android-x64`. Pass the flag more than once, or as a comma-separated list, to include extra ABIs.
Gradle NDK ABI filters (for example `ndk.abiFilters`) are not a substitute for `--target-platform`. If Gradle omits an ABI that is still in `--target-platform`, Shorebird skips that architecture instead of failing, and the release ships with only the ABIs that actually built. Use `--target-platform` to declare the architectures you want — a mismatched Gradle filter will not error.
`--target-platform` is a Shorebird flag. Do not put it after `--` — that forwards it to `flutter build` and is not applied the same way.
`shorebird patch android` against a single-arch release does not need the flag. The patch command skips architectures that were not part of the release.
Note
By default, `shorebird release` uses the Flutter version bundled within the Shorebird installation.
That version can be checked by running `shorebird doctor`.
To release with a different Flutter version, you can specify the version using the `--flutter-version` flag.
```
shorebird release android --flutter-version 3.47.5
```
* iOS
Create an iOS release by running the following command:
`shorebird release ios`
Example output:
```
$ shorebird release ios
✓ Fetching apps (0.2s)
✓ Building release (59.0s)
✓ Getting release version (40ms)
✓ Fetching releases (0.1s)
🚀 Ready to create a new release!
📱 App: My App (7a29188a-9363-426a-9a36-74a5e166373d)
📦 Release Version: 1.0.0+1
🕹️ Platform: ios
Would you like to continue? (y/N) Yes
✓ Fetching Flutter revision (40ms)
✓ Creating release (0.1s)
✓ Creating artifacts (5.1s)
✓ Updating release status (57ms)
✅ Published Release!
Your next step is to upload the IPA to App Store Connect.
`build/ios/ipa/new_flutter_app.ipa`
To upload to the App Store either:
1. Drag and drop the "build/ios/ipa/new_flutter_app.ipa" bundle into the Apple Transporter macOS app (https://apps.apple.com/us/app/transporter/id1450874784)
2. Run xcrun altool --upload-app --type ios -f build/ios/ipa/new_flutter_app.ipa --apiKey your_api_key --apiIssuer your_issuer_id.
See "man altool" for details about how to authenticate with the App Store Connect API key.
```
If your application supports flavors or multiple release targets, you can specify the flavor and target using the `--flavor` and `--target` options:
```
shorebird release ios --target ./lib/main_development.dart --flavor development
```
Note
`shorebird release` wraps `flutter build` and can take any argument `flutter build` can. To pass arguments to the underlying `flutter build`, you need to put `flutter build` arguments after a `--` separator. For example: `shorebird release android -- --dart-define="foo=bar"` will define the `"foo"` environment variable inside Dart as you might have done with `flutter build` directly.
Note
By default, `shorebird release` uses the Flutter version bundled within the Shorebird installation.
That version can be checked by running `shorebird doctor`.
To release with a different Flutter version, you can specify the version using the `--flutter-version` flag.
```
shorebird release ios --flutter-version 3.47.5
```
### Signing issues
Depending on how you normally sign your iOS app, you may see an error at the end of the build saying something like: `Runner.app requires a provisioning profile with ___ feature` or that no signing certificate was found. This can be addressed in a few ways:
#### Setting up automatic signing in Xcode
If you are releasing on your local machine (i.e., not in a CI environment), this option is easier than the following options, but does not always work well in CI environments.
In Xcode, open your project and navigate to the “Signing & Capabilities” tab. Ensure that “Automatically manage signing” is checked.
#### Create an ExportOptions.plist file.
You may need to provide an ExportOptions.plist file to the `shorebird release ios` command. This file is used by Xcode to determine which certificate and provisioning profile should be used to sign the .ipa. An example of this file is:
```
methodapp-storeprovisioningProfilescom.example.your_bundle_idYour App's App Store Provisioning Profile NamesigningCertificateApple DistributionsigningStylemanualteamID*****
```
To use this file, pass it to the `shorebird release ios` command:
```
shorebird release ios --export-options-plist=path/to/ExportOptions.plist
```
* Linux
Create a Linux release by running the following command:
`shorebird release linux`
Example output:
```
$ shorebird release linux
✓ Fetching apps (0.3s)
✓ Building app bundle with Flutter 3.41.4 (1e0e5760ee) (18.3s)
✓ Fetching releases (0.1s)
🚀 Ready to create a new release!
📱 App: sample (d0cf1d8f-e741-4f5d-b280-b794000df1cd)
📦 Release Version: 1.0.0+1
🕹️ Platform: linux
🐦 Flutter Version: 3.41.4 (1e0e5760ee)
Would you like to continue? (y/N) Yes
✓ Fetching releases (0.1s)
✓ Creating release (0.3s)
✓ Updating release status (0.1s)
✓ Uploading artifacts (3.5s)
✓ Updating release status (1.7s)
✅ Published Release 1.0.0+1!
```
* macOS
Create a macOS release by running the following command:
`shorebird release macos`
Example output:
```
$ shorebird release macos
✓ Fetching apps (0.3s)
✓ Building app bundle with Flutter 3.41.4 (1e0e5760ee) (18.3s)
✓ Fetching releases (0.1s)
🚀 Ready to create a new release!
📱 App: sample (d0cf1d8f-e741-4f5d-b280-b794000df1cd)
📦 Release Version: 1.0.0+1
🕹️ Platform: macos
🐦 Flutter Version: 3.41.4 (1e0e5760ee)
Would you like to continue? (y/N) Yes
✓ Fetching releases (0.1s)
✓ Creating release (0.3s)
✓ Updating release status (0.1s)
✓ Uploading artifacts (3.5s)
✓ Updating release status (1.7s)
✅ Published Release 1.0.0+1!
macOS app created at build/macos/Build/Products/Release/new_flutter_app.app.
To create a patch for this release, run shorebird patch --platforms=macos --release-version=1.0.0+1
Note: shorebird patch --platforms=macos without the --release-version option will patch the current version of the app.
```
If your application supports flavors or multiple release targets, you can specify the flavor and target using the `--flavor` and `--target` options:
```
shorebird release macos --target ./lib/main_development.dart --flavor development
```
Note
`shorebird release` wraps `flutter build` and can take any argument `flutter build` can. To pass arguments to the underlying `flutter build`, you need to put `flutter build` arguments after a `--` separator. For example: `shorebird release android -- --dart-define="foo=bar"` will define the `"foo"` environment variable inside Dart as you might have done with `flutter build` directly. In PowerShell, the `--` separator must be quoted: `'--'`.
Note
By default, `shorebird release` uses the Flutter version bundled within the Shorebird installation.
That version can be checked by running `shorebird doctor`.
To release with a different Flutter version, you can specify the version using the `--flutter-version` flag.
```
shorebird release macos --flutter-version 3.47.5
```
* Windows
Create a Windows release by running the following command:
`shorebird release windows`
Example output:
```
$ shorebird release windows
✓ Fetching apps (0.3s)
✓ Building Windows app with Flutter 3.41.4 (1e0e5760ee) (18.3s)
✓ Fetching releases (0.1s)
🚀 Ready to create a new release!
📱 App: sample (d0cf1d8f-e741-4f5d-b280-b794000df1cd)
📦 Release Version: 1.0.0+1
🕹️ Platform: windows
🐦 Flutter Version: 3.41.4 (1e0e5760ee)
Would you like to continue? (y/N) Yes
✓ Fetching releases (0.1s)
✓ Creating release (0.3s)
✓ Updating release status (0.1s)
✓ Uploading artifacts (3.5s)
✓ Updating release status (1.7s)
✅ Published Release 1.0.0+1!
Windows executable created at build/windows/x64/runner/Release
To create a patch for this release, run shorebird patch --platforms=windows --release-version=1.0.0+1
Note: shorebird patch --platforms=windows without the --release-version option will patch the current version of the app.
```
If your application supports flavors or multiple release targets, you can specify the flavor and target using the `--flavor` and `--target` options:
```
shorebird release windows --target ./lib/main_development.dart --flavor development
```
Note
`shorebird release` wraps `flutter build` and can take any argument `flutter build` can. To pass arguments to the underlying `flutter build`, you need to put `flutter build` arguments after a `--` separator. For example: `shorebird release android -- --dart-define="foo=bar"` will define the `"foo"` environment variable inside Dart as you might have done with `flutter build` directly. In PowerShell, the `--` separator must be quoted: `'--'`.
Note
By default, `shorebird release` uses the Flutter version bundled within the Shorebird installation.
That version can be checked by running `shorebird doctor`.
To release with a different Flutter version, you can specify the version using the `--flutter-version` flag.
```
shorebird release windows --flutter-version 3.47.5
```
To package this build for the Microsoft Store, set `build_windows: false` in the `msix_config` section of `pubspec.yaml` so `package:msix` does not rebuild with stock Flutter. See [Releasing for Windows](/flutter-concepts/releasing-flutter-apps/windows/).
## Options
| Option | Abbreviation | Description |
| -------------------- | ------------ | -------------------------------------------------------------------------------------------------------------------------------------------------------------------- |
| `--platforms` | `-p` | Comma-separated list of platforms to release simultaneously (e.g., `android,ios`). |
| `--flavor` | | The product flavor to use when building. |
| `--target` | `-t` | The main entrypoint file of the application. |
| `--flutter-version` | | The Flutter version to build with (e.g., `3.47.5`). Defaults to the version bundled with Shorebird. |
| `--build-name` | | Override the version name (e.g., `1.2.3`). |
| `--build-number` | | Override the version code / build number (e.g., `42`). |
| `--artifact` | | Android artifact type: `aab` (default) or `apk`. |
| `--target-platform` | | Android ABIs to compile: `android-arm`, `android-arm64`, `android-x64`. Defaults to all three. |
| `--dry-run` | `-n` | Build and validate the release but **do not upload** it. Ideal for CI validation. |
| `--obfuscate` | | Obfuscate Dart code. Without `--split-debug-info`, symbols are written to `build/shorebird/symbols`. |
| `--split-debug-info` | | Output Dart debug symbol files to the specified directory. See [Uploading Symbols](/code-push/crash-reporting/uploading-symbols#dart-symbols-for-obfuscated-builds). |
### iOS-specific options
| Option | Description |
| ------------------------ | --------------------------------------------------------------------------- |
| `--no-codesign` | Skip code signing for the iOS build. |
| `--export-options-plist` | Path to a custom `ExportOptions.plist` for the iOS archive export step. |
| `--export-method` | Distribution method: `app-store`, `ad-hoc`, `development`, or `enterprise`. |
### Releasing for multiple platforms simultaneously
If your app supports multiple platforms, you can build and publish releases for them in a single command using the `--platforms` (or `-p`) option:
```
shorebird release --platforms=android,ios
```
This will compile the binaries for the specified platforms and register them as a single version release in your Shorebird console. Note that to release for iOS or macOS, you must run this command on macOS hardware.
## Manage releases
In addition to using the [Shorebird console](https://console.shorebird.dev/), you can manage your app’s releases directly from the command line using the `shorebird releases` commands.
### List releases
[Viewing releases from CLI and console](https://app.arcade.software/share/CtBj7r9AA5Xm0p0tIJYX)
#### Via the Shorebird CLI
To list all releases associated with your app:
```
shorebird releases list
```
This will output a list of all releases, showing their version number, target platform, Flutter version, and active patch number.
#### Via the console
You can view all of your releases for your current app (as defined by your `shorebird.yaml`) on the [Shorebird console](https://console.shorebird.dev/).
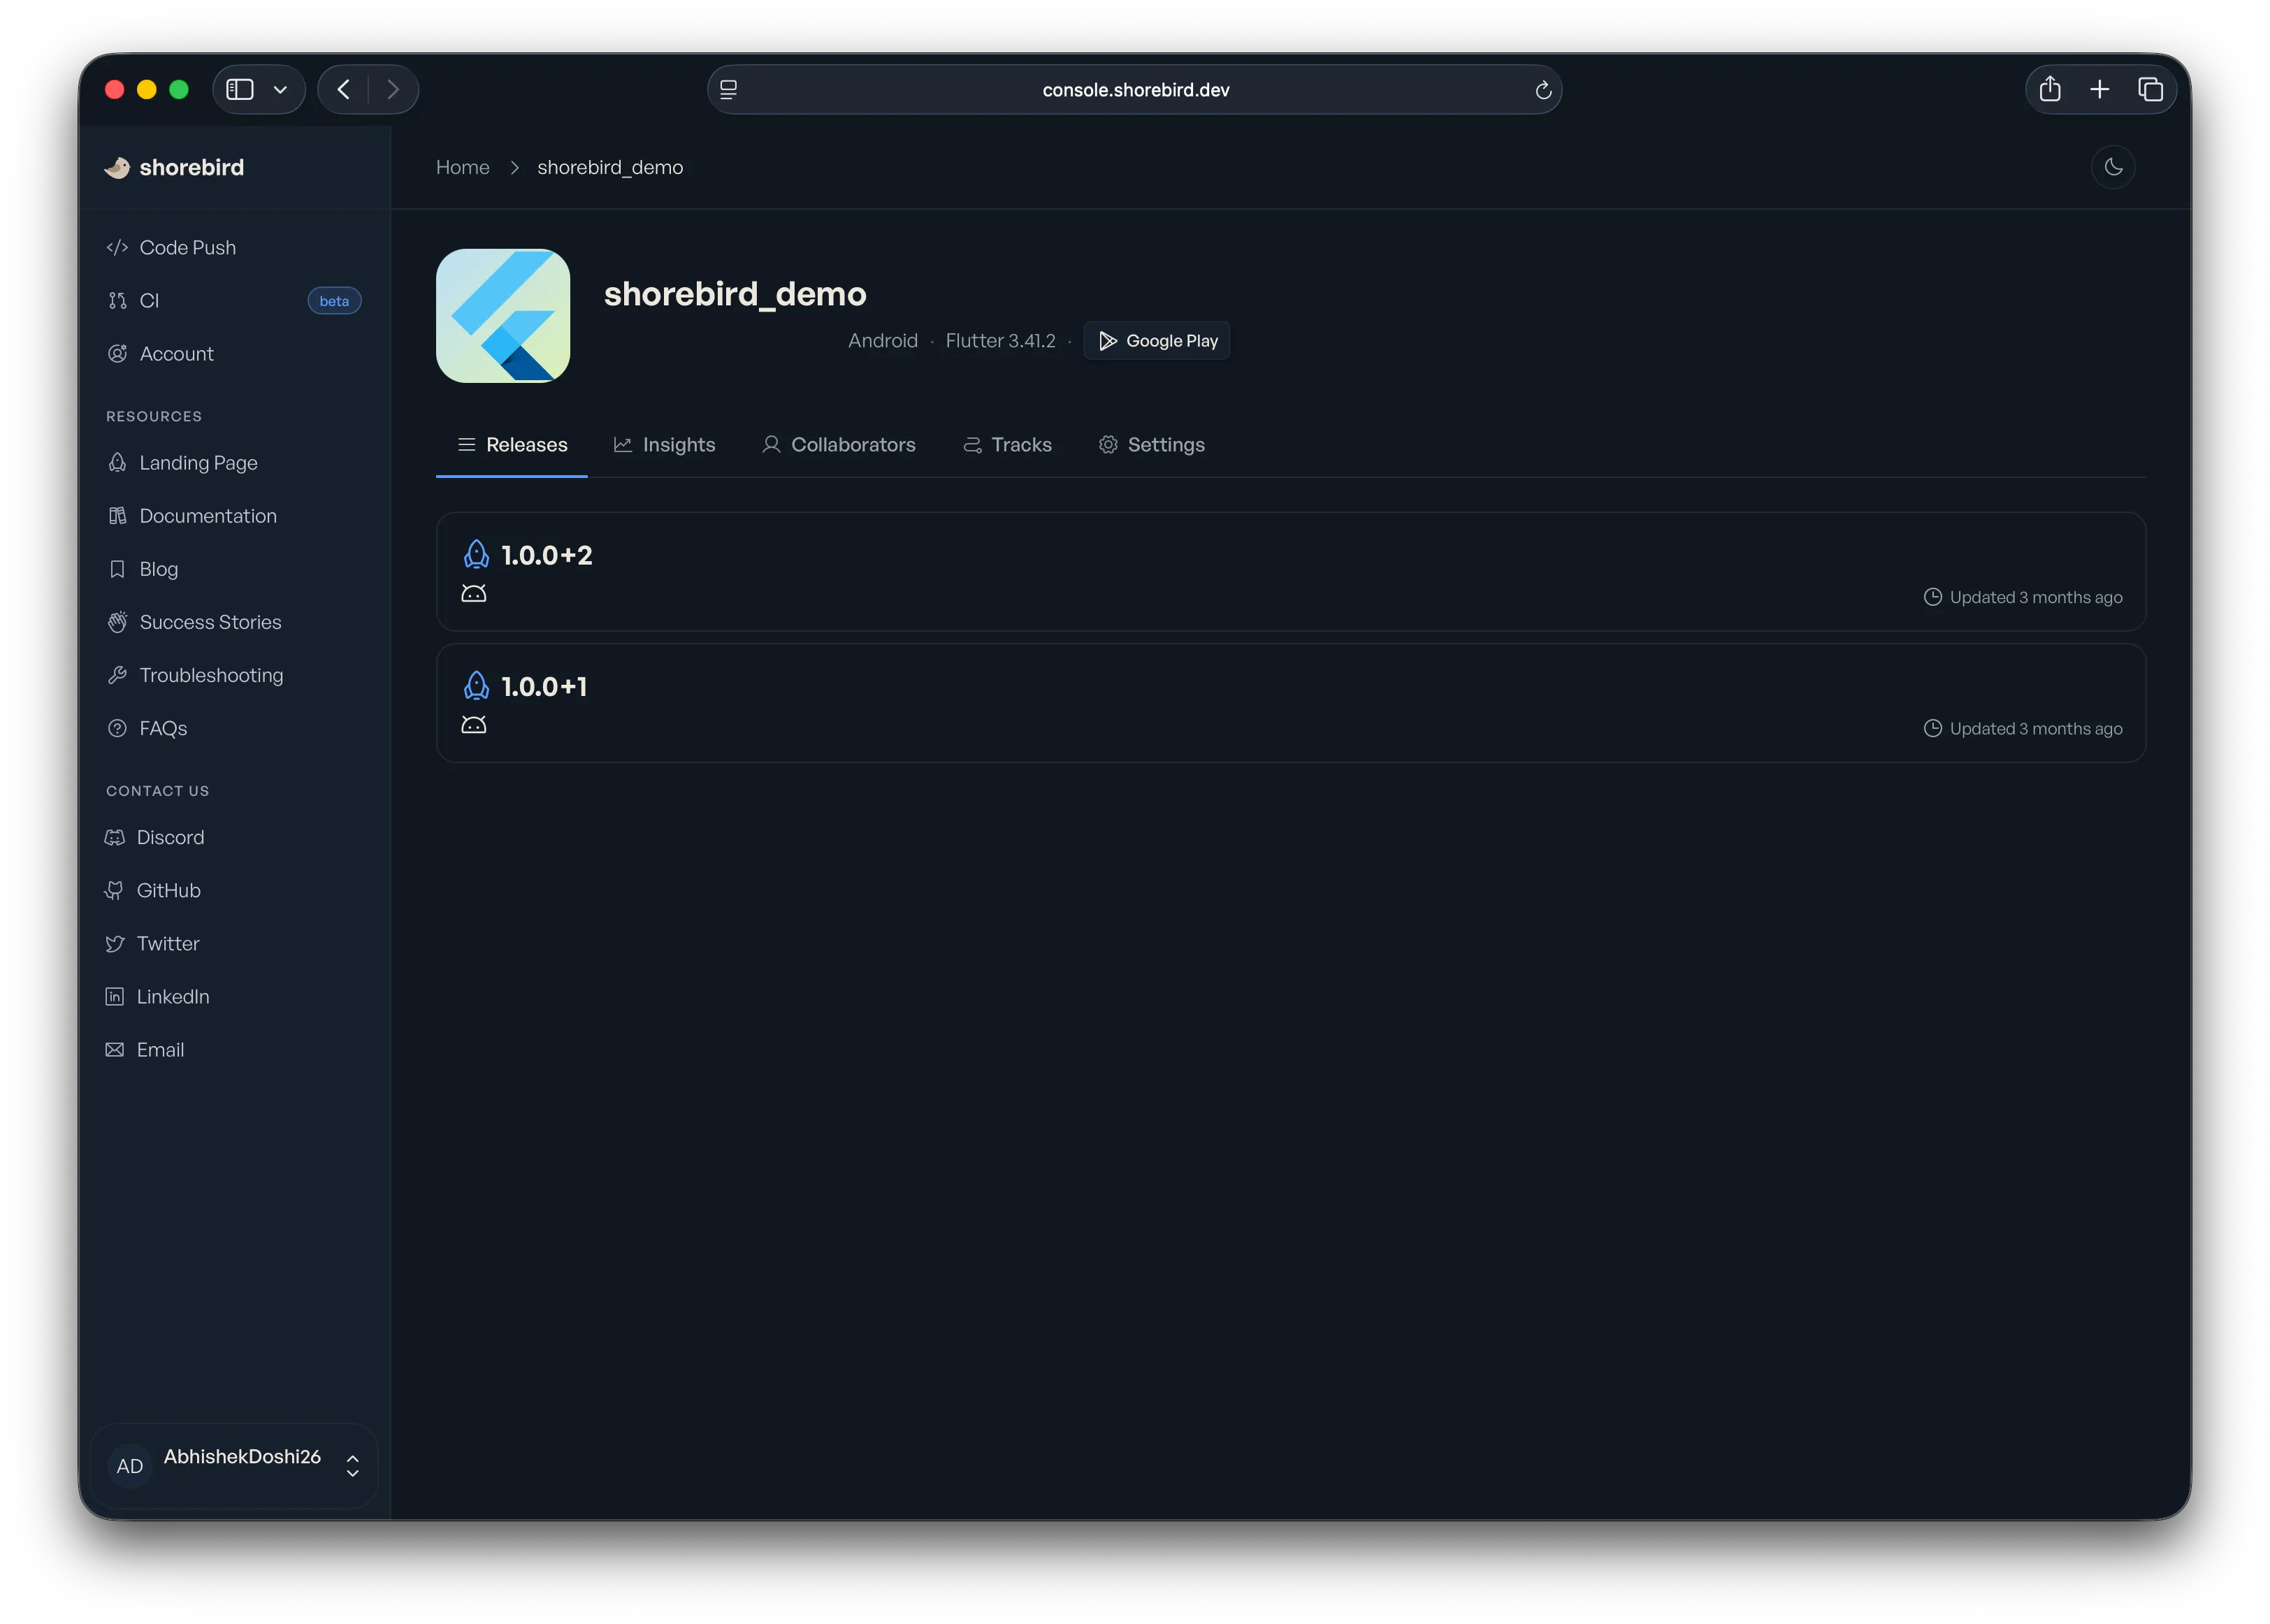
### View release details
To view detailed information for a specific release version:
```
shorebird releases info --release-version 1.0.0+1
```
This command displays metadata for the release, including which platforms are active and details of any patches created for it.
### Get APKs from a Release (Android only)
If you created an Android release using an App Bundle (`.aab`) and want to generate local APKs from it for testing or side-loading, you can download them using:
```
shorebird releases get-apks --release-version 1.0.0+1
```
This downloads the release AAB and builds APK files locally. By default that produces a **universal** APK (every ABI in the AAB). Pass `--no-universal` to extract one APK per ABI instead:
```
shorebird releases get-apks --release-version 1.0.0+1 --no-universal
```
If you want a small APK at build time rather than splitting a fat AAB afterwards, use `--target-platform` as described in [Build a smaller APK for one architecture](#build-a-smaller-apk-for-one-architecture).
### Delete releases
[Delete a Release](https://app.arcade.software/share/1eUps58NpU5sFkTxljGu)
Deleting a release is permanent
Deleting a release removes the release, its artifacts, and every patch associated with it, and it can’t be restored afterwards. The console asks you to confirm before anything is removed.
If you only want to stop serving a bad patch, you can [roll it back](/code-push/rollback) instead. You can undo a rollback later.
You can delete a release for your app (as defined by your `shorebird.yaml`) on the [Shorebird console](https://console.shorebird.dev/).
1. Navigate to the application.
2. Click on the release you wish to delete.
3. Go to the “Settings” tab at the top of the page.
4. In the “Danger Zone” there will be a “Delete” button.
In order to complete the delete request, you do need to confirm which binaries you would like to be deleted. You can easily delete all releases or pick by platform. The list of platforms shown is based on the binaries that are uploaded for that release.
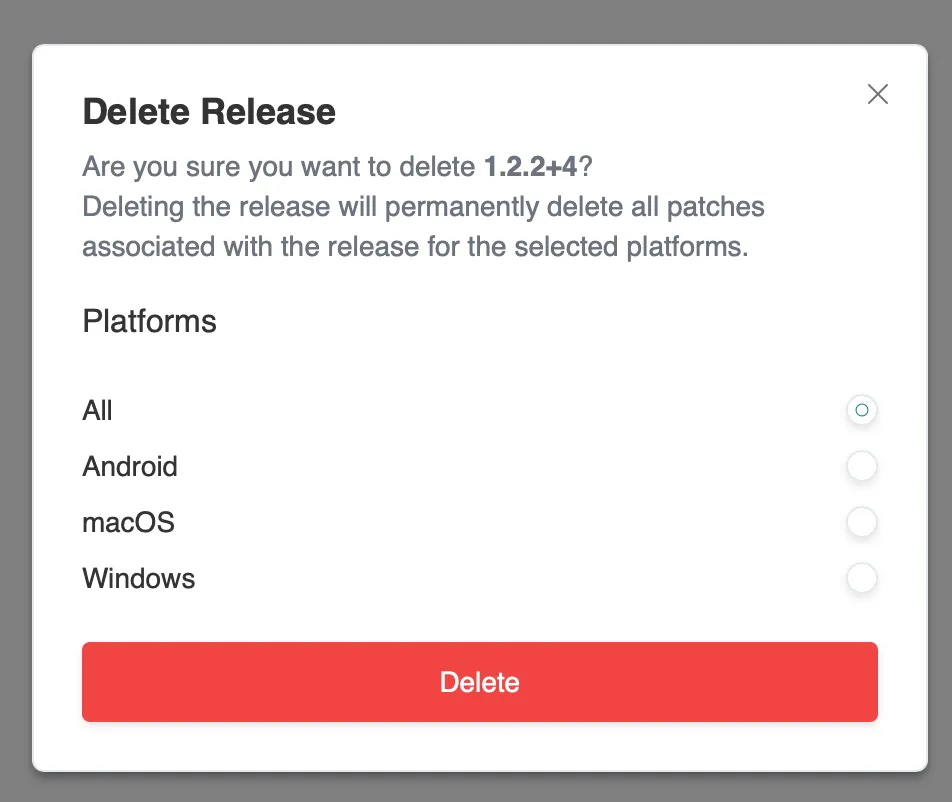
The deletion takes effect as soon as you confirm. See [Delete Apps, Releases, and Patches](/code-push/delete) for what is removed and for alternatives to deleting.
## Side-loading and MDM
A common question is: Does Shorebird require publishing to the App Store or Play Store?
No. Shorebird works fine with side-loading and mobile device management (MDM) on Android. No one has yet reported trying Shorebird with the iOS Developer Enterprise program, but it’s expected to work just as well.
To build Shorebird for distribution via APK (e.g., side-loading), use the `--artifact` flag with the `shorebird release` command. For example:
```
shorebird release android --artifact=apk
```
That will produce *both* .apk and .aab files. You can distribute either or both as needed.
## What’s next
[Create a Patch](/code-push/patch)Push over-the-air updates to your published release.
[Releasing for Android](/flutter-concepts/releasing-flutter-apps/android)Learn how to build, sign, and submit your release to the Google Play Store.
[Releasing for iOS](/flutter-concepts/releasing-flutter-apps/ios)Learn how to configure Xcode signing and submit your release to the Apple App Store.
[Releasing for Windows](/flutter-concepts/releasing-flutter-apps/windows)Package a Shorebird Windows release as an MSIX without rebuilding on stock Flutter.
# Roll back a Patch
> Learn how to roll back and roll forward patches in Shorebird.
If you discover that a live patch has a bug, Shorebird supports patch roll back. When a patch is rolled back, it is remotely uninstalled from end users’ devices and replaced by either the previous patch or the base release if no previous patch is available.
A rollback is not permanent. If you roll a patch back and then decide you want it after all, you can [roll it forward](#roll-a-patch-forward) to make it the active patch again.
Emergency Quick-Rollback
If a broken patch is live in production, roll it back immediately using one of these options:
* **Option A (CLI - Fastest)**: Run the following command in your terminal. It needs Shorebird 1.6.120 or newer. On an older CLI, use Option B, or run `shorebird upgrade` first:
```
shorebird patches rollback --release-version --patch-number
```
* **Option B (Console)**: Go to the [Shorebird Console](https://console.shorebird.dev/), select your release, click the three-dots icon on the patch row, and select **Rollback**.
Note
Roll back requires a minimum Flutter version of 3.27.4.
[Roll Back a Patch](https://app.arcade.software/share/GlHfzbxcicw61ux4NCHx)
## Active and superseded patches
When a device checks in, Shorebird serves the highest-numbered patch on that device’s track that has not been rolled back. The Console shows that patch as active.
Patches have no individual on/off switch. Publishing patch 3 outranks patch 2 without any action on patch 2:
* One patch is served per track at a time.
* Lower-numbered patches are superseded. Deactivating them changes nothing about what devices receive.
* Rolling back the active patch moves devices to the next-highest patch on the track that has not been rolled back, or to the base release.
To return users to patch 1 while patch 3 is live, roll back patch 3 and patch 2. Leave patch 1 alone.
Note
Rolling back a superseded patch has no immediate effect, since devices are not served it. It removes that patch from the set devices can fall back to later.
### Why the Console may still show old patches installing
Patch install events are reported the next time an app launches, which can be hours or days later. A patch that is no longer served can keep showing new install events during that window.
## How to roll back a patch
In the [Shorebird Console](https://console.shorebird.dev/), navigate to the release that contains the patch you want to roll back. On the right side of the patch row, click the “more” icon (three vertical dots) and select “Rollback”:
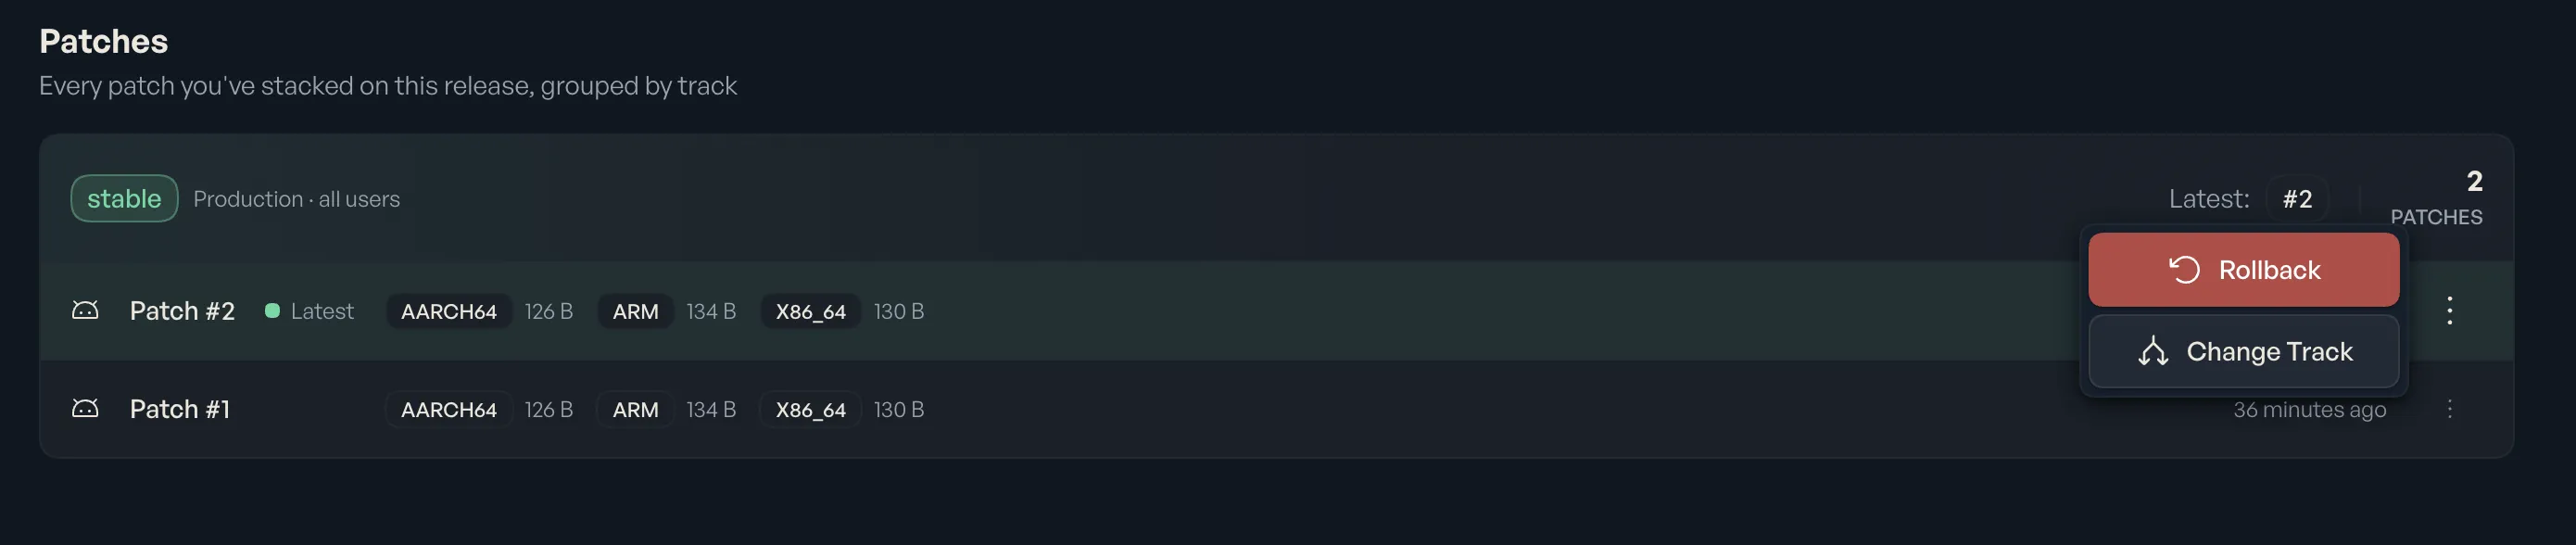
### Roll back from the CLI
As of Shorebird 1.6.120, you can also roll back a patch from the command line. Pass the release version and the patch number:
```
shorebird patches rollback --release-version 1.0.0+1 --patch-number 2
```
```
Patch 2 on release 1.0.0+1 has been rolled back.
ID: 42
Number: 2
Track: stable
Rolled back: yes
```
Shorebird reads the app ID from `shorebird.yaml` in the current directory. To run the command from anywhere else, such as a CI job, pass `--app-id`. If your app uses [flavors](/code-push/guides/flavors/android), pass `--flavor` to pick the right app ID.
If the patch is already rolled back, the command says so and exits successfully. Add `--require-change` to make it exit with an error instead, so a script can tell whether this run changed anything. Add the global `--json` flag for machine-readable output:
```
shorebird patches rollback --release-version 1.0.0+1 --patch-number 2 \
--require-change --json
```
## What happens when a patch is rolled back?
Imagine a release with two patches:

When a user downloads this release from the store, Shorebird will see that patch 2 is the latest available patch and download it.
If a problem is discovered with patch 2, it can be rolled back. The Console will look like this after a rollback:

Users who download the app from the store will now get patch 1 instead of patch 2. Users who already had patch 2 installed will be downgraded to patch 1.
### Under the hood
When a Shorebird app checks for new patches, the server includes in its response a list of rolled back patches. If the device has any rolled back patches installed, it deletes them and reverts to the last “good” patch, which will be visible the next time the app starts.
Note
If your app needs to download an older patch as part of a rollback, installing that patch will count against your monthly patch installs. If you have no remaining patch installs, the app will revert to the base release.
## Roll a patch forward
Rolling a patch forward is the opposite of rolling it back: it takes a patch you previously rolled back and makes it the active patch again. Use it when you roll back a patch and then determine it was not the cause of the problem, or when you have confirmed the patch is safe after all.
In the [Shorebird Console](https://console.shorebird.dev/), navigate to the release containing the rolled back patch. On the right side of the patch row, click the “more” icon (three vertical dots) and select “Roll Forward”:

Confirm the dialog to roll the patch forward.
The **Roll Forward** action only appears on a patch that is currently rolled back. On a patch that is not rolled back, the same menu offers “Rollback” instead.
### Roll forward from the CLI
`shorebird patches rollforward` takes the same arguments as [`shorebird patches rollback`](#roll-back-from-the-cli), including `--app-id`, `--flavor`, `--require-change`, and `--json`:
```
shorebird patches rollforward --release-version 1.0.0+1 --patch-number 2
```
```
Patch 2 on release 1.0.0+1 has been rolled forward.
ID: 42
Number: 2
Track: stable
Rolled back: no
```
If the patch isn’t rolled back, the command reports that it is already active and exits successfully, unless you pass `--require-change`.
### What happens when a patch is rolled forward?
The patch stops being reported as rolled back, so it becomes the active patch for its track again. Devices download it on their next update check and apply it the next time the app restarts, exactly as they would a newly published patch.
Note
Devices that were downgraded by the rollback have to download the patch again, and that counts against your monthly patch installs.
## Patch integrity and automatic rollback
Shorebird includes safety features to prevent needing to issue the manual rollback of a patch.
`shorebird patch` also generates a hash of your patch file which is stored separately from the patch and checked every time your patch is installed, or booted from on the user’s device.
Customers are also encouraged to use Shorebird’s [patch-signing feature](/code-push/guides/patch-signing) to cryptographically sign patch files. This uses the same cryptographic algorithms used in the Google and Apple app stores. When enabled, your [public key](https://en.wikipedia.org/wiki/Public-key_cryptography) is included in your app bundle and a patch’s signature is checked on every install and boot to ensure your app can never accept a patch file not signed by your secret key.
Finally Shorebird’s [updater](https://github.com/shorebirdtech/updater) includes automatic on-device rollback. If for any reason a patch’s hash or signature does not match, the patch is discarded. If a patch fails to load into the Dart runtime, the device marks it “bad” and never tries to boot it again. That launch runs your release’s original code. If automatic updates are on, the device also checks for a newer patch. With `auto_update: false` in `shorebird.yaml`, the check happens when your app calls the updater. Later launches boot the newer patch once it has downloaded. Until then, they boot the previous working patch still on the device, or your release’s original code if there isn’t one.
The previous patch file is always kept on disk until at least one successful boot is made of the next patch, after which a patch file is automatically cleaned up from the user’s device to minimize disk usage.
All code which implements these integrity measures is of course open source and available for review on [GitHub](https://github.com/shorebirdtech/). An overview of Shorebird’s code locations is available under [System Architecture](/code-push/system-architecture).
## Related
[Patch Signing](/code-push/guides/patch-signing)Cryptographically sign your patches for added security.
[Security Policies](https://handbook.shorebird.dev/security/)Shorebird's public security policies and compliance.
[System Architecture](/code-push/system-architecture)Overview of Shorebird's components and source code.
# System Architecture
> How Shorebird works.
Shorebird is a set of tools that allow you to build and deploy new versions of your Flutter app directly to your users’ devices.
This document exists to explain how Shorebird works and to provide a high-level overview of the components that make up the Shorebird system.
## Data flow diagram
```
flowchart TD
DEV["Developer machine\n(source code never leaves)"]
CLI["Shorebird CLI"]
APP_STORES["App/Play Stores"]
DEV --> CLI
subgraph CLOUD ["Shorebird Cloud (GCP)"]
API["API server\napi.shorebird.dev"]
CONSOLE["Console\nconsole.shorebird.dev"]
DB["AlloyDB\n(encrypted, not public)"]
API <--> DB
subgraph GCS ["Google Cloud Storage"]
PRIV["Private release bucket\nstorage.googleapis.com"]
end
end
subgraph CF ["Cloudflare"]
CDN["Public patch CDN\ncdn.shorebird.cloud"]
end
subgraph DEVICE ["End-user device"]
APP["Customer app\n(Shorebird updater embedded)"]
end
CLI -. "app_id, metadata (HTTPS)" .-> API
API -. "signed upload URL" .-> CLI
CLI -- "release binary upload (direct)" --> PRIV
CONSOLE -- "uses" --> API
CLI -- "create binary for upload" --> APP_STORES
APP -. "patch check (HTTPS)" .-> API
API -. "download URL" .-> APP
APP -- "patch diff download" --> CDN
```
## How Shorebird Code Push works
When you make a Shorebird “release”, that’s just using `flutter build` under the covers, the only change being that it’s also including the Shorebird updater library (with small modifications to the Flutter Engine) inside your application. These changes make it possible for your app to request “patches” when running and thus replace its Dart code with new Dart code.
A Shorebird “patch” essentially replaces all of the Dart code in your app.
On Android, Windows, Mac, and Linux, this is very straightforward: a Shorebird patch simply provides a new compiled version of your Dart code to run inside the Dart virtual machine.
iOS is more complicated. Patching works the same way at a high level (a “patch” is simply replacing *all* of the Dart code in your app), but the implementation is very different than on other platforms. Apple has policy and technical restrictions about the mechanism through which iOS applications are allowed to update. Shorebird is designed to comply with those restrictions through use of a novel Dart interpreter.
On iOS, instead of compiling to the normal machine code, Shorebird compiles to a modified format that can be then interpreted on device. Because interpreters are slower than running compiled code directly on a CPU, Shorebird has also built additional systems to minimize the use of the interpreter.
Even if you were to replace all of your app code via a patch (don’t do that, it would be deceptive to users and against Shorebird and store policies), the vast majority (e.g. 80%) of your patched Dart code would still be expected to run using the existing compiled and signed Dart code in your store-distributed application. This is because the vast majority of a typical Flutter application is actually Flutter Framework code rather than application code.
Shorebird has made two major changes to Dart to facilitate patching well on iOS including:
* Modifying the Dart compiler not just convert “source” -> “new compiled output”, but to also take a second parameter “previous compiled output” and make “new compiled output” maximally similar to the previous
* Creating a new “linker” for Dart which is able to look at two separate Dart programs “previous” and “new” and decide which code can be used out of “previous” when executing “new” at a per-function level.
These two changes combined make it so that you should expect almost all (typically 98% or higher with occasional outliers) of the patched code to run out of the “previous” binary included in the IPA, and thus run full-speed on the CPU.
See also articles on the Shorebird blog explaining [How Code Push Works](https://shorebird.dev/blog/how-we-built-code-push/).
## Lifetime of a Shorebird Update
This assumes the developer already has installed Shorebird and has a working Flutter project, as covered in the [Getting Started](/) guide.
`shorebird init` tells Shorebird servers to create a new “App” entry associated with your account as well as writes the resulting app\_id to `shorebird.yaml` in your project.
`shorebird release` builds your app using `flutter build` and then uploads the resulting binary to a private Google Cloud Storage bucket. The command also creates a “release” record in Shorebird’s database that associates the app\_id with the release version.
`shorebird preview` can be used to download and run any of these privately stored release binaries on your local device.
Developers then typically take the resulting .aab or .ipa and distribute it to their users, typically via the Play Store or App Store.
At some point later, developers use `shorebird patch` to build a new version of their app. `shorebird patch` then downloads the previous release binary associated with that app\_id and version number (patches use the same version number as the release they are patching) and then builds a “patch diff” from the combined release and patch binaries. This “patch diff” is then uploaded to a public Google Cloud Storage bucket where it will be served to devices requesting an update with the corresponding app\_id and release version.
`shorebird patch` also creates a record in Shorebird’s database that associates the patch with the app\_id and release version and alerts Shorebird’s “patch check” servers that a new patch is available. Patches can optionally be “staged” when uploaded. They will then not appear in patch checks until the patch “channel” is set to “stable” by the developer in the Shorebird Console.
Release binaries which were built with Shorebird contain Shorebird’s updater library. By default, the updater library will check for patches every time the app is started. This is done via a background thread to not slow down launch. The updater code makes a single request to Shorebird’s “patch check” servers, which are also Google Cloud Run instances. The “patch check” servers respond with the URL of the patch diff if one is available.
A typical patch check is made via https, and contains:
```
{
"app_id": "uuid...",
"channel": "stable",
"release_version": "1.0.0",
"patch_number": 1,
"platform": "android",
"arch": "arm64-v8a"
}
```
A patch response contains:
```
{
"patch_available": true,
"patch": {
"number": 1,
"hash": "sha256...",
"download_url": "google cloud storage url"
}
}
```
The code to do these checks is open source as part of the [Shorebird Updater library](https://github.com/shorebirdtech/updater/blob/main/library) and may change from what is documented above:
The updater library then downloads the patch diff and applies it to the release binary. The patch diff is a binary diff. The updater library also checks the hash of the patch diff to confirm download integrity.
The hash is not meant to be a security feature, but rather a way to detect errors in the patch diff. A common error is developers running `shorebird release` with one source and then actually building and releasing a different binary, resulting in invalid patches. This hash helps detect such errors. For added security, there’s also a way for you to [sign your patches](/code-push/guides/patch-signing/) if needed as per your security requirements.
The modified Flutter engine also reports successful or failed launch of a patch back to Shorebird’s servers the next time it makes a patch check.
A patch event contains:
```
{
"app_id": "uuid...",
"arch": "arm64-v8a",
"platform": "android",
"type": "PatchInstallSuccess",
"release_version": "1.0.0",
"patch_number": 1
}
```
These events are used to display patch install analytics in the Shorebird Console.
If a patch fails to launch after install, in addition to sending a “PatchInstallFailure” event, the updater library will also mark that patch number as “bad” locally and refuse to boot the app with that patch number again. This is to prevent a bad patch from causing a crash loop on the device.
## Shorebird components and source code
Shorebird consists of 3 major parts:
1. The `Shorebird CLI` tool that you use to build and deploy your app from the command line.
2. A modified Flutter engine that is include in your app.
3. Shorebird’s public-cloud infrastructure which hosts your app’s updates.
### The `Shorebird CLI`
The [`shorebird_cli`](https://github.com/shorebirdtech/shorebird/tree/main/packages/shorebird_cli) commands are documented on this site. Most of the build logic is just wrapping the `flutter` tool and it also adds a few commands to interface with Shorebird’s servers.
### Flutter modifications
Code Push requires technical changes to the underlying Flutter engine. To make those changes required forking Flutter.
Shorebird had to fork 4 Flutter and Dart repositories to make Code Push work:
#### `flutter/buildroot` “the buildroot”
The [`flutter/buildroot`](https://github.com/flutter/buildroot) repo contains the build scripts that are used to build the Flutter engine for various platforms. It’s separate from `flutter/engine` in order to share code and configuration with the Fuchsia build system.
This repository was forked to make several small modifications:
1. Expose Shorebird’s updater symbols from the Flutter engine up to `package:shorebird_code_push`
2. Include `libunwind` since the [Shorebird Updater](https://github.com/shorebirdtech/updater) (Rust) code requires it for backtraces.
The [Shorebird Updater](https://github.com/shorebirdtech/updater) is a Rust library which is linked into the Flutter engine via a static library (`libupdater.a`) that exposes a C API.
Because the default Flutter engine linking flags hide all symbols from linked static libraries, and because the `shorebird\_\*` symbols from `libupdater.a` need to be exposed to the Dart code, one change was made to `buildroot` and a second to the `engine` to place the symbols on the allow-list.
Note
You can see Shorebird’s buildroot changes on GitHub by comparing its trunk to the upstream buildroot, e.g. master: [https://github.com/flutter/buildroot/compare/master…shorebirdtech:buildroot:shorebird/dev](https://github.com/flutter/buildroot/compare/master...shorebirdtech:buildroot:shorebird/dev)
#### `flutter/engine` “the Flutter engine”
The [`flutter/engine`](https://github.com/flutter/engine/) repo contains C++ code that runs on the device. It is responsible for rendering the UI, handling input, and communicating with the host.
This code was forked to add the [Shorebird Updater](https://github.com/shorebirdtech/updater), which lets the Flutter engine load new code from Shorebird’s servers.
Note
Shorebird’s Flutter Engine fork is public. You can see the engine changes on GitHub by comparing Shorebird’s trunk to the upstream Flutter engine, e.g. for 3.22.0: [https://github.com/flutter/engine/compare/3.22.0…shorebirdtech:engine:shorebird/dev](https://github.com/flutter/engine/compare/3.22.0...shorebirdtech:engine:shorebird/dev)
#### `flutter/flutter` “the Flutter framework”
The [`flutter/flutter`](https://github.com/flutter/flutter/) repo contains the Dart code that runs on the device as well as the `flutter` tool that is used to build and run Flutter apps.
This code was forked to be able to deliver Shorebird’s modified Flutter engine, changing the version of the engine that the `flutter` tool uses, and to include the `shorebird.yaml` configuration as part of the asset bundle.
Note
Shorebird’s Flutter Framework fork is public. You can see the engine changes on GitHub by comparing Shorebird’s trunk to the upstream Flutter Framework, e.g. for stable: [https://github.com/flutter/flutter/compare/stable…shorebirdtech:flutter:shorebird/dev](https://github.com/flutter/flutter/compare/stable...shorebirdtech:flutter:shorebird/dev)
#### `dart-lang/sdk` “the Dart SDK”
The [`dart-lang/sdk`](https://github.com/dart-lang/sdk/) repo contains the Dart SDK, including the VM, dart2js, core libraries, and more.
This code was forked in order to teach Dart how to run modified (patched) code in an interpreter while being able to run all unmodified code on the CPU.
Note
Shorebird’s Dart SDK fork is private currently. It will likely be public in the future, and there are plans to upstream many changes as the team grows and the product matures.
#### Installing a forked Flutter
When you install Shorebird, it installs Flutter and Dart from Shorebird’s fork. These are currently not exposed on the user’s path, rather private copies that Shorebird will use when building your app.
This was necessary to avoid conflicts with other Flutter installations on the user’s machine. Specifically, the way that Flutter downloads artifacts is based on the version of the engine. If Shorebird were to use the same version of the engine as the user’s Flutter installation, it would overwrite the user’s engine artifacts.
Shorebird delivers its artifacts to this fork of Flutter in two ways: first, by changing the version of the engine in the `flutter` tool, and second, by passing `FLUTTER_STORAGE_BASE_URL` set to `download.shorebird.dev` (instead of `download.flutter.io`) when calling its vended copy of the `flutter` tool.
Currently this means `shorebird` will not work in an environment where the user needs to use `FLUTTER_STORAGE_BASE_URL` to download Flutter artifacts from a private mirror (e.g. a corporate network or China).
#### Serving forked binaries
A custom server is also used to handle requests from `flutter` for the modified engine. The source for that server is here:
The artifact proxy is hosted at via Google Cloud Run.
This proxy knows how to serve the modified binaries from Shorebird’s Google Storage bucket, as well as how to forward along requests to Google’s Flutter storage bucket for unmodified binaries for all parts of Flutter that didn’t need to be modified.
### Shorebird’s cloud infrastructure
Shorebird’s public-cloud based infrastructure is responsible for hosting your app’s updates. It’s a set of services that handle the following:
* Release binary (private) storage
* Patch binary (public) storage and serving (via global CDN)
* Patch check requests (via Google Cloud Run)
Shorebird also provides a web-based console for developers to manage their apps and view analytics, as well as the underlying database that powers the patch checks and console.
The majority of Shorebird’s infrastructure is hosted on Google Cloud Platform, although it will likely expand to other cloud providers over time. For a full list of providers see the [privacy policy](https://shorebird.dev/privacy/). All of these services are currently set to use US regions by default.
# Tracks
> Use tracks to control which devices receive a patch, enabling staged rollouts and internal testing workflows.
**Tracks** are named deployment channels that control which devices receive a patch. Every Shorebird app has a built-in `stable` track, which is the default channel that all devices subscribe to. You can create additional tracks on the fly, simply by naming them when publishing a patch. No configuration or registration is needed; a track is created the first time you publish to it. To create, list, or delete tracks yourself, see [Managing tracks from the CLI](#managing-tracks-from-the-cli).
Note
The CLI calls tracks **channels** in some places, such as the `shorebird channels` commands. Track and channel mean the same thing.
## How tracks work
When your app starts up, the Shorebird updater asks the server: *“Is there a new patch on the **stable** track for this release version?”* If you have integrated `package:shorebird_code_push`, your app can instead ask for patches on a different named track. This makes it possible to route specific devices (e.g., your QA team’s phones) to a `beta` or `staging` patch without affecting production users.
```
flowchart LR
A["patch --track=staging"] --> B{"Validate"}
B -- "Issues" --> A
B -- "OK" --> C["Promote to stable"]
C --> D["All devices update"]
```
## Built-in vs. custom tracks
| Track | Description |
| ---------- | ----------------------------------------------------------------------------------------------------------- |
| `stable` | The default track. All devices receive patches from this track unless they explicitly subscribe to another. |
| `staging` | Commonly used for internal / CI validation before promoting to production. |
| `beta` | Commonly used for wider pre-production testing (e.g., QA teams, opt-in testers). |
| *Any name* | Custom tracks are created on demand, or with `shorebird channels create`. |
Note
Track names are arbitrary strings. `shorebird channels create` and `shorebird patches set-track` accept names of up to 128 characters. Use whatever naming convention makes sense for your team. `stable`, `beta`, and `staging` are built-in names, so those tracks can’t be deleted.
## Publishing a patch to a track
[Pushing a patch to staging track](https://app.arcade.software/share/n22dgnzUR0qwvjNciQ2i)
Pass the `--track` flag to any `shorebird patch` command. If you omit the flag, the patch is published to `stable` by default.
* Android
Android
```
shorebird patch android --track=staging
```
* iOS
iOS
```
shorebird patch ios --track=staging
```
* macOS
macOS
```
shorebird patch macos --track=staging
```
You can use any custom track name:
```
shorebird patch android --track=beta
shorebird patch android --track=qa-team
```
## Previewing a patch on a specific track
Use `shorebird preview` with the `--track` flag to run your app locally against a specific track’s patches:
```
shorebird preview \
--app-id \
--release-version 1.0.0+1 \
--track staging
```
This downloads the release and runs it on a connected device or emulator, applying the latest patch available on the specified track.
## Promoting a patch between tracks
Once you’ve validated a patch on a staging track, you can promote it to `stable` without rebuilding. This pushes the patch to all production users.
Note
The Shorebird console and the `shorebird patches promote` command only promote a patch to `stable`. To move a patch to a different custom track, use `shorebird patches set-track` from the CLI.
### Via the Shorebird console
Navigate to the release details page, click the **⋮** context menu next to the patch, choose **Change Track**, and select `stable` in the dialog that appears.
### Via the CLI
Promote a patch directly to `stable`:
```
shorebird patches promote \
--release-version 1.0.0+1 \
--patch-number 1
```
To move a patch to any other track by name, use `set-track`:
```
shorebird patches set-track \
--release 1.0.0+1 \
--patch 1 \
--track beta
```
## Subscribing a device to a track
By default, devices always subscribe to the `stable` track. To have a device check a different track, you must:
1. Add [`package:shorebird_code_push`](https://pub.dev/packages/shorebird_code_push) to your app.
2. Set `auto_update: false` in your `shorebird.yaml` to disable the default background updater.
3. Call the updater manually with a `track` argument.
shorebird.yaml
```
app_id: your-app-id-here
auto_update: false
```
```
import 'package:shorebird_code_push/shorebird_code_push.dart';
final updater = ShorebirdUpdater();
// Subscribe this device to the beta track
await updater.update(track: UpdateTrack.beta);
// Or use a custom track name
await updater.update(track: UpdateTrack.custom('qa-team'));
```
Tip
`UpdateTrack.stable` and `UpdateTrack.beta` are convenience constants. For any other track name, use `UpdateTrack.custom('your-track-name')`.
## Listing patches by track
To see all patches for a release, including their track assignment, run:
```
shorebird patches list --release-version 1.0.0+1
```
The output shows each patch number, its active status, and the track it is currently assigned to.
## Managing tracks from the CLI
As of Shorebird 1.6.121, the `shorebird channels` commands list, create, and delete an app’s tracks. Like other app commands, they read the app ID from `shorebird.yaml` in the current directory. Pass `--app-id` to run them from anywhere else, or `--flavor` to pick a flavor’s app ID. All of them support the global `--json` flag.
### List tracks
```
shorebird channels list
```
```
1 stable
2 beta
```
Each line shows the track’s ID and name.
### Create a track
```
shorebird channels create --name qa
```
You don’t need to create a track before publishing to it, since `shorebird patch --track=` creates it for you. Use `channels create` when you want the track to exist before its first patch. The command fails if a track with that name already exists.
### Delete a track
Devices on a deleted track stop receiving patches. There’s no confirmation prompt. Instead, you confirm by repeating the track’s name with `--confirm-name`, which works the same in a terminal and in CI:
```
shorebird channels delete --name qa --confirm-name qa
```
The built-in `stable`, `beta`, and `staging` tracks can’t be deleted.
## Common patterns
[Staging Patches](/code-push/guides/staging-patches)Walk through the full workflow of publishing to staging, previewing, and promoting to production.
[Testing Patches with a Subset of Users](/code-push/guides/testing-patches)Route specific devices (e.g. your QA team) to a beta track using account-based logic or a hidden UI.
[Percentage-Based Rollouts](/code-push/guides/percentage-based-rollouts)Gradually roll out patches to an increasing percentage of users using tracks and a cloud key-value store.
## Frequently asked questions
### How are Shorebird tracks different from Google Play testing tracks or Apple TestFlight?
Google Play testing tracks (internal, alpha, closed testing, production) and Apple TestFlight are **app distribution** mechanisms that control which users can install a given version of your app from the store. Shorebird tracks are a **patch distribution** mechanism that controls which running devices receive a Dart code update.
Shorebird has no built-in awareness of which Play track or TestFlight group a device is in. However, you can detect the install mechanism at runtime and use that signal to subscribe the device to the appropriate Shorebird track. See [Testing Patches](/code-push/guides/testing-patches#option-3-control-shorebird-track-based-on-how-the-app-was-installed) for more details.
### Does rolling back a patch on one track affect other tracks?
No. Tracks are independent. Rolling back or disabling a patch on `staging` has no effect on patches on the `stable` track, and vice versa.
### Can a device be on multiple tracks at the same time?
No. A device subscribes to exactly one track per update check. If your app logic changes the track dynamically (e.g., the user opts into a beta program), it will request patches from the new track on its next update check.
### What happens if there is no patch on the requested track?
If no patch is available on the requested track for the current release version, the device continues to run the base release (or the last successfully applied patch). It does **not** fall back to the `stable` track automatically.
### Can you promote a patch to a track other than stable?
Using `shorebird patches set-track` from the CLI, you can assign a patch to any track:
```
shorebird patches set-track \
--release 1.0.0+1 \
--patch 1 \
--track beta
```
The Shorebird console and `shorebird patches promote` only target `stable`. Use `set-track` from the CLI when you need to move a patch to a different track.
# Troubleshooting
> Troubleshooting for Code Push
This page covers the most common issues with Shorebird Code Push. Still stuck? Reach out on [Discord](https://discord.gg/shorebird) or [file an issue](https://github.com/shorebirdtech/shorebird/issues). The Shorebird team is happy to help.
## Patch not showing up
Your first step in debugging should be to check your app’s logs. Instructions for this can be found at .
You should see logs prefixed with `[shorebird]`. If you do not see `[shorebird]` in your logs, the app you are running was not built using `shorebird release` and cannot receive patches. You will need to redistribute your app using a binary created by `shorebird release`.
If you do see Shorebird in your logs, you’ll want to look for a line that includes the patch check request being made. It looks like:
```
Sending patch check request: PatchCheckRequest {
app_id: "",
channel: "stable",
release_version: "1.0.3+16", <-- this is the release version
patch_number: ,
platform: "android",
arch: "aarch64"
}
```
If the release version is the version you expect to see, check the [Shorebird Console](https://console.shorebird.dev) to ensure that this release exists for the given app ID and that it has a patch. Please reach out on Discord if such a patch exists and is not being applied.
Common issues:
**The app is running in Debug or Profile mode.**
Shorebird updates are only compiled into and active in **Release builds** of your application. When you run your app in Debug or Profile mode (e.g., via `flutter run`), the Shorebird updater is completely disabled, and standard Flutter JIT or AOT engines are used. Ensure you test updates using a release build (e.g., generated via `shorebird release` or tested via `shorebird preview`).
**You are testing on an iOS Simulator.**
Shorebird patches are not supported on iOS Simulators. Shorebird’s iOS engine uses a custom interpreter designed specifically for physical arm64 iOS devices to comply with Apple’s security sandbox. Because of this, Shorebird updates cannot run on iOS Simulators (which run on x86*64 or arm64 macOS JIT/interpreter architectures). You must use a physical iOS device to test iOS patches. Android emulators \_are* fully supported.
**The patch was created for a different release version than the one running on your device/emulator.**
Patches are only compatible with the release version they were created for. If you create a patch for version `1.0.0+1`, it will not work on version `1.0.0+2`.
Note
This can happen unexpectedly on iOS due to Xcode’s automatic incrementing of build numbers. If you are seeing this issue on iOS, ensure that the build number of the release and the patch match. See [the iOS releasing guide](/flutter-concepts/releasing-flutter-apps/ios/) for instructions on how to disable automatic build number incrementing.
**How to tell if this is the problem**
You will see `Shorebird updater: no active patch` in your device logs.
**How to fix it**
Ensure that the version of your app on your device/emulator matches the version of the release you patched. You can see what release version your app is running by looking in the device logs for a patch check request:
```
Sending patch check request: PatchCheckRequest {
app_id: "",
channel: "stable",
release_version: "1.0.3+16", <-- this is the release version
patch_number: ,
platform: "android",
arch: "aarch64"
}
```
Only patches created for this release version will be compatible with your app.
**The app’s process is still running because of a foreground service.**
If the app runs a foreground service or other long-running background work, swiping it from the recent-apps list does not kill the process. Shorebird loads the patch on the next process start.
**How to tell if this is the problem**
The process ID does not change when you swipe the app away. Run `adb shell pidof ` before and after swiping: if it prints the same PID both times, the process never died and no patch will be applied.
From Dart, the equivalent signal is `checkForUpdate()` returning `UpdateStatus.restartRequired`, or `readNextPatch()` reporting a higher patch number than `readCurrentPatch()`.
**How to fix it**
Force-stop the app, or stop the service first, then relaunch. See [How do you use Shorebird with a long-running Android background process?](/code-push/faq/#how-do-you-use-shorebird-with-a-long-running-android-background-process).
## `Your app contains asset changes` warning when creating a patch
The `shorebird patch` command will print a warning if it detects changes to files in your compiled app that correspond to asset changes (e.g., added or removed images, fonts, etc.). This does not always mean that your patch will not work, but Shorebird cannot be sure that the changes are safe.
Shorebird does not (yet) have the [ability to patch assets](https://github.com/shorebirdtech/shorebird/issues/318) but intends to add such in the future, at which time this warning may go away.
An example of this warning:
```
✓ Verifying patch can be applied to release (4.0s)
[WARN] The release artifact contains asset changes, which will not be included in the patch.
Added files:
base/assets/flutter_assets/assets/images/bg_button_disable.png
Changed files:
base/assets/flutter_assets/AssetManifest.bin
base/assets/flutter_assets/AssetManifest.json
base/assets/flutter_assets/fonts/MaterialIcons-Regular.otf
Continue anyway? (y/N)
```
So what does this mean? In this case, it means you added a new image to your app. The warning is because your patched Dart code could *depend* on those new assets which will not be present when the patch is applied in the wild. It can be safe to ignore this kind of warning if you’re removing an asset that is not used by your code, or your Dart code knows how to handle the asset being missing.
Also included in the above changes are the `AssetManifest` files. These files change any time you add or remove an asset from your app, and are generally a symptom rather than the cause of the warning.
The final file changed above is the `MaterialIcons-Regular.otf` font file, which can happen if your app uses more or fewer icons from the Dart code. Flutter will automatically “tree shake” your fonts, so if you don’t use an icon in your Dart code, it will not be included in the final app. You can disable this behavior with `--no-tree-shake-icons` at the risk of increasing your app size. This type of warning will also go away once [asset patching](https://github.com/shorebirdtech/shorebird/issues/318) is added.
A type of change not shown above is one which changes .dex files on Android or the `Runner.app` directory on iOS. These changes represent changes to the native code of your app, and are not patchable by Shorebird. If you see this warning, you should be very careful about publishing your patch, as it may cause your app to crash when the Dart code tries to call into native code which operates differently than expected.
**What happens if you ignore this warning?**
You can bypass this warning by passing the `--allow-asset-diffs` flag to the `shorebird patch` command.
The consequences of ignoring this warning depend on the changes that were made. In the tree-shaking example above, if you ignore the warning, your app will render incorrectly if you use an icon that was not included in the release build. Any assets introduced in a patch will fail to load, and your app may crash if it depends on them.
If you are not sure whether your change is safe, you can [stage your patch](/code-push/guides/staging-patches) and test locally before deploying it to users.
## `Your app contains native changes` warning when creating a patch, even though you haven’t changed Swift/Objective-C/Kotlin/Java code
The `shorebird patch` command will print a warning if it detects changes to files in your compiled app that correspond to native code changes (`.dex` files on Android, files in the `Runner.app` directory on iOS). This does not always mean that your patch will not work, but because Shorebird cannot be sure that the changes are safe, and because Shorebird can’t patch non-Dart code, it prints a warning.
Note
Shorebird assumes a repeatable build — if you build the application twice it ends up byte-for-byte identical (with a few minor known exceptions, like the certificate signing date for iOS apps). Some Flutter Plugins or obfuscation solutions violate this assumption and can cause these native changes to appear. Shorebird may be incompatible with those plugins. You can test for this by doing a `shorebird release` and then `shorebird patch` with no changes and seeing if you still get a native changes warning. If you believe this is the case, please reach out; the Shorebird team is happy to help.
This can be caused by a number of things. The most common causes are:
1. A dependency/plugin you are using has changed its native code. **You should use caution when publishing patches that include changes to native code from plugins. In the worst case, these changes may cause your patched app to crash.**
Tip
Add your `pubspec.lock` file to version control so you’re always aware of updates to your dependencies.
Versioning your `pubspec.lock` file ensures changes to transitive dependencies are explicit. Each time the dependencies change due to `dart pub upgrade` or a change in `pubspec.yaml`, the difference will be apparent in the lock file.
2. A dependency/plugin produces a different output on every build. This can happen if the dependency includes a timestamp indicating when it was built, for example. This kind of change is usually safe to publish, but you should be sure this is the only reason you are seeing this warning.
3. (iOS only) The release was built with a different version of Xcode than the patch. This can be fixed by ensuring that you are using the same version of Xcode to build the release and the patch. If you have upgraded to a newer version of Xcode since building the release, you can download older versions of Xcode from [Apple’s developer downloads page](https://developer.apple.com/download/all/).
4. (iOS only) You are building with an old version of Xcode. Specifically, this warning has been seen when building with Xcode 14.1. If you are using a version of Xcode that is not the latest, try upgrading to the latest version.
5. The version and build number of the patch do not match that of the release. For example, if the release was built with version `1.0.0+1`, but the patch was generated with version `1.0.0+2`, you might see this warning. Shorebird has implemented some safeguards to make this less likely, but it is worth verifying if you are seeing this warning and you do not know why.
**What happens if you ignore this warning?**
Danger
If the changes are to native code that interacts with your Flutter app or with Flutter itself, **your app will crash**.
If the native code that changed does not interact with your Dart code or Flutter at all, the patch should run without issue.
If you are not sure whether your change is safe, you can [stage your patch](/code-push/guides/staging-patches) and test locally before deploying it to users.
If you are sure the changes are safe, you can bypass this warning by passing the `--allow-native-diffs` flag to the `shorebird patch` command.
## Shorebird fails to install
This can happen on Windows due to Windows’ limit of 260 characters for a filename.
You can fix this by running:
```
git config --system core.longpaths true
```
You may need to run this as an administrator, and you will need to restart your terminal after running this command.
## Can’t run your app in VS Code
If you see error output like the following when using the Run or Debug button in VS Code:
```
FAILURE: Build failed with an exception.
* What went wrong:
Execution failed for task ':app:checkDebugAarMetadata'.
> Could not resolve all files for configuration ':app:debugRuntimeClasspath'.
> Could not find io.flutter:arm64_v8a_debug:1.0.0-4a5e8142f3e7368a48e4f6151cb7b1a684d6dd83.
Searched in the following locations:
```
It’s possible that VS Code is incorrectly using Shorebird’s version of Flutter instead of the Flutter on your path (see ). You can fix this by explicitly providing VS Code with the path to your Flutter installation. In your `settings.json` file, add the line:
```
"dart.flutterSdkPath": "/path/to/flutter"
```
Where “/path/to/flutter” is the path to your Flutter installation. You can get this by running `which flutter` in your terminal (or `where.exe flutter` on Windows) and removing the `/bin/flutter` from the end of that path.
## Could not find an option named “dart define”
This typically happens on Windows when using the `--` separator. PowerShell handles the `--` separator differently than other shells (see [this StackOverflow answer](https://stackoverflow.com/a/15788023) for more info). To work around this, you can quote the `--` separator. For example:
```
shorebird release android '--' --dart-define=foo=bar
```
## Xcode project `overrides FLUTTER_ build setting(s)` warning
`shorebird doctor` and `shorebird init`, and `shorebird release` and `shorebird patch` for iOS, print this warning when your Xcode project hard-codes a Flutter build setting:
```
ios/Runner.xcodeproj/project.pbxproj overrides FLUTTER_ build setting(s): FLUTTER_ROOT. FLUTTER_* variables are set by Flutter (at runtime or via ios/Flutter/Generated.xcconfig) and should not be hard-coded in the Xcode project.
```
Flutter sets `FLUTTER_*` build settings itself, in `ios/Flutter/Generated.xcconfig`. A value hard-coded in the Xcode project takes priority over that file. For example, a `FLUTTER_ROOT` that points at your own Flutter install can make Xcode build part of your app with a different Flutter than Shorebird’s, which can cause build failures.
To fix it, remove each setting the warning names:
1. Open `ios/Runner.xcworkspace` in Xcode.
2. Select the **Runner** project, then the **Build Settings** tab.
3. Search for `FLUTTER_`.
4. Select each setting the warning lists and press **Delete**. Check every target and build configuration.
`FLUTTER_TARGET` is allowed and never triggers the warning, since projects commonly set it to a flavor’s entry point, such as `lib/main_dev.dart`.
For a Flutter module used with add-to-app, the check looks at `.ios/Runner.xcodeproj` instead.
## Your iOS build number is auto incrementing
This is likely because you are providing an ExportOptions.plist file that sets `manageAppVersionAndBuildNumber` to true. This is incompatible with Shorebird because Shorebird requires that you maintain control over your app’s version and build numbers in order to target patches at specific releases. You can fix this problem by either setting `manageAppVersionAndBuildNumber` to false or removing the value from your ExportOptions.plist file.
## Invalid Podfile file
You might see this error message if the `FLUTTER_ROOT` definition in your project’s `ios/Flutter/Generated.xcconfig` points to a Shorebird Flutter installation. This can be fixed by running any of:
1. `flutter clean`, or
2. `flutter build ios` in your project’s root directory, or
3. `flutter run` in your project’s root directory and targeting an iOS simulator/device.
## Unsupported class file major version 65
The error `Unsupported class file major version 65` (or 66—the number varies sometimes) happens when gradle is being executed with an incompatible Java version.
You can check the specific Gradle version that your app is using by running `shorebird doctor -v` inside the project folder. This command will also print the Java version that Shorebird is using.
Refer to the [official Gradle documentation](https://docs.gradle.org/current/userguide/compatibility.html) to check which Java version works with which Gradle release.
Shorebird looks for Java in this order, and uses the first one it finds:
1. The `jdk-dir` Flutter setting, if you’ve set one.
2. The JDK bundled with Android Studio.
3. The `JAVA_HOME` environment variable.
4. The `java` on your `PATH`.
`shorebird doctor -v` prints the Java path it picked. Because Android Studio’s JDK comes before `JAVA_HOME`, setting `JAVA_HOME` has no effect on a machine with Android Studio installed. To use a different JDK there, set `jdk-dir`:
```
shorebird flutter config --jdk-dir=/path/to/jdk
```
`shorebird flutter config` passes its arguments to Shorebird’s copy of `flutter config`. Flutter stores `jdk-dir` in your user settings, not in the SDK, so it also changes the JDK used by any other Flutter install on your account. To go back to automatic detection, run `shorebird flutter config --jdk-dir=`.
* [Android Studio](https://developer.android.com/studio) comes with a bundled JDK which should be auto-detected by Shorebird and might be the easiest way of solving the issue.
* If in a GitHub Action, the [setup-java](https://github.com/actions/setup-java) action can help.
* Or install the required Java version for your project’s Gradle release and point `jdk-dir` at it, or `JAVA_HOME` if Android Studio isn’t installed.
## Android build fails with “lower than Flutter’s minimum supported version”
Starting with Flutter 3.47, Android builds fail if your project uses a Gradle, Android Gradle Plugin (AGP), or Kotlin version older than Flutter’s minimum:
| Dependency | Minimum version |
| --------------------- | --------------- |
| Gradle | 8.14 |
| Android Gradle Plugin | 8.11.1 |
| Kotlin | 2.2.20 |
Earlier Flutter versions only printed a warning for these versions. Java 17 remains the minimum Java version, unchanged. The error names the dependency that is too old:
```
Error: Your project's Gradle version (8.12.0) is lower than Flutter's minimum supported version of 8.14.0. Please upgrade your Gradle version.
Alternatively, use the flag "--android-skip-build-dependency-validation" to bypass this check.
```
The error also includes a “Potential fix” line pointing at the file to change. Gradle is set in `android/gradle/wrapper/gradle-wrapper.properties`. AGP and Kotlin are set in the `plugins` block of `android/settings.gradle` (or `settings.gradle.kts`). Projects created from older templates set them in the top-level `android/build.gradle` instead.
If you need to ship before upgrading, you can skip the check temporarily by forwarding Flutter’s flag after `--`:
```
shorebird release android -- --android-skip-build-dependency-validation
```
Pass the same flag to `shorebird patch android`. Treat this as a stopgap: Flutter doesn’t support building with these older versions.
## `libapp.so.sym or libapp.so.dbg not present` warning on Android
Starting with Flutter 3.44, the Android Gradle Plugin strips `libapp.so` and produces a `libapp.so.sym` file, which Google Play Console uses to symbolicate Dart crashes. If you see this warning when building an Android release:
```
libapp.so.sym or libapp.so.dbg not present when checking final appbundle for debug symbols. Play Console will not receive Dart crash symbols for this build. To enable, remove `packaging.jniLibs.keepDebugSymbols.add("**/libapp.so")` from android/app/build.gradle.kts.
```
your `android/app/build.gradle` (or `build.gradle.kts`) most likely still contains this line, which some projects added to keep `libapp.so` unchanged for Shorebird:
```
packaging.jniLibs.keepDebugSymbols.add("**/libapp.so")
```
On Flutter 3.44 and newer, remove it. The line stops the Android Gradle Plugin from stripping `libapp.so`, so no `libapp.so.sym` is produced. Your build still succeeds, but Play Console won’t be able to symbolicate Dart crashes. `shorebird doctor` warns you if the line is present.
On Flutter versions older than 3.44, keep the line.
## Missing a provisioning profile or no signing team was found
This issue is addressed in the [releasing guide](/code-push/release). Take a look at the iOS section for more information.
## Message saying patch might run slowly
iOS uses a very different patching process than Android does. The details of which are described in [System Architecture](/code-push/system-architecture/). This is also discussed in the [Patch Performance](/code-push/performance/) page.
See [Sending a patch-debug.zip to Shorebird](#sending-a-patch-debugzip-to-shorebird) if you are asked for one.
***
## Sending a patch-debug.zip to Shorebird
`shorebird patch ios` writes `build/patch-debug.zip` when it [links](/code-push/system-architecture#how-shorebird-code-push-works) the patch against its release. Send it with any report of a slow patch or a low shared-code percentage.
### When it is produced
Every `shorebird patch ios` run writes one. Android patches do not use the linker and do not produce one.
Shorebird names it in the patch summary only when the link percentage is below 90%:
```
🔍 Debug Info: build/patch-debug.zip
```
Even if you did not see that line, the file is still there.
### Where to find it
`build/patch-debug.zip`, relative to your project root. Codemagic respects `$CM_EXPORT_DIR`, so it also shows up in your build artifacts there. On other CI providers, archive it before the runner is torn down.
### What is inside
The compiled Dart snapshots from both sides of the link, plus the link metadata Shorebird uses to compute the shared-code percentage. That is enough to reproduce the link and identify which code was not shared, without access to your project.
Note
`patch-debug.zip` contains your app’s compiled Dart code. It is only partially compiled and names may not be obfuscated, so treat it as more sensitive than the binary you ship publicly, though less sensitive than your source. It contains no Shorebird credentials.
### How to send it
Send your app ID, the release version, and the file.
A [GitHub issue](https://github.com/shorebirdtech/shorebird/issues) is usually easiest, and a public upload is fine for most apps. For a private app, use [Discord](https://discord.gg/shorebird), , or your shared Slack channel if you are an enterprise customer.
***
## Resolving persistent compile or build failures
If you encounter persistent compilation issues or strange env errors that standard builds do not trigger, the local compilation state or tool caches might be corrupted. You can clear all cached build states and tools to start fresh:
1. **Verify environment health**:
```
shorebird doctor
```
2. **Clean standard build directories**:
```
flutter clean
```
3. **Clean the Shorebird tools cache**:
```
shorebird cache clean
```
4. Re-run your release or patch command.
***
## Shorebird commands fail with network/TLS connection errors behind a proxy
If your development machine or CI/CD runner is situated behind a corporate proxy or firewall, Shorebird CLI commands may fail to connect to Shorebird servers, showing timeout or TLS handshake errors.
To resolve this:
1. **Configure proxy environment variables**: Ensure that standard CLI proxy environment variables are set up in your terminal session:
* **macOS/Linux**:
```
export HTTP_PROXY="http://your-proxy-server:port"
export HTTPS_PROXY="http://your-proxy-server:port"
export NO_PROXY="localhost,127.0.0.1"
```
* **Windows (PowerShell)**:
```
$env:HTTP_PROXY="http://your-proxy-server:port"
$env:HTTPS_PROXY="http://your-proxy-server:port"
$env:NO_PROXY="localhost,127.0.0.1"
```
2. **Whitelist Shorebird domains**: Ensure your company firewall allows outbound HTTPS traffic (on port `443`) to the following domains:
* `api.shorebird.dev` (Management API)
* `download.shorebird.dev` (Engine and CLI downloads)
* `console.shorebird.dev` (Console interface)
***
## Patch download size is unexpectedly large
Shorebird patches are usually small (a few hundred KB) because they only download the binary diff (patch artifact) of your compiled Dart code compared to the release version. If a patch size is unexpectedly large (several MBs):
1. **Upgraded dependencies**: Adding or upgrading large third-party packages in your `pubspec.yaml` can significantly change your compilation graph, causing a cascading code change that results in a larger diff.
2. **Code generators**: Extensive updates to code generation tools (e.g., `build_runner`, `freezed`, `json_serializable`) may modify large amounts of boilerplate code across dozens of files, resulting in a larger binary diff.
3. **Obfuscation configuration mismatch**: Ensure that you have not modified your obfuscation settings (passing/omitting `--obfuscate`) between the release build and the patch build. A mismatch in obfuscation config shuffles class and method names, causing the diff calculation to result in a massive file. Shorebird automatically detects release obfuscation, so you should not add or remove the `--obfuscate` flag when patching.
# Uninstall
> How to disable Shorebird.
*First, do no harm*
Shorebird is designed to be a drop-in replacement for stock Flutter, and can be disabled at any time with no effect on your users.
## Thank you
Thank you for trying Shorebird. If you’d like to continue using Shorebird but have questions or concerns, please reach out on Discord or via email at .
Otherwise, consider trying Shorebird again in the future.
## Uninstalling Shorebird
Building with `shorebird release` will include Shorebird Code Push in your app. Building with `flutter build --release` will not include Shorebird in your app. At any time you can simply drop back to `flutter build` and things will work as they did before.
You can remove `shorebird` from your path by removing it from your `.bashrc` or `.zshrc` and deleting the `.shorebird` directory located in `~/.shorebird`.
# Update Strategies
> Ways to use Shorebird to update your app
## Automatic (default)
By default, Shorebird checks for and installs new patches in the background on launch. It does this via a background thread to ensure that it does not affect the launch speed of your application. Patches installed via Shorebird are then available on next launch of the app.
## Manual
Shorebird also provides you with the ability to control when patches are applied. You may want finer-grained control over updates to:
* Control rollout of patches (to only update some accounts at a time to reduce your server load or reduce rollout risk, for example).
* Require users to update to the latest version before they can use the app (see note below).
To manually manage updates, you can use the [`package:shorebird_code_push`](https://pub.dev/packages/shorebird_code_push), which enables programmatic control over when the Shorebird updater checks for and downloads patches. See the package documentation for more information and usage examples.
You will also want to disable the default automatic update behavior by adding this line to your `shorebird.yaml` file:
```
auto_update: false
```
Disabling automatic updates is not required to use `shorebird_code_push`, but Shorebird will automatically download and apply updates if your shorebird.yaml file does not contain `auto_update: false`.
Note
Because Shorebird can only download and apply patches when your app is running, the user will see the unpatched release version that was first published in the store when they first launch your app. If it is important to your business to gate usage of your app on users having the latest code, it could be appropriate for you to check for updates as part of a login screen, or other launch gate.
## Triggering updates via notification
It is possible to trigger updates via push notifications.
Shorebird does not provide its own notification service, but it’s possible to use others, such as [Firebase Cloud Messaging (FCM)](https://firebase.google.com/docs/cloud-messaging) to send a notification to your app, and then use that notification to trigger an update. Because these services typically allow you to target specific devices, you could use this to trigger updates for specific users.
Because any notification service which uses Dart (e.g. FCM) will also trigger the launch of the Flutter engine when the notification is delivered, the app will update if it is not already running.
If you are manually managing updates with the `shorebird_code_push` package, you can check for and trigger updates in your notification handler.
## How should Shorebird interact with other update systems (e.g. `in_app_update`)?
For applications that already ensure users are on the latest version (e.g. with `in_app_update`, a system on Android whereby the Play Store will automatically prompt users to update your app), you will likely want to write some code to coordinate between Shorebird and your existing update system.
[`package:shorebird_code_push`](https://pub.dev/packages/shorebird_code_push) can help you here. For example, with `in_app_update`, you could use `package:shorebird_code_push` to check if the user has already applied the necessary patch and *not* then prompt them to update.
Shorebird patches are typically much smaller than full app downloads (a few KB on Android, a few hundred KB on iOS), so it is likely better for your users if you can use Shorebird to deliver patches instead of `in_app_update`. However, there are [changes which Shorebird cannot make](/code-push/#what-types-of-changes-can-be-included-in-a-patch), so `in_app_update` may be the best solution in some cases.
Shorebird “patches” also do not change the version number of your app, so `in_app_update` will not see them as a new version. This is by design – patches are applied to releases, rather than being new releases themselves. This can complicate your analytics/reporting code as you will have the case where e.g. `1.0.1+13, patch 1` has identical dart code to `1.0.1+13, no patches`. You can get the current booted patch number via `package:shorebird_code_push`’s [readCurrentPatch](https://pub.dev/documentation/shorebird_code_push/latest/shorebird_code_push/ShorebirdUpdater/readCurrentPatch.html) method.
Shorebird also currently makes the guarantee that it does not see or store your code. Implementing “push to deploy” may not be possible without source code access, which is not a change Shorebird would make lightly.
## Can you update your app without starting it twice?
The short answer is no (under the default background update configuration).
There are two steps required to apply an update:
1. **Download and Install**: The Shorebird updater needs to fetch the patch from the CDN and write/apply the binary diff to the local cache directory on disk.
2. **Launch with New Code**: The app needs to restart so that the modified Flutter engine loads the newly cached patch files instead of the base release files.
Because the default Shorebird configuration performs the update check and download **in the background on startup**, the download completes *after* the Dart VM is already running the base code. Consequently, the patch cannot be hot-swapped into memory dynamically on that launch.
During development or QA testing, this means you must restart the app twice:
* **First Launch**: App launches (unpatched), detects the patch, downloads it in the background, and installs it.
* **Second Launch**: App launches, detects the installed patch from the local cache, boots from it, and displays the changes.
To bypass this behavior and apply patches immediately on the first launch, you must manage updates manually.
Checking for and installing the update can be triggered at any time using `package:shorebird_code_push`. By default, Shorebird only triggers an install check on launch of your app, but it is possible to trigger on other signals as appropriate for your application (e.g. by sending a notification), see above.
While the Dart VM has the ability to hot-restart, most apps use plugins or call out to other native code which would not be aware that the Dart portions have restarted and are likely to end up in a state that could lead to a crash in the native side of the application. A “hot-restart” feature might be worth exploring in the future, in cases where the developer can ensure that the native side of the app is in a safe state to be restarted, or where a set of plugins that are safe during a hot-restart could be provided.
Shorebird’s default settings are such that the user should never have to think about an update. If they’re regularly using the app, it will just be always up-to-date. (Shorebird will detect and install updates when they launch the app while connected to the internet.) Modern mobile operating systems are very aggressive about killing background apps, so the app will be restarted from scratch fairly often even if it doesn’t appear to the user as a full restart.
# Enterprise
> What the Shorebird Enterprise plan includes and how to get started
The Enterprise plan is for teams that need Shorebird to fit an existing security, procurement, and identity setup. Everything in Pro and Business is included, plus the capabilities below.
Tip
Shorebird is trusted by engineering teams at companies of all sizes. See [Shorebird Success Stories](https://shorebird.dev/success-stories) for examples of how teams are shipping with Shorebird.
## What is included
* **SAML single sign-on.** Members sign in to the Shorebird Console through your identity provider instead of a personal Google or Microsoft account. See [SAML Single Sign-On](/enterprise/saml/) for the setup process.
* **The full set of organization roles**, including the App Manager role. See [Member roles](/account/orgs#member-roles) for what each role can do.
* **Invoice billing**, tax support, alternative payment methods, and custom contract or procurement processes. See [Billing](/account/billing/) for how Shorebird bills.
* **Higher patch volume**, beyond the 2.5 million patch installs per month covered by the self-service plans.
* **Support for Flutter versions more than [two years old](/getting-started/flutter-version#supported-flutter-versions)**, negotiated as part of the contract.
## Getting started
Pro and Business plans are self-service and need no contact with Shorebird. If your team needs any of the above, [reach out regarding an Enterprise Plan](https://shorebird.dev/talk-to-sales) and Shorebird will follow up to set up your account.
Once your organization is on the Enterprise plan, SAML SSO is configured by the Shorebird team. [SAML Single Sign-On](/enterprise/saml/) lists exactly what to send.
# SAML Single Sign-On
> Set up SAML 2.0 single sign-on for your Shorebird organization with Okta or another identity provider
Shorebird supports SAML 2.0 single sign-on (SSO) for teams on the [Enterprise plan](/enterprise/). Members sign in to the Shorebird Console through your identity provider (IdP) instead of a personal Google or Microsoft account.
SAML is not self-serve yet. The Shorebird team creates the connection for you: send what is described below to , and Shorebird will activate SSO for your email domain and confirm when it is live.
## How sign-in works
A SAML connection is keyed to an email domain, such as `acme.com`:
1. A member opens the [Shorebird Console](https://console.shorebird.dev) and clicks **Continue with SSO**.
2. They enter their work email address. The domain selects your connection, and they are redirected to your IdP.
3. After authenticating, the IdP posts a signed assertion back to Shorebird, which signs the member in.
A few consequences of this design are worth knowing before you start:
* **Sign-in must start at Shorebird.** IdP-initiated sign-in, such as clicking the app tile in the Okta dashboard, is not supported.
* **One connection per email domain.** The email address in the assertion must be at the connection’s domain, or sign-in is rejected. If your team uses several domains, send a metadata URL for each one and Shorebird will create a connection per domain.
* **SSO covers authentication only.** Assigning the app to a user in your IdP does not add them to your Shorebird organization. Membership and roles are still managed in organization settings, as described in [Organizations](/account/orgs/).
## What to send Shorebird
Two things:
* **Your IdP metadata URL.** In Okta, this is the **Identity Provider metadata** link on the application’s **Sign On** tab. The document behind that link already holds the entity ID, the SSO URL, and the signing certificate, and Shorebird reads all three from it directly.
* **Your email domain**, such as `acme.com`. This is what routes a member’s sign-in to your IdP, and it is the one value the metadata does not contain.
### If your IdP publishes no metadata URL
Some providers, Google Workspace among them, offer metadata only as a download. Send the XML file itself, or pull these three values out of it and send those instead:
| Value | Where to find it (Okta example) | Example |
| ----------------------- | --------------------------------------------------------- | ----------------------------------------------------------------------- |
| IdP Entity ID | “Identity Provider Issuer” in the SAML setup instructions | `http://www.okta.com/exk1a2b3c4EXAMPLE` |
| IdP SSO URL | “Identity Provider Single Sign-On URL” | `https://acme.okta.com/app/acme_shorebird_1/exk1a2b3c4EXAMPLE/sso/saml` |
| IdP signing certificate | The “X.509 Certificate”, as PEM text | `-----BEGIN CERTIFICATE-----` … |
None of the three is optional. The certificate in particular is what Shorebird uses to verify that an assertion really came from your IdP, so send it as PEM text, including the `-----BEGIN CERTIFICATE-----` and `-----END CERTIFICATE-----` lines.
## Settings to use in your identity provider
Configure the application in your IdP with these values:
| Setting | Value |
| ------------------------------ | ----------------------------------------------- |
| Single sign-on URL (ACS URL) | `https://auth.shorebird.dev/auth/saml/callback` |
| Audience URI (SP Entity ID) | `https://auth.shorebird.dev` |
| Name ID format | `EmailAddress` |
| Application username | `Email` |
| Default RelayState | Leave empty |
| Assertion encryption | Off |
| Signed authentication requests | Not used, and must not be required |
Shorebird does not decrypt assertions, so assertion encryption must stay off, and it does not sign its authentication requests, so the application must not require signed requests.
### The email address is the identity
Shorebird identifies a member by email address, read from an attribute named `email` (or `mail`, or the OID `urn:oid:0.9.2342.19200300.100.1.3`), from Entra ID’s default `emailaddress` claim, or from an `EmailAddress` or `Unspecified` Name ID. A `Persistent` or `Transient` Name ID is opaque and is never read as an email address, so an IdP configured that way must also send the attribute:
| Name | Name format | Value |
| ------- | ----------- | ------------ |
| `email` | Unspecified | `user.email` |
## Setting up in Okta
1. In the Okta Admin Console, go to **Applications → Applications → Create App Integration**, choose **SAML 2.0**, and click **Next**. Okta documents this flow in [Create SAML app integrations](https://help.okta.com/en-us/content/topics/apps/apps_app_integration_wizard_saml.htm).
2. Name the app (for example, “Shorebird”) and click **Next**.
3. On the **Configure SAML** screen, fill in the single sign-on URL, audience URI, Name ID format, and application username from [Settings to use in your identity provider](#settings-to-use-in-your-identity-provider).
4. Under **Attribute Statements**, add the `email` attribute described above.
5. Click **Next**, answer the feedback questions, and click **Finish**.
6. On the app’s **Sign On** tab, copy the **Identity Provider metadata** link. **View SAML setup instructions**, on the same tab, shows the issuer, SSO URL, and certificate individually if you ever need them.
7. [Assign the app](https://help.okta.com/en-us/content/topics/provisioning/lcm/lcm-assign-app-user.htm) to the users and groups who should have access to Shorebird.
8. Email the metadata URL and your email domain, as described in [What to send Shorebird](#what-to-send-shorebird), to .
For background on how the pieces fit together, see Okta’s [SAML overview](https://developer.okta.com/docs/concepts/saml/) and [About single sign-on](https://help.okta.com/en-us/content/topics/apps/apps-about-sso.htm).
Other SAML 2.0 providers, such as Microsoft Entra ID, Google Workspace, OneLogin, and JumpCloud, work the same way. The field names differ, but the metadata document and the settings Shorebird needs are the same.
## After activation
Once Shorebird enables the connection, sign in with a single account first to confirm the setup, then roll the app out to the rest of the team.
Service provider metadata for an active connection is served at `https://auth.shorebird.dev/auth/saml/metadata/`. Importing that document into your IdP is a quick way to confirm that the ACS URL and entity ID match on both sides.
### Rotating the signing certificate
Shorebird does not re-read your metadata on its own. Every certificate it listed when Shorebird last read it is accepted, so a rotation your IdP announced there in advance needs nothing from you; a certificate generated since does. Email before the old one expires, and Shorebird will re-read your metadata URL. If your connection was created from values sent by hand, send the new certificate as PEM text instead, and the old one too if it is still in use. A certificate Shorebird has never seen breaks sign-in for everyone on the domain the moment your IdP starts signing with it.
## Troubleshooting
| Message | Likely cause |
| ----------------------------------------- | ----------------------------------------------------------------------------------------------------------------------------------------------------------------------------------------------------------------------------- |
| “No SSO configured for this domain” | The connection has not been created or enabled yet, or the address entered is at a different domain than the one that was registered. |
| “SSO login failed” | The assertion was rejected. The most common causes are a signing certificate Shorebird has not seen, an asserted email address at a domain other than the connection’s, or no email address anywhere Shorebird reads it from. |
| Sign-in succeeds, but no apps are visible | Authentication worked, but the account is not a member of the organization yet. Invite the member from organization settings. |
Assertions are accepted for up to one hour after they are issued, with a minute of tolerance for clock differences, and each one can be used only once. If sign-in fails only for some members, check that the IdP host’s clock is accurate.
Anything else, or a provider not covered here, is worth an email to .
# Add Flutter to an existing app
> A technical guide to embedding Flutter as a module inside an existing Android or iOS application using the add-to-app pattern.
Not every Flutter project starts from scratch. Many teams have large, mature native apps and want to adopt Flutter incrementally, one screen or one feature at a time. Flutter supports this through a feature called [**add-to-app**](https://docs.flutter.dev/add-to-app): the ability to embed a Flutter module inside an existing Android or iOS application as a library dependency.
Add-to-app is currently supported on Android, iOS, macOS, and web. This guide focuses on the two most common platforms: Android and iOS.
## Why add-to-app?
The two primary use cases are:
* **Hybrid navigation stacks**: An app contains multiple screens, some rendered by Flutter and others by the native framework. The user navigates between them freely.
* **Partial-screen views**: A single native screen hosts both native views and Flutter widgets side by side. The Flutter portion renders one component (a chart, a form, a product card) while the rest of the screen stays native.
Beyond UI, add-to-app also lets you run shared non-UI Dart logic (networking, business rules, cryptography) inside a native app, taking advantage of Dart’s portability and interoperability with other languages.
## Flutter module vs Flutter app
When you create a standalone Flutter app (`shorebird create my_app`), the project contains a complete `android/` and `ios/` host wrapper that Flutter owns entirely. For add-to-app, you create a **Flutter module** instead. Run this command from the directory that will contain both the Flutter module and the native host project:
```
shorebird create --template=module my_flutter_module
```
The resulting structure is a little different from a regular app:
```
my_flutter_module/
lib/
main.dart # Dart entry point
pubspec.yaml
.android/ # Auto-generated Android host (for standalone testing)
.ios/ # Auto-generated iOS host (for standalone testing)
```
The `.android/` and `.ios/` directories are generated wrappers that let you run the module in isolation with `flutter run`. They are prefixed with a dot to signal that they are managed by Flutter, so never edit them directly. These wrappers are also not compiled into your app binary — they exist purely as a local development convenience. When the module is embedded into your real native app, the native project provides the host instead.
The Dart code inside `lib/` is identical to a regular Flutter app. The only structural requirement is a valid entry point:
```
import 'package:flutter/material.dart';
@pragma('vm:entry-point')
void main() => runApp(const MyFlutterApp());
```
The `@pragma('vm:entry-point')` annotation prevents tree-shaking from removing `main` in ahead-of-time (AOT) compiled builds.
## The FlutterEngine
Before any Flutter UI can appear on screen, the native app must start a Dart runtime. That runtime is encapsulated in the `FlutterEngine` class.
```
graph LR
A["Native App (Android / iOS)"] -->|"creates & starts"| B["FlutterEngine (Dart VM + Flutter runtime)"]
B -->|"renders into"| C["FlutterActivity / FlutterViewController"]
C -->|"displays in"| D["Native UI hierarchy"]
style A fill:#e1f5fe,stroke:#03a9f4,stroke-width:2px,color:#000
style B fill:#e8f5e9,stroke:#4caf50,stroke-width:2px,color:#000
style C fill:#fff3e0,stroke:#ff9800,stroke-width:2px,color:#000
style D fill:#fce4ec,stroke:#e91e63,stroke-width:2px,color:#000
```
A `FlutterEngine`:
* Starts a Dart isolate and executes the entry-point function (`main()` by default).
* Owns all platform channels between Dart and native code.
* Holds a reference to the active `FlutterRenderer` that draws pixels.
Starting an engine takes time, typically 100 to 200 ms on a modern device. If you wait until the user taps a button to start the engine, they will see a visible delay before the Flutter UI appears. The recommended pattern is to **pre-warm** the engine before it is needed.
### Engine warm-up
#### Android
```
class MyApplication : Application() {
lateinit var flutterEngine: FlutterEngine
override fun onCreate() {
super.onCreate()
flutterEngine = FlutterEngine(this)
// Start executing Dart code immediately.
flutterEngine.dartExecutor.executeDartEntrypoint(
DartExecutor.DartEntrypoint.createDefault()
)
// Cache the engine so FlutterActivity/FlutterFragment can reuse it.
FlutterEngineCache
.getInstance()
.put("my_engine_id", flutterEngine)
}
}
```
#### iOS
```
import Flutter
@main
class AppDelegate: FlutterAppDelegate {
lazy var flutterEngine = FlutterEngine(name: "my_engine")
override func application(
_ application: UIApplication,
didFinishLaunchingWithOptions launchOptions: [UIApplication.LaunchOptionsKey: Any]?
) -> Bool {
// Start the engine. Dart's main() runs immediately.
flutterEngine.run()
GeneratedPluginRegistrant.register(with: self.flutterEngine)
return super.application(application, didFinishLaunchingWithOptions: launchOptions)
}
}
```
### Multiple engines
Sometimes you need more than one Flutter screen running at the same time. Common examples are a picture-in-picture overlay sitting on top of a native screen, or an app that shows two independent Flutter panels side by side in a tablet layout. In these cases, use [`FlutterEngineGroup`](https://docs.flutter.dev/add-to-app/multiple-flutters) rather than creating additional `FlutterEngine` instances directly. `FlutterEngineGroup` spawns engines that share resources such as the GPU context, font metrics, and the isolate group snapshot. Without that sharing, each additional engine costs roughly 19 MB on Android and 13 MB on iOS. With `FlutterEngineGroup`, each additional engine costs only about 180 KB of native heap on top of the first.
#### Android
```
class MyApplication : Application() {
val engines = FlutterEngineGroup(this)
}
// To spawn a new engine from an Activity:
val dartEntrypoint = DartExecutor.DartEntrypoint.createDefault()
val newEngine = (applicationContext as MyApplication)
.engines
.createAndRunEngine(this, dartEntrypoint)
```
#### iOS
```
// In AppDelegate
lazy var engineGroup = FlutterEngineGroup(name: "my_engine_group", project: nil)
// To spawn a new engine from a view controller:
let newEngine = (UIApplication.shared.delegate as! AppDelegate)
.engineGroup
.makeEngine(withEntrypoint: nil, libraryURI: nil)
```
Each engine produced by `FlutterEngineGroup` is still an independent Dart program with its own isolate, state, and plugin registrations. The shared resources are managed internally and do not affect isolation between engines.
## Android integration
### 1. Add the module as a Gradle dependency
Add the Flutter module to your Android project as a source dependency. Both projects must sit on the same machine. Gradle locates the module at build time:
```
// settings.gradle (host app)
include ':app'
setBinding(new Binding([gradle: this]))
evaluate(new File(
settingsDir.parentFile,
'my_flutter_module/.android/include_flutter.groovy'
))
```
```
// app/build.gradle
dependencies {
implementation project(':flutter')
}
```
### 2. Choose a display mechanism
Flutter provides three ways to show Flutter content in an Android app:
| API | Best for |
| ----------------- | ----------------------------------------------- |
| `FlutterActivity` | Full-screen Flutter experiences |
| `FlutterFragment` | Embedding Flutter inside an existing `Activity` |
| `FlutterView` | Manual, fine-grained layout control |
#### FlutterActivity
The simplest path to a full-screen Flutter screen:
```
// Using a cached, pre-warmed engine (recommended).
val intent = FlutterActivity
.withCachedEngine("my_engine_id")
.build(context)
startActivity(intent)
```
If you have not pre-warmed an engine, use `FlutterActivity.createDefaultIntent(context)` instead. Flutter will start a new engine when the `Activity` is created, which introduces a cold-start delay.
#### FlutterFragment
Embed Flutter inside any existing `FragmentActivity`:
```
val flutterFragment = FlutterFragment
.withCachedEngine("my_engine_id")
.build()
supportFragmentManager
.beginTransaction()
.add(R.id.fragment_container, flutterFragment, "flutter_fragment")
.commit()
```
#### FlutterView
For maximum flexibility, attach a `FlutterView` directly in your layout:
```
val flutterView = FlutterView(context)
myConstraintLayout.addView(flutterView)
// Attach the engine's renderer to this view.
flutterView.attachToFlutterEngine(flutterEngine)
```
Call `flutterView.detachFromFlutterEngine()` before attaching the engine to a different view. An engine can only render into one view at a time.
## iOS integration
### 1. Add the module as a dependency
Since Flutter 3.44, the recommended method is **Swift Package Manager (SPM)**. Run the following command in the Flutter module directory to generate an XCFramework:
```
flutter build ios-framework --xcframework --output=../MyFlutterPackage
```
Then add the local package in Xcode: **File > Add Package Dependencies > Add Local**, and point to the generated `MyFlutterPackage` directory.
### 2. Display Flutter content
#### Full-screen: FlutterViewController
```
import Flutter
class HomeViewController: UIViewController {
@IBAction func showFlutter(_ sender: Any) {
let appDelegate = UIApplication.shared.delegate as! AppDelegate
let flutterEngine = appDelegate.flutterEngine
let flutterViewController = FlutterViewController(
engine: flutterEngine,
nibName: nil,
bundle: nil
)
present(flutterViewController, animated: true, completion: nil)
}
}
```
#### Partial-screen: FlutterViewController as a child
To embed Flutter inside part of an existing `UIViewController`:
```
let flutterVC = FlutterViewController(
engine: appDelegate.flutterEngine,
nibName: nil,
bundle: nil
)
// Add as a child view controller.
addChild(flutterVC)
flutterVC.view.frame = CGRect(x: 0, y: 200, width: view.bounds.width, height: 300)
view.addSubview(flutterVC.view)
flutterVC.didMove(toParent: self)
```
## Platform channels
Platform channels are how Dart and native code send messages to each other. The most common type is `MethodChannel`, which uses an asynchronous request/response model. For a complete reference, see the [platform channels documentation](https://docs.flutter.dev/platform-integration/platform-channels).
```
sequenceDiagram
participant Dart
participant MethodChannel
participant Native
Dart->>MethodChannel: invokeMethod('getBatteryLevel')
MethodChannel->>Native: onMethodCall('getBatteryLevel')
Native-->>MethodChannel: result(42)
MethodChannel-->>Dart: Future resolves to 42
```
The examples below read the device’s battery level. This is a good illustration because battery information is only available through a native OS API, so there is no way to get it from Dart without crossing the platform boundary.
### Dart side
```
const channel = MethodChannel('com.example.myapp/battery');
Future getBatteryLevel() async {
final int level = await channel.invokeMethod('getBatteryLevel');
return level;
}
```
### Android side (Kotlin)
```
val channel = MethodChannel(
flutterEngine.dartExecutor.binaryMessenger,
"com.example.myapp/battery"
)
channel.setMethodCallHandler { call, result ->
if (call.method == "getBatteryLevel") {
val level = getBatteryLevel()
if (level != -1) {
result.success(level)
} else {
result.error("UNAVAILABLE", "Battery level unavailable", null)
}
} else {
result.notImplemented()
}
}
```
### iOS side (Swift)
```
let channel = FlutterMethodChannel(
name: "com.example.myapp/battery",
binaryMessenger: flutterViewController.binaryMessenger
)
channel.setMethodCallHandler { call, result in
guard call.method == "getBatteryLevel" else {
result(FlutterMethodNotImplemented)
return
}
result(UIDevice.current.batteryLevel * 100)
}
```
Channel names must be unique across the application. Use reverse-domain notation (`com.yourcompany.appname/feature`) to avoid collisions with plugins.
## Multi-engine vs multi-view
Flutter supports two flavors of add-to-app depending on the platform:
| | Multi-engine | Multi-view |
| ----------------- | ------------------------------------------------ | ------------------------------------------------------ |
| **Platforms** | Android, iOS, macOS | Web |
| **Dart programs** | One per engine (isolated) | One shared program |
| **State sharing** | Not possible between engines | Full object sharing |
| **Memory cost** | Higher (one VM per engine) | Lower |
| **Use case** | Independent Flutter screens with no shared state | Multiple embedded Flutter widgets on the same web page |
On Android and iOS, each `FlutterEngine` runs its own Dart isolate. Isolates share no memory, so communication between them requires explicit message passing via `Isolate.sendPort`. If two embedded Flutter screens need to share application state, consider using a single engine and routing between named routes inside Flutter rather than spinning up a second engine.
## Performance considerations
### Warm-up timing
Start the `FlutterEngine` in `Application.onCreate()` (Android) or `application(_:didFinishLaunchingWithOptions:)` (iOS), not when the user triggers a navigation action. The first call to `dartExecutor.executeDartEntrypoint` is where the Dart VM initializes and the most latency is incurred.
### First-frame jank
[Impeller](https://docs.flutter.dev/perf/impeller) is the default renderer on iOS and on Android (API 29+) as of Flutter 3.27. It pre-compiles a fixed set of Metal/Vulkan shaders at engine start so shader compilation jank does not happen at runtime, which means most apps get smooth first frames without any extra configuration.
### Memory overhead
The cost of each additional engine depends on how it is created:
| | Plain `FlutterEngine()` | `FlutterEngineGroup` |
| ---------------------- | -------------------------------- | ------------------------------ |
| Additional native heap | \~19 MB (Android), \~13 MB (iOS) | \~180 KB |
| Dart heap (initial) | \~1 MB | \~1 MB |
| Dart heap (loaded app) | Proportional to app complexity | Proportional to app complexity |
The \~180 KB figure cited in Flutter’s documentation applies specifically to engines spawned from `FlutterEngineGroup`, which shares the GPU context, font cache, and isolate group snapshot across all engines in the group. A standalone `FlutterEngine()` does not benefit from that sharing, so each one carries the full cost.
Avoid pre-warming engines that the user is unlikely to reach. Lazy initialization (creating the engine on first navigation) is acceptable for infrequently visited screens where a small delay is tolerable.
### Texture and platform view overhead
When Flutter renders inside a native view hierarchy, it composites its texture with the native rendering layer. On Android, this uses a `SurfaceTexture` or `SurfaceView` depending on the display mode. On iOS, it uses a `CALayer`. The compositing step adds a small GPU cost; for partial-screen views where Flutter covers only a fraction of the screen, this cost is negligible.
# Flutter Animations
> Reference guide for implementing implicit, explicit, and physics-based animations in Flutter.
The Flutter animation framework provides a layered architecture for controlling motion. At its core, the framework categorizes animations into implicit transitions, explicit controller-driven animations, and physics-based simulations.
## Implicit animations
Implicit animations automatically interpolate between a current value and a new target value over a specified duration. The framework calculates intermediate frames when a property changes and the widget rebuilds.
`AnimatedContainer` is a versatile implicit widget that can animate changes to size, color, padding, and alignment simultaneously:
```
AnimatedContainer(
duration: const Duration(milliseconds: 300),
curve: Curves.easeInOut,
width: isExpanded ? 200 : 100,
decoration: BoxDecoration(
color: isExpanded ? Colors.blue : Colors.red,
borderRadius: BorderRadius.circular(isExpanded ? 16.0 : 8.0),
),
child: const Text('Hello'),
)
```
The underlying architecture relies on `ImplicitlyAnimatedWidget`. When the widget’s configuration changes (detected in `didUpdateWidget`), the state reuses its internal `AnimationController`, rebases the tween’s `begin` to the current animation value, and restarts the transition toward the new target. This is why implicit animations transition smoothly when interrupted mid-flight.
### Non-linear interpolation (curves)
By default, animations transition linearly. Applying a `Curve` modifies the interpolation rate. The framework provides standard curves via the `Curves` class, such as `Curves.easeIn`, `Curves.bounceOut`, and `Curves.elasticInOut`. You can also define custom mathematical curves by subclassing `Curve` and overriding the `transformInternal` method.
## Explicit animations
Explicit animations require manual lifecycle management using an `AnimationController`. This approach is necessary for looping animations, sequenced transitions, and animations triggered by gesture events.
```
graph TD
T["TickerProvider (vsync)"] -->|Tick per frame| C["AnimationController (0.0 to 1.0)"]
C -->|Linear Value| A["CurvedAnimation (Non-linear timing)"]
A -->|Eased Value| TW["Tween (Maps to target data type)"]
TW -->|Output Value| W["AnimatedBuilder (Rebuilds UI)"]
style T fill:#e1f5fe,stroke:#03a9f4,stroke-width:2px,color:#000
style C fill:#e8f5e9,stroke:#4caf50,stroke-width:2px,color:#000
style A fill:#fff3e0,stroke:#ff9800,stroke-width:2px,color:#000
style TW fill:#fce4ec,stroke:#e91e63,stroke-width:2px,color:#000
style W fill:#f3e5f5,stroke:#9c27b0,stroke-width:2px,color:#000
```
### Animation controllers and vsync
An `AnimationController` generates a new value whenever the hardware is ready for a new frame. To prevent off-screen computations and synchronize with the device refresh rate, the controller requires a `TickerProvider` (passed via the `vsync` argument).
```
class _MyWidgetState extends State with SingleTickerProviderStateMixin {
late final AnimationController _controller;
@override
void initState() {
super.initState();
_controller = AnimationController(
duration: const Duration(seconds: 2),
vsync: this,
);
}
@override
void dispose() {
// Not calling dispose() leaks the Ticker. In debug mode, the mixin's
// dispose() throws "was disposed with an active Ticker" if the controller
// is still animating when the State is removed from the tree.
_controller.dispose();
super.dispose();
}
}
```
When managing multiple controllers in a single widget, use `TickerProviderStateMixin` instead of `SingleTickerProviderStateMixin`.
```
class _MyWidgetState extends State with TickerProviderStateMixin {
late final AnimationController _controllerA;
late final AnimationController _controllerB;
}
```
### Tweens and mapping
A controller typically outputs values between `0.0` and `1.0`. A `Tween` maps this unit interval to a required data type (such as `Offset` or `double`). For types that lack arithmetic operators, use a dedicated subclass: `ColorTween` for colors, `RectTween` for rectangles, and so on.
```
final Animation sizeAnimation = Tween(
begin: 10.0,
end: 100.0,
).animate(
CurvedAnimation(
parent: _controller,
curve: Curves.easeOut,
),
);
```
### Rebuilding the UI
To apply the animation to the render tree, use an `AnimatedBuilder` or subclass `AnimatedWidget`. This localized rebuilding prevents the entire widget tree from refreshing on every frame.
```
AnimatedBuilder(
animation: sizeAnimation,
builder: (BuildContext context, Widget? child) {
return Container(
width: sizeAnimation.value,
height: sizeAnimation.value,
color: Colors.blue,
child: child, // passed through; not rebuilt on each tick
);
},
child: const FlutterLogo(),
)
```
Alternatively, `TweenAnimationBuilder` provides a declarative API that does not require a manually managed `AnimationController`. Whenever the tween’s `end` value changes, the widget re-animates from the current value toward the new target, making it well-suited for driven transitions and entrance animations where that retargeting behavior is desirable.
```
TweenAnimationBuilder(
tween: Tween(begin: 0.0, end: 1.0),
duration: const Duration(milliseconds: 600),
curve: Curves.easeOut,
builder: (BuildContext context, double value, Widget? child) {
return Opacity(
opacity: value,
child: child,
);
},
child: const Text('Fades in on first build'),
)
```
## Physics-based simulations
For animations that must react naturally to user input (such as a scroll view snapping into place), use the physics simulation engine rather than fixed-duration controllers.
The `AnimationController` can execute a `Simulation` using `controller.animateWith(Simulation)`. The framework provides several standard physics models:
* `SpringSimulation`: Models tension and friction.
* `GravitySimulation`: Models gravitational acceleration.
* `FrictionSimulation`: Models gradual deceleration.
```
// Use AnimationController.unbounded so the controller is not clamped to
// [0.0, 1.0]. A standard controller would clip the spring's range immediately.
final AnimationController controller = AnimationController.unbounded(vsync: this);
final SpringDescription spring = SpringDescription(
mass: 1.0,
stiffness: 100.0,
damping: 10.0,
);
final SpringSimulation simulation = SpringSimulation(
spring,
0.0, // start position
100.0, // end position
0.0, // initial velocity
);
controller.animateWith(simulation);
```
## Third-party vector animations
For complex vector graphics and state-machine animations, use third-party formats rather than the built-in widget framework:
* **[Lottie](https://lottiefiles.com/)**: Uses animations exported as JSON from Adobe After Effects. Best for predetermined, timeline-based animations.
* **[Rive](https://rive.app/)**: Uses interactive state machines designed for real-time manipulation. Best for dynamic assets requiring programmatic state changes.
## Performance considerations
Modifying properties that affect layout (such as `width`, `height`, or `padding`) forces the framework to recalculate geometry on every frame, which can cause dropped frames.
To optimize performance, animate properties that are applied during the paint phase, which avoids rebuilds and layout recalculation:
* **Opacity**: Use `FadeTransition` or `AnimatedOpacity`.
* **Transform**: Use `RotationTransition`, `ScaleTransition`, or `SlideTransition`.
When using `AnimatedBuilder`, always pass static child widgets via the `child` parameter. This prevents the framework from recreating the child subtree during every animation tick.
For complex subtrees that animate independently from the rest of the screen, wrap them in a `RepaintBoundary`. This isolates the subtree into its own layer, so its repaints do not propagate to the rest of the tree.
```
RepaintBoundary(
child: RotationTransition(
turns: _controller,
child: const FlutterLogo(size: 100),
),
)
```
# Architecture Trees
> A deep dive into the three-tree architecture that powers Flutter, explained by the creator.
If you’ve spent any time with Flutter, you’ve probably heard the phrase: *“Everything is a widget.”* While that’s a fantastic way to think about building your app, it’s not the whole story. If you want to build really smooth, high-performing apps, it helps to peek under the hood and see what’s actually happening.
When the Flutter framework was designed, there was a distinct goal: **[keep things consistently fast and smooth at 60 (or even 120) frames per second.](https://docs.flutter.dev/perf)** To pull that off, Flutter avoids using a single, heavy structure (like the DOM in web development). Instead, it uses a team of three different “trees” working together: the **Widget Tree**, the **Element Tree**, and the **RenderObject Tree**.
Here’s a breakdown of what each tree does and how they team up to paint pixels on your screen.
```
graph TD
W["Widget Tree (The Blueprints)"] --> E["Element Tree (The State Managers)"]
E --> R["RenderObject Tree (The Workhorses)"]
style W fill:#e1f5fe,stroke:#03a9f4,stroke-width:2px,color:#000
style E fill:#e8f5e9,stroke:#4caf50,stroke-width:2px,color:#000
style R fill:#fff3e0,stroke:#ff9800,stroke-width:2px,color:#000
```
## 1. The widget tree: your blueprints
Widgets are what you write every day: `Container`, `Text`, `Row`, `Column`, and so on.
But what *is* a Widget, really? **Think of a widget as an immutable blueprint.**
Widgets don’t actually draw anything on the screen. They are super lightweight Dart objects that just hold configuration data, like “this should be blue” or “this needs 10 pixels of padding.” Because they are just simple data containers and never change (immutable), Flutter can toss them out and rebuild millions of them every second without breaking a sweat.
When you call `setState()`, you aren’t directly telling the screen to redraw. You are just telling Flutter to throw away the old stale objects and create new ones from the blueprints you created.
## 2. The element tree: the state manager
If widgets are just temporary blueprints, how does Flutter remember anything? How does it keep track of an animation playing, or what you typed into a text field?
Enter the **Element Tree** (where your `State` lives).
For every Widget you put in your app, Flutter creates a corresponding **Element**. You can think of the Element Tree as the brain or the skeleton of your app. Unlike widgets, **Elements stick around and can change over time.** For `StatefulWidgets`, the Element is what actually holds onto the `State` object you interact with daily.
When a new Widget Tree is built, Flutter doesn’t throw away the Element Tree. Instead, it looks at the new blueprints and compares them to the existing Elements:
* If the new widget looks like the old one (same type and key), the Element just says “close enough,” updates its settings, and stays right where it is.
* If the widget type completely changed, the old Element is tossed out, and a brand new one takes its place.
This is the secret to Flutter’s speed. The Element Tree manages the lifecycle and acts as the smart middleman that decides when actual heavy lifting needs to be done.
## 3. The RenderObject tree: the workhorse
Finally, there’s the **RenderObject Tree**.
While Widgets hold the blueprints and Elements manage the brains, RenderObjects do the heavy lifting: **figuring out exactly how big things are, where they go on the screen, and painting the actual pixels.**
For every visual Element in your app, there’s a RenderObject. These are heavy and expensive to create, which is exactly why the Element Tree protects them. RenderObjects contain all the complicated math needed to measure constraints and tell the graphics engine how to draw.
If you change a `Container` from blue to red, the Widget is recreated, the Element updates its state, but the *exact same* RenderObject is kept around; it’s simply told, “Hey, next time you draw, use red paint instead of blue.”
## The lifecycle: putting it all together
Here’s what happens when you tap a button that changes a color:
1. **You tap the button**: `setState()` is called.
2. **New Blueprints**: Flutter asks your `build` method for new widgets. A new Widget Tree is spun up instantly.
3. **Checking the Changes**: The Element Tree looks at the new widgets and compares them to the old ones. It notices that only a color changed.
4. **Passing the Message**: The Element updates its internal reference to the new widget and passes the message down to its RenderObject about the new color.
5. **Painting**: The RenderObject marks itself as needing a fresh coat of paint (`markNeedsPaint()`). On the very next frame, the engine asks that specific RenderObject to redraw itself, leaving everything else untouched.
## The secret identity of BuildContext
If you’ve written any Flutter code, you’ve seen this:
```
@override
Widget build(BuildContext context) {
return Container();
}
```
You might have wondered, *“What exactly is that `context` thing?”*
Here is the biggest “Aha” moment for most Flutter beginners: **`BuildContext` is actually just the Element.**
When Flutter asks your widget to build itself, it hands you the `BuildContext`. It’s just the Element marking its spot in the tree, so that if you need to find an ancestor widget (like a `Theme` or a `Navigator`), you can use it to look up the tree.
## Why this matters
By splitting the work into blueprints (Widgets), brains (Elements), and brawn (RenderObjects), Flutter gives you a really friendly way to code without giving up any of that sweet native-level performance.
Understanding this team of three trees makes you a much better Flutter developer:
* You’ll understand why [`Keys`](https://api.flutter.dev/flutter/foundation/Key-class.html) are sometimes needed (they help the Element tree match up widgets correctly when you reorder lists).
* You’ll realize why creating lots of widgets is totally fine, but stacking unnecessary deep widgets like [`Opacity`](https://api.flutter.dev/flutter/widgets/Opacity-class.html) or [`Clip`](https://api.flutter.dev/flutter/widgets/ClipRect-class.html) (which create heavy RenderObjects) can slow things down.
* You’ll know exactly what’s happening under the hood, making debugging and optimizing a breeze.
# What is Flutter?
> An Introduction to Flutter for Developers
In the early stages of mobile development, you had two options: build your app twice (once for iOS in Swift, once for Android in Kotlin) or compromise on quality by wrapping a web view. The first option doubled your engineering costs and created divergent user experiences. The second option left users with janky interfaces that felt wrong on both platforms.
Flutter changed this equation. It’s Google’s open source UI toolkit for building natively compiled applications for mobile, web, and desktop from a single codebase. Unlike earlier cross-platform frameworks that wrapped native components, Flutter draws its own pixels, giving you complete control over every frame that renders on screen.
Flutter isn’t experimental anymore. Companies like [eBay Motors](https://flutter.dev/showcase/ebay) use it for their vehicle marketplace app. [BMW](https://flutter.dev/showcase/bmw) uses it for its connected car experiences. [Nubank](https://flutter.dev/showcase/nubank), one of the world’s largest digital banks, built its entire mobile platform with Flutter and serves over 100 million customers.
This article explains how Flutter works under the hood, why businesses and developers choose it, and the ecosystem of tools and agencies that make it production-ready for enterprise teams.
## How Flutter works: the architecture
Most cross-platform frameworks act as translators. They take your code and convert it into native iOS and Android UI components at runtime. This translation layer creates performance bottlenecks and inconsistencies because iOS buttons don’t behave exactly like Android buttons.
Flutter takes a different approach. It doesn’t use native platform widgets at all. Instead, it draws every pixel itself using a high-performance graphics engine. Think of it like a video game engine, but for building apps. On iOS, Android, desktop, and web, Flutter controls the entire rendering pipeline from your code down to the pixels on screen.
This approach starts with [Skia](https://skia.org/), the same 2D graphics library that powers Chrome and Android. In 2022-24, Flutter introduced and set as default [Impeller](https://docs.flutter.dev/perf/impeller), a next-generation rendering engine that compiles shaders ahead of time for even better performance. When your Flutter app renders a button, it’s not asking the OS for a button component. It’s drawing the exact pixels that make up that button, down to the shadow and animation curves.
Google chose [Dart](https://dart.dev/) as the programming language for Flutter for specific technical reasons. Dart compiles to native ARM machine code on mobile, which means your production app runs at full speed without a JavaScript bridge or interpreter. During development, Dart’s Just-in-Time (JIT) compiler powers Hot Reload, one of Flutter’s most praised features. You can change your code and see the result in under a second, without losing your app’s state or restarting.
Flutter’s architecture centers on widgets. Everything in Flutter is a widget, from structural elements like rows and columns to styling properties like padding and margins. You compose these widgets together to build your interface. A button isn’t a single object. It’s a composition of widgets for gesture detection, padding, material effects, and text styling. This composability makes Flutter interfaces predictable and testable.
The framework uses Ahead-of-Time (AOT) compilation for production builds. Your Dart code compiles directly to native ARM code, eliminating the runtime overhead of interpretation or just-in-time compilation. This is why Flutter apps can maintain 60fps (or 120fps on high-refresh displays) consistently. The framework’s [rendering pipeline is designed to complete all work for a frame in under 16 milliseconds](https://docs.flutter.dev/tools/devtools/performance#:~:text=This%20means%20that%2C%20approximately%20every%2016ms%2C%20the%20UI%20updates%20to%20reflect%20animations%20or%20other%20changes%20to%20the%20UI.), the budget for 60fps rendering.
Flutter’s architecture has one more advantage: consistency across platforms. Because Flutter controls its own rendering, a button looks identical on iOS 15, Android 13, and a three-year-old device. You’re not at the mercy of platform differences or OS version fragmentation.
## Why developers and businesses choose Flutter
Hot Reload changed how mobile developers work. Before Flutter, changing a UI element meant recompiling your app, reinstalling it, and navigating back to the screen you were working on. This cycle took 30-60 seconds. With Hot Reload, you save your file and see the change in a few seconds, with your app’s current state preserved. You can iterate on animations, test edge cases, and experiment with designs at a pace that wasn’t possible before.
For businesses, the math is simple. You write one codebase instead of two. That means one team instead of two separate iOS and Android teams. You don’t need to synchronize features between platforms or maintain parity between codebases. When you fix a bug, it’s fixed everywhere. When you ship a feature, it ships to all your users at once.
Flutter gives you pixel-perfect control over your interface on every screen size. You’re not limited by platform conventions or native component libraries. Companies building design systems appreciate this control. You can match your brand guidelines exactly, animate transitions the way your designers envisioned, and create custom UI components that work identically across mobile, desktop, and web.
Dart’s null safety system, introduced in Dart 2.12, prevents null reference errors at compile time. These errors are responsible for billions of dollars in software failures across the industry. Dart’s type system catches null errors before you ship code to users. The language also supports modern features like async/await for handling asynchronous operations, strong type inference, and extension methods for adding functionality to existing classes.
The business case extends beyond engineering efficiency. Teams shipping Flutter apps report faster time-to-market because they’re not coordinating two platform-specific releases. They can experiment more freely because changes are cheaper to make. Most importantly, they can maintain quality standards across all platforms without fragmenting their engineering resources.
## The Flutter ecosystem: tools and agencies
A framework is only useful if you can actually ship production apps with it. Flutter has matured into a commercial ecosystem with specialized tools and agencies that handle the full application lifecycle.
### The tooling stack
**Shorebird** solves one of mobile development’s biggest frustrations: app store review times. When you find a critical bug, you can’t just push a fix. You have to submit an update, wait 24-48 hours for Apple’s review (longer on weekends), then wait for users to actually install the update. [Shorebird](https://shorebird.dev) enables [over-the-air updates](https://docs.shorebird.dev/code-push/) for Flutter apps. You can [patch bugs](https://docs.shorebird.dev/code-push/patch/) and ship changes directly to your users’ devices without going through the store review process. It works by updating your Dart code while keeping your native shell unchanged, which keeps you compliant with [App Store](/flutter-concepts/releasing-flutter-apps/ios/) and [Play Store](/flutter-concepts/releasing-flutter-apps/android/) guidelines.
**Codemagic** is a CI/CD platform built specifically for mobile apps. Generic CI systems like GitHub Actions work, but they weren’t designed for the specific needs of mobile builds: managing certificates, provisioning profiles, platform-specific signing, and coordinating releases across multiple stores. [Codemagic](https://codemagic.io/) handles these mobile-specific workflows out of the box. It [integrates with Shorebird](https://docs.shorebird.dev/code-push/ci/codemagic/) and provides specialized workflows for releasing to the App Store, Play Store, and Firebase App Distribution.
**ServerPod** lets you build your backend in Dart. Most Flutter apps talk to a backend written in Node.js, Python, or Go. [ServerPod](https://serverpod.dev/) lets you write full-stack applications in a single language. It includes an ORM, API generation, authentication, and real-time communication. If you’re building a Flutter app and need a backend, ServerPod means your entire team can work in Dart with shared types and business logic between client and server.
**Widgetbook** is Storybook for Flutter. It creates a catalog of your UI components where you can develop widgets in isolation, test them with different data, and document their usage. When you’re building a design system or working on a team where designers need to review components, [Widgetbook](https://www.widgetbook.io/) provides a development environment focused purely on UI components, separate from your app’s business logic and navigation.
### The experts: agencies
Not every company has the internal expertise or bandwidth to build a Flutter app from scratch. For businesses looking to scale quickly without an internal team, hiring a specialized Flutter app development company is a common path.
**Very Good Ventures (VGV)** is known for defining architecture patterns and best practices in the Flutter community. They’ve worked with companies like Betterment and Hamilton, building production Flutter apps that handle millions of users. VGV open sources many of their tools, including [Very Good CLI](https://cli.vgv.dev/) for scaffolding projects and Very Good Coverage for enforcing code coverage standards. When companies need to establish patterns for large Flutter codebases, [VGV’s architectural guidance](https://verygood.ventures/) shapes how teams structure their apps.
**LeanCode** specializes in enterprise Flutter applications. They’ve built apps for European banks, healthcare providers, and logistics companies where security, compliance, and scale matter. Their expertise includes integrating Flutter with existing enterprise systems, implementing complex authentication flows, and optimizing performance for apps with heavy data requirements.
A dedicated Flutter mobile app development company can accelerate time-to-market by using pre-built modules, established patterns, and deep knowledge of the platform’s edge cases. These agencies have encountered and solved the problems you’ll face, from handling offline sync to optimizing app size to debugging platform-specific issues.
## Flutter vs. the competition
It is also important to look at Flutter’s competitors to understand the benefits that you get over them
### Flutter vs. React Native
React Native uses a JavaScript bridge to communicate with native platform components. When you render a button in React Native, your JavaScript code sends a message across this bridge to create a native iOS or Android button. This bridge adds latency and complexity. Flutter eliminates the bridge entirely by rendering its own components. This architectural difference means Flutter delivers more consistent performance, especially in complex UIs with heavy animation or frequent state changes.
React Native’s approach has an advantage: it uses actual native components, so updates to iOS or Android automatically apply to React Native apps. But this same characteristic creates consistency problems. Your React Native app can look and behave differently depending on the OS version. Flutter trades this automatic updating for guaranteed consistency across platforms and OS versions.
### Flutter vs. native development
Building native apps in Swift and Kotlin gives you immediate access to every OS API and the latest platform features on day one. Flutter catches up quickly (usually within weeks of a platform update), but native development is always first to new capabilities.
The tradeoff is the maintenance burden. Native development means maintaining separate codebases with duplicated business logic, separate testing, and coordinated releases. For teams that can’t afford dedicated iOS and Android engineers, or for companies where mobile isn’t the core product, this duplication is expensive. Flutter significantly reduces this maintenance cost, though you give up the cutting edge of platform features.
The decision often comes down to your constraints. If you need the absolute latest iOS 26 features and your app’s value is tied to platform-specific capabilities, native development makes sense. If you need to ship across platforms quickly, control your interface precisely, and minimize long-term maintenance, Flutter is the better choice.
## Where Shorebird fits in the stack
The app stores serve a purpose. They enforce security standards, review apps for policy compliance, and give users confidence about the software they install. But the review process creates a bottleneck. You can’t respond to production issues quickly. You can’t iterate based on user feedback without waiting days for approval.
This is the “last mile” problem. Flutter solves the problem of writing once and deploying everywhere. But you still hit the bottleneck of app store review times when you need to update your app.
[Shorebird patches this last mile](https://docs.shorebird.dev/code-push/system-architecture/). It enables over-the-air updates that bypass the store review process. When you find a bug, you [create a patch](https://docs.shorebird.dev/code-push/patch/) and push it directly to your users. They receive the update automatically, without reinstalling your app or waiting for store approval. Shorebird works by separating your Dart code from your native app shell. The shell (which contains platform-specific code) goes through normal store reviews. Your Dart code (which is most of your app) can be updated over-the-air.
Shorebird integrates cleanly with the rest of the Flutter ecosystem. You can add Shorebird commands to your [Codemagic workflows](https://docs.shorebird.dev/code-push/ci/codemagic/) to automatically create patches when you merge to production. Your developers continue using their existing tools. Shorebird adds one command to your [deployment process](https://docs.shorebird.dev/code-push/guides/development-workflow/).
The philosophy behind Shorebird is that big tech companies like Google, Meta, and Microsoft have solved these problems internally for their own apps. They have systems to update apps without store reviews. Shorebird makes these capabilities available to every Flutter developer, not just teams with the resources to build their own infrastructure.
## Next steps
Now that you understand Flutter and the ecosystem around it, here are practical paths forward:
**Start Your First Flutter Project**: Download the [Flutter SDK](https://docs.flutter.dev/get-started/install) and follow the [Shorebird Quick Start](https://docs.shorebird.dev/getting-started/) to create a new project with Code Push capabilities built in. The `shorebird create` command scaffolds a Flutter app with Shorebird already integrated.
**Set Up Your Development Workflow**: Establish a robust development process by following Shorebird’s [development workflow guide](https://docs.shorebird.dev/code-push/guides/development-workflow/). Learn how to [test patches](https://docs.shorebird.dev/code-push/guides/testing-patches/) before deploying them and implement [staging environments](https://docs.shorebird.dev/code-push/guides/staging-patches/) to catch issues before production.
**Implement Continuous Integration**: Automate your build and deployment pipeline using [Shorebird’s CI documentation](https://docs.shorebird.dev/code-push/ci/github/). Whether you’re using GitHub Actions, [Codemagic](https://docs.shorebird.dev/code-push/ci/codemagic/), or [Fastlane](https://docs.shorebird.dev/code-push/ci/fastlane/), you can integrate Code Push into your existing workflows.
**Prepare for Production Release**: Before launching to the app stores, review the platform-specific guidelines in [Releasing a Flutter App](/flutter-concepts/releasing-flutter-apps/). Implement [patch signing](https://docs.shorebird.dev/code-push/guides/patch-signing/) for additional security and set up [percentage-based rollouts](https://docs.shorebird.dev/code-push/guides/percentage-based-rollouts/) to gradually deploy updates to your user base.
**Scale Your Team’s Usage**: If you’re working with a team, set up [Shorebird Organizations](https://docs.shorebird.dev/account/orgs/) to manage access and collaborate on releases. Configure your apps to work with [build flavors](https://docs.shorebird.dev/code-push/guides/flavors/android/) if you maintain multiple app variants or white-label applications.
# Flutter for Beginners
> Your First App in 30 Minutes
The traditional Flutter development workflow has a significant gap: you build an app, ship it to the app stores, and then wait days or weeks for approval whenever you need to push a fix. Shorebird eliminates this friction by enabling over-the-air (OTA) [Code Push updates](https://docs.shorebird.dev/code-push/) for Flutter apps.
With the `shorebird create` command, you can now scaffold production-ready Flutter projects that support instant updates from the very first line of code. This tutorial walks you through the entire workflow, from installation to your first release, while covering Flutter fundamentals along the way.
## Prerequisite: Installing the Shorebird CLI
Before creating your first project, you’ll need the Shorebird command-line interface. The installation process differs slightly by operating system, but remains straightforward on all platforms.
**For macOS and Linux**, open your terminal and run:
```
curl --proto '=https' --tlsv1.2 https://raw.githubusercontent.com/shorebirdtech/install/main/install.sh -sSf | bash
```
**For Windows**, open PowerShell and execute:
```
Set-ExecutionPolicy RemoteSigned -scope CurrentUser
iwr -UseBasicParsing 'https://raw.githubusercontent.com/shorebirdtech/install/main/install.ps1'|iex
```
These commands download Shorebird to `~/.shorebird/bin`, including a modified [Flutter engine](https://github.com/shorebirdtech/flutter/tree/shorebird/dev/engine) that enables Code Push capabilities. This modified Flutter lives inside Shorebird’s cache and won’t interfere with your existing Flutter installation. You continue using your normal [Flutter SDK](https://docs.flutter.dev/get-started/install) for development.
After installation, you can verify everything works by running `shorebird --version` and then authenticate with `shorebird login`. This opens your browser to create a free Shorebird account or sign into an existing one.
## Step 1: Creating your first OTA-enabled Flutter app
Here’s where [`shorebird create`](https://docs.shorebird.dev/code-push/create/) shines. Instead of running `flutter create` and manually configuring Shorebird later, this single command handles everything:
```
shorebird create my_flutter_app
```
Under the hood, `shorebird create` performs two operations automatically. First, it runs `flutter create` to scaffold a standard Flutter project with the familiar counter app template. Second, it runs [`shorebird init`](https://docs.shorebird.dev/code-push/initialize/) to configure your project for OTA updates and register it with Shorebird’s cloud infrastructure.
> You might be prompted to log in using `shorebird login` if you are running the Shorebird CLI for the first time.
The command generates a unique `app_id` (like `8c846e87-1461-4b09-8708-170d78331aca`) that identifies your app in Shorebird’s system. This ID determines which patches get delivered to which apps. You can think of it as your app’s fingerprint in the Shorebird ecosystem. [The `app_id` is not secret](https://docs.shorebird.dev/code-push/faq/#do-you-need-to-keep-your-app_id-secret) and should be committed to version control.
Beyond the standard Flutter files, `shorebird create` adds or modifies these files:
* **shorebird.yaml**: A new configuration file in your project root containing your `app_id`
* **pubspec.yaml**: Updated to include `shorebird.yaml` in the assets section
* **AndroidManifest.xml**: Updated to include INTERNET permission (required for downloading patches)
## Step 2: Understanding your Flutter project structure
Whether you use `shorebird create` or `flutter create`, the resulting project follows Flutter’s standard directory layout. Understanding this structure is essential for productive development.
The **lib/** folder contains all your [Dart](https://dart.dev/) code. The entry point is **lib/main.dart**, which houses the `main()` function that calls `runApp()` with your root widget. As your app grows, you’ll organize screens, widgets, and business logic into subdirectories within **lib/**.
The **android/** folder holds Android-specific configuration, including Gradle build files and **AndroidManifest.xml**. Unless you’re integrating native Android code or configuring platform-specific settings, you’ll rarely need to edit files here directly.
The **ios/** folder mirrors this for Apple mobile platforms, containing the Xcode workspace and iOS project files. Platform-specific configuration like `Info.plist` lives here, and you’ll visit this directory when configuring iOS-specific capabilities or signing certificates.
The **pubspec.yaml** file at the project root is arguably the most important configuration file. It defines your app’s name, version, dependencies, and assets. When Shorebird creates or initializes a project, it adds **shorebird.yaml** to the assets list here, ensuring the configuration file gets bundled with your app:
```
flutter:
uses-material-design: true
assets:
- shorebird.yaml
```
## Step 3: Understanding Flutter’s widget tree
Flutter builds user interfaces through a hierarchical tree of widgets; everything is a widget. You compose simple widgets into complex UIs by nesting them as children of other widgets. A typical app structure uses four fundamental widgets that form the visual backbone:
* **Scaffold** provides the [Material Design](https://m3.material.io/) layout structure, acting as a container for your app’s major visual elements. It exposes properties for the app bar, body content, floating action buttons, drawers, and bottom navigation.
* **AppBar** creates the top navigation bar. It typically displays a title, optional leading widget (like a menu icon), and trailing action buttons (like search or settings icons).
* **Center** is a layout widget that positions its single child in the middle of the available space. It’s commonly used to center content within the Scaffold’s body.
* **Text** displays styled text on screen. It’s one of the simplest widgets, but one you’ll use constantly.
Here’s how these widgets nest together to form a tree:
```
Scaffold(
appBar: AppBar(
title: const Text('My First App'),
),
body: const Center(
child: Text('Hello, world!'),
),
)
```
This hierarchy, `Scaffold` containing `AppBar` and `Center`, with `Text` nested inside `Center`, demonstrates how Flutter builds UIs through composition rather than inheritance.
### Stateless widgets versus stateful widgets
Flutter distinguishes between widgets that never change and widgets that can update dynamically. By treating some widgets as immutable, Flutter can rebuild the UI more efficiently.
`StatelessWidget` represents UI that doesn’t change based on user interaction. These widgets receive their configuration from parent widgets, store values in `final` variables, and render the same output given the same inputs. You should use `StatelessWidget` for static content like labels, icons, or logos that display the same way regardless of app state.
Also, when in doubt, start with a `StatelessWidget`. You can always switch to a `StatefulWidget` later if the widget needs to manage its own state or respond to user interaction.
```
class Greeting extends StatelessWidget {
const Greeting({super.key});
@override
Widget build(BuildContext context) {
return const Text('Welcome to Flutter!');
}
}
```
`StatefulWidget` manages mutable state. When something needs to change, a counter incrementing, a form field updating, or data loading from an API, you need a StatefulWidget. It creates a companion `State` object that persists across rebuilds and holds the mutable data.
```
class Counter extends StatefulWidget {
const Counter({super.key});
@override
State createState() => _CounterState();
}
class _CounterState extends State {
int _count = 0;
void _increment() {
setState(() {
_count++;
});
}
@override
Widget build(BuildContext context) {
return ElevatedButton(
onPressed: _increment,
child: Text('Count: \$_count'),
);
}
}
```
The key mechanism is `setState()`. Calling it notifies Flutter that the state has changed and triggers a rebuild of the widget, updating the UI to reflect the new values.
### Hot reload accelerates your development workflow
One of Flutter’s most celebrated features is *hot reload*, which injects updated code into the running [Dart VM](https://dart.dev/tools/dart-vm) without restarting your app. When you save a file, Flutter recompiles only the changed libraries, sends them to the device, and rebuilds the widget tree, typically in under one second.
The magic of hot reload is state preservation. Your app remains at the same screen, with the same data loaded, while UI changes appear instantly. You don’t need to re-navigate to a deeply nested screen or re-enter form data after every code change.
To trigger hot reload, simply save your file in VS Code or Android Studio (the IDEs auto-reload by default), or press `r` in the terminal if running via `flutter run`. For changes that affect initialization logic, like modifications to `main()` or `initState()`, use hot restart (press `R`), which restarts the app from scratch while still being faster than a full rebuild.
Hot reload only works in debug mode. Release builds compile Dart to native code and don’t support this feature, which is precisely why Shorebird’s Code Push capability is so valuable for production apps.
## Step 4: making your first change
At this point, you have a fully working Flutter app with OTA updates wired in. You can try it out by running the following command:
```
flutter run
```
Here’s what the app will look like on an Android device:
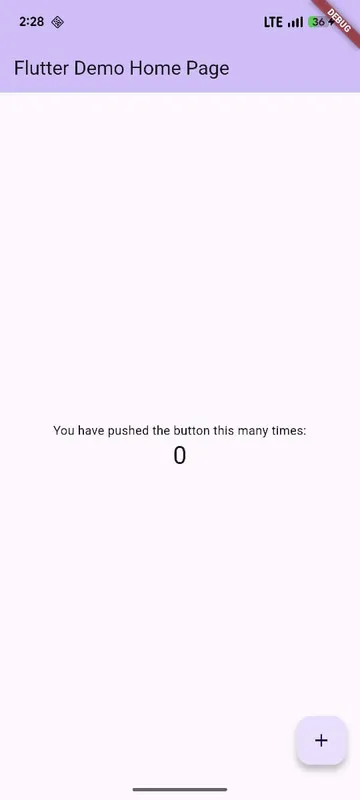
Before shipping anything, make a small but visible change so you can see how Flutter’s UI responds to code edits. This next step tweaks the app’s theme color and updates some on-screen text.
Open **lib/main.dart** in your editor. Near the top of the file, you’ll find the `MaterialApp` widget. This is where global application settings live, including theming.
Look for the `theme` property. By default, it will look something like this:
```
theme: ThemeData(
colorScheme: .fromSeed(seedColor: Colors.deepPurple),
),
```
Change the `primarySwatch` to a different color, for example, `Colors.deepPurple`:
```
theme: ThemeData(
colorScheme: .fromSeed(seedColor: Colors.blue),
),
```
This single change updates the color used by Material components such as the app bar, buttons, and highlights across the entire app. Flutter’s theming system works top-down, so modifying the theme here affects every widget below it in the tree.
Next, scroll down to the widget that renders text on the screen. In the default counter app, you’ll see a `Text` widget inside the `body` of a `Scaffold`. It might look similar to this:
```
const Text(
'You have pushed the button this many times:',
),
```
Replace the string with something custom:
```
const Text(
'Welcome to my first OTA-enabled Flutter app!',
),
```
Save the file and run the app using:
```
flutter run
```
Within seconds, you should see the updated theme color and new text reflected in the UI:
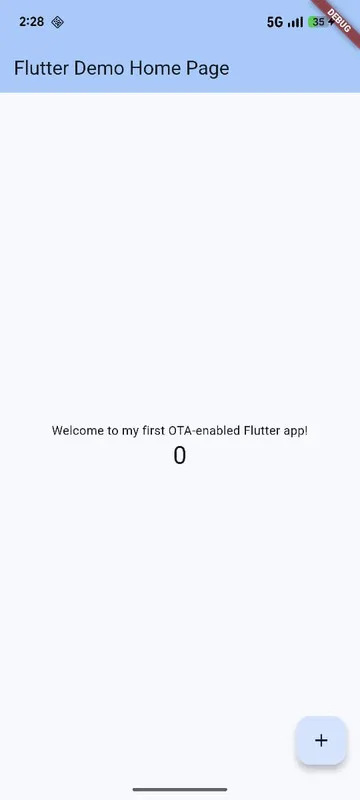
This fast feedback loop is one of Flutter’s biggest strengths. You edit Dart code, the framework rebuilds the widget tree, and the changes appear immediately.
The next step takes this simple customization further by preparing the app for its first Shorebird-powered release, setting the stage for OTA updates that go beyond local development.
## Step 5: From development to release with Shorebird
Once your app is ready for users, Shorebird provides commands to build, preview, and distribute your releases.
**Creating a release** captures a snapshot of your compiled code that Shorebird stores in the cloud. This becomes the baseline for future patches:
```
shorebird release android # Creates an Android release (.aab)
shorebird release ios # Creates an iOS release (.ipa)
```
The [`shorebird release`](https://docs.shorebird.dev/code-push/release/) command builds your app using Shorebird’s modified Flutter engine, uploads the compiled Dart code to Shorebird’s servers, and outputs the artifacts you’ll submit to the app stores (see [Releasing a Flutter App](/flutter-concepts/releasing-flutter-apps/)). For Android, you get an `.aab` file for [Google Play](/flutter-concepts/releasing-flutter-apps/android/); for iOS, an `.ipa` for [App Store Connect](/flutter-concepts/releasing-flutter-apps/ios/).
**Previewing a release** lets you test the exact build that will ship to users:
```
➜ my_flutter_app shorebird preview
✓ Fetching releases (0.5s)
✓ Fetching releases (0.5s)
Which release would you like to preview? 1.0.0+1
✓ Fetching aab artifact (0.4s)
✓ Using stable track (0.7s)
✓ Extracting metadata (1.0s)
✓ Built apks: /Users//.shorebird/bin/cache/previews/dbad83ad-92fd-4228-af9a-014800f6efd7/android_1.0.0+1_1966896.apks (2.9s)
✓ Installing apks (6.0s)
✓ Starting app (1.8s)
```
The [`shorebird preview`](https://docs.shorebird.dev/code-push/preview/) command downloads the release artifacts from Shorebird’s cloud and installs them on a connected device or emulator. It’s particularly useful for verifying releases built on [CI/CD servers](https://docs.shorebird.dev/code-push/ci/github/) before distributing them to end users.
After your initial release is live in the stores, you can push instant updates with [`shorebird patch`](https://docs.shorebird.dev/code-push/patch/) whenever you fix bugs or add features, no app store review required.
For instance, update the theme of the app to use the following:
```
theme: ThemeData(
colorScheme: .fromSeed(seedColor: Colors.deepPurple),
),
```
Then, run `shorebird patch android`. Once the command completes running, try closing and restarting an installed release of the app. The theme of the app should get updated on a fresh run:
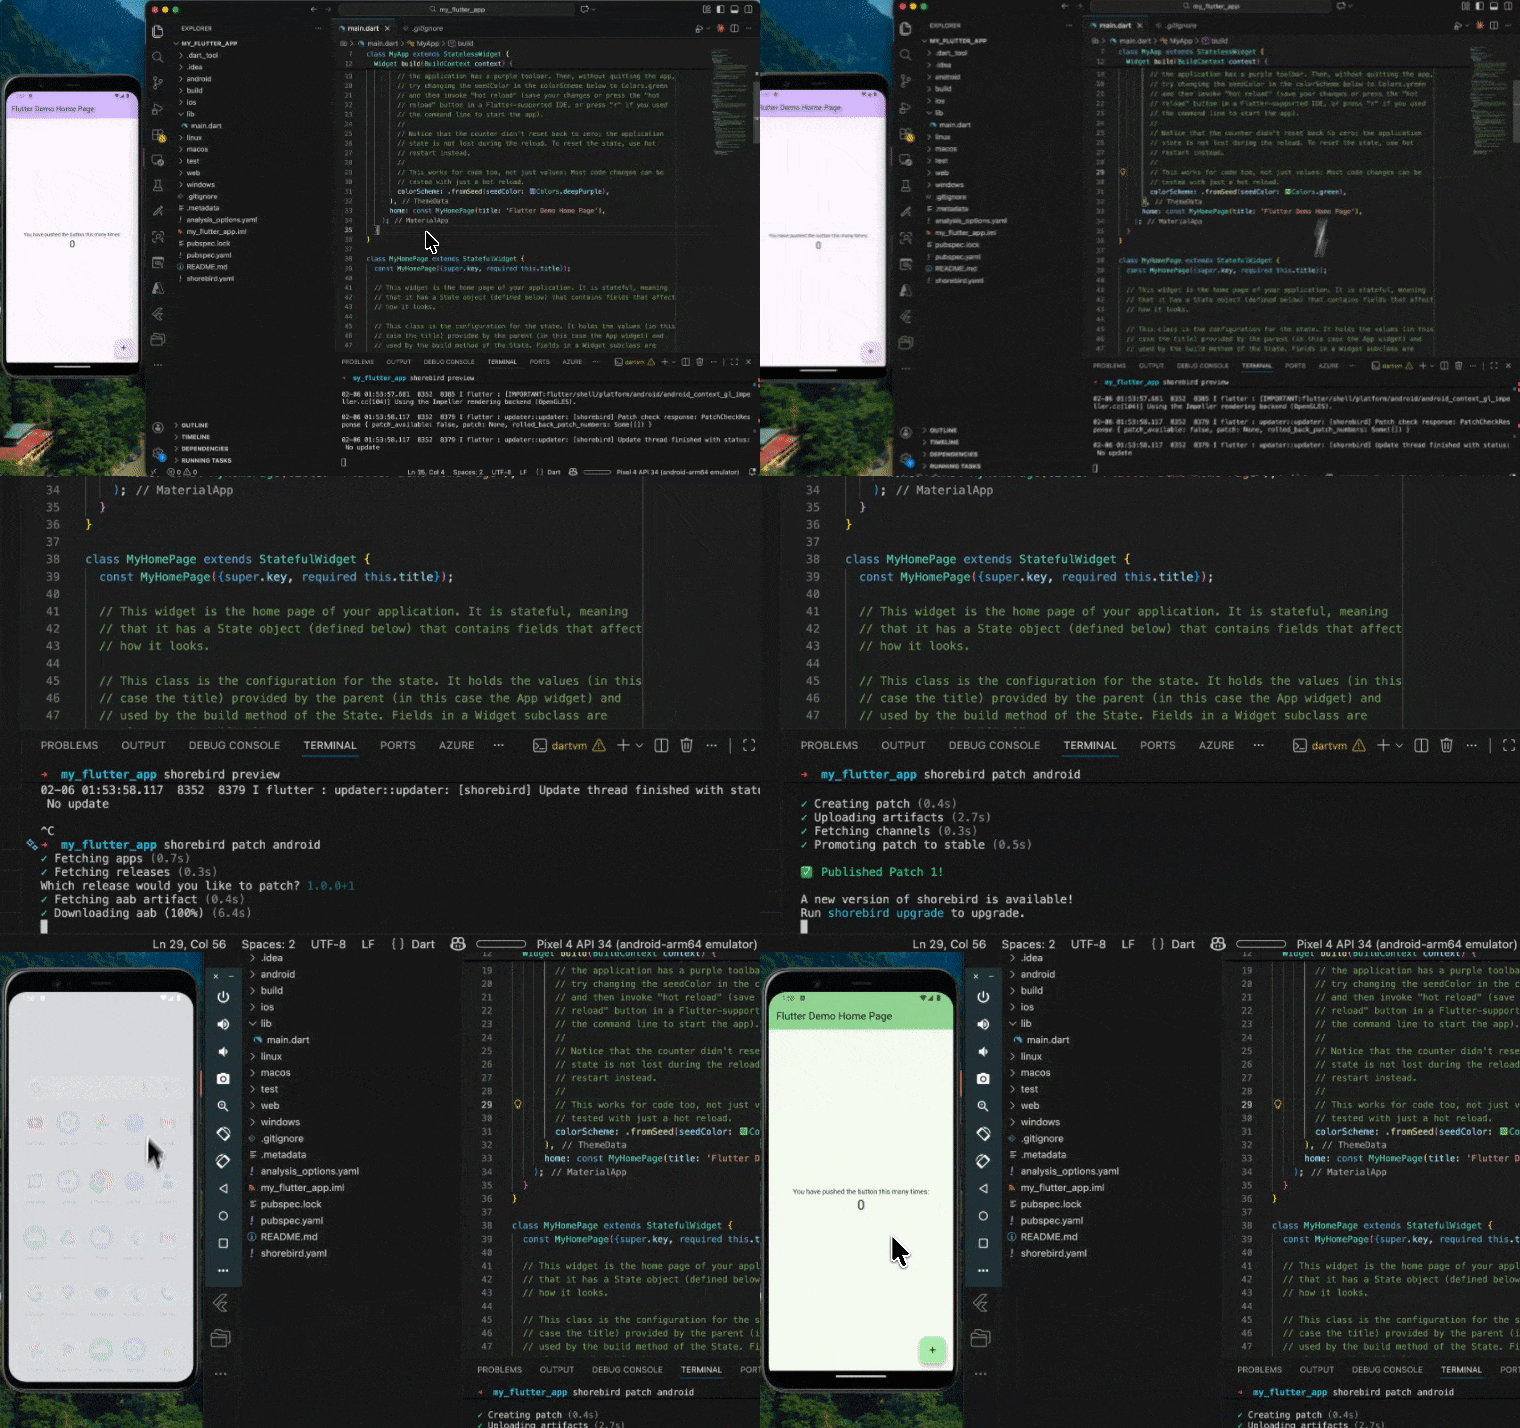
Also, you will be able to view the patch on your Shorebird Console:

If needed, you can rollback your patches easily from here:
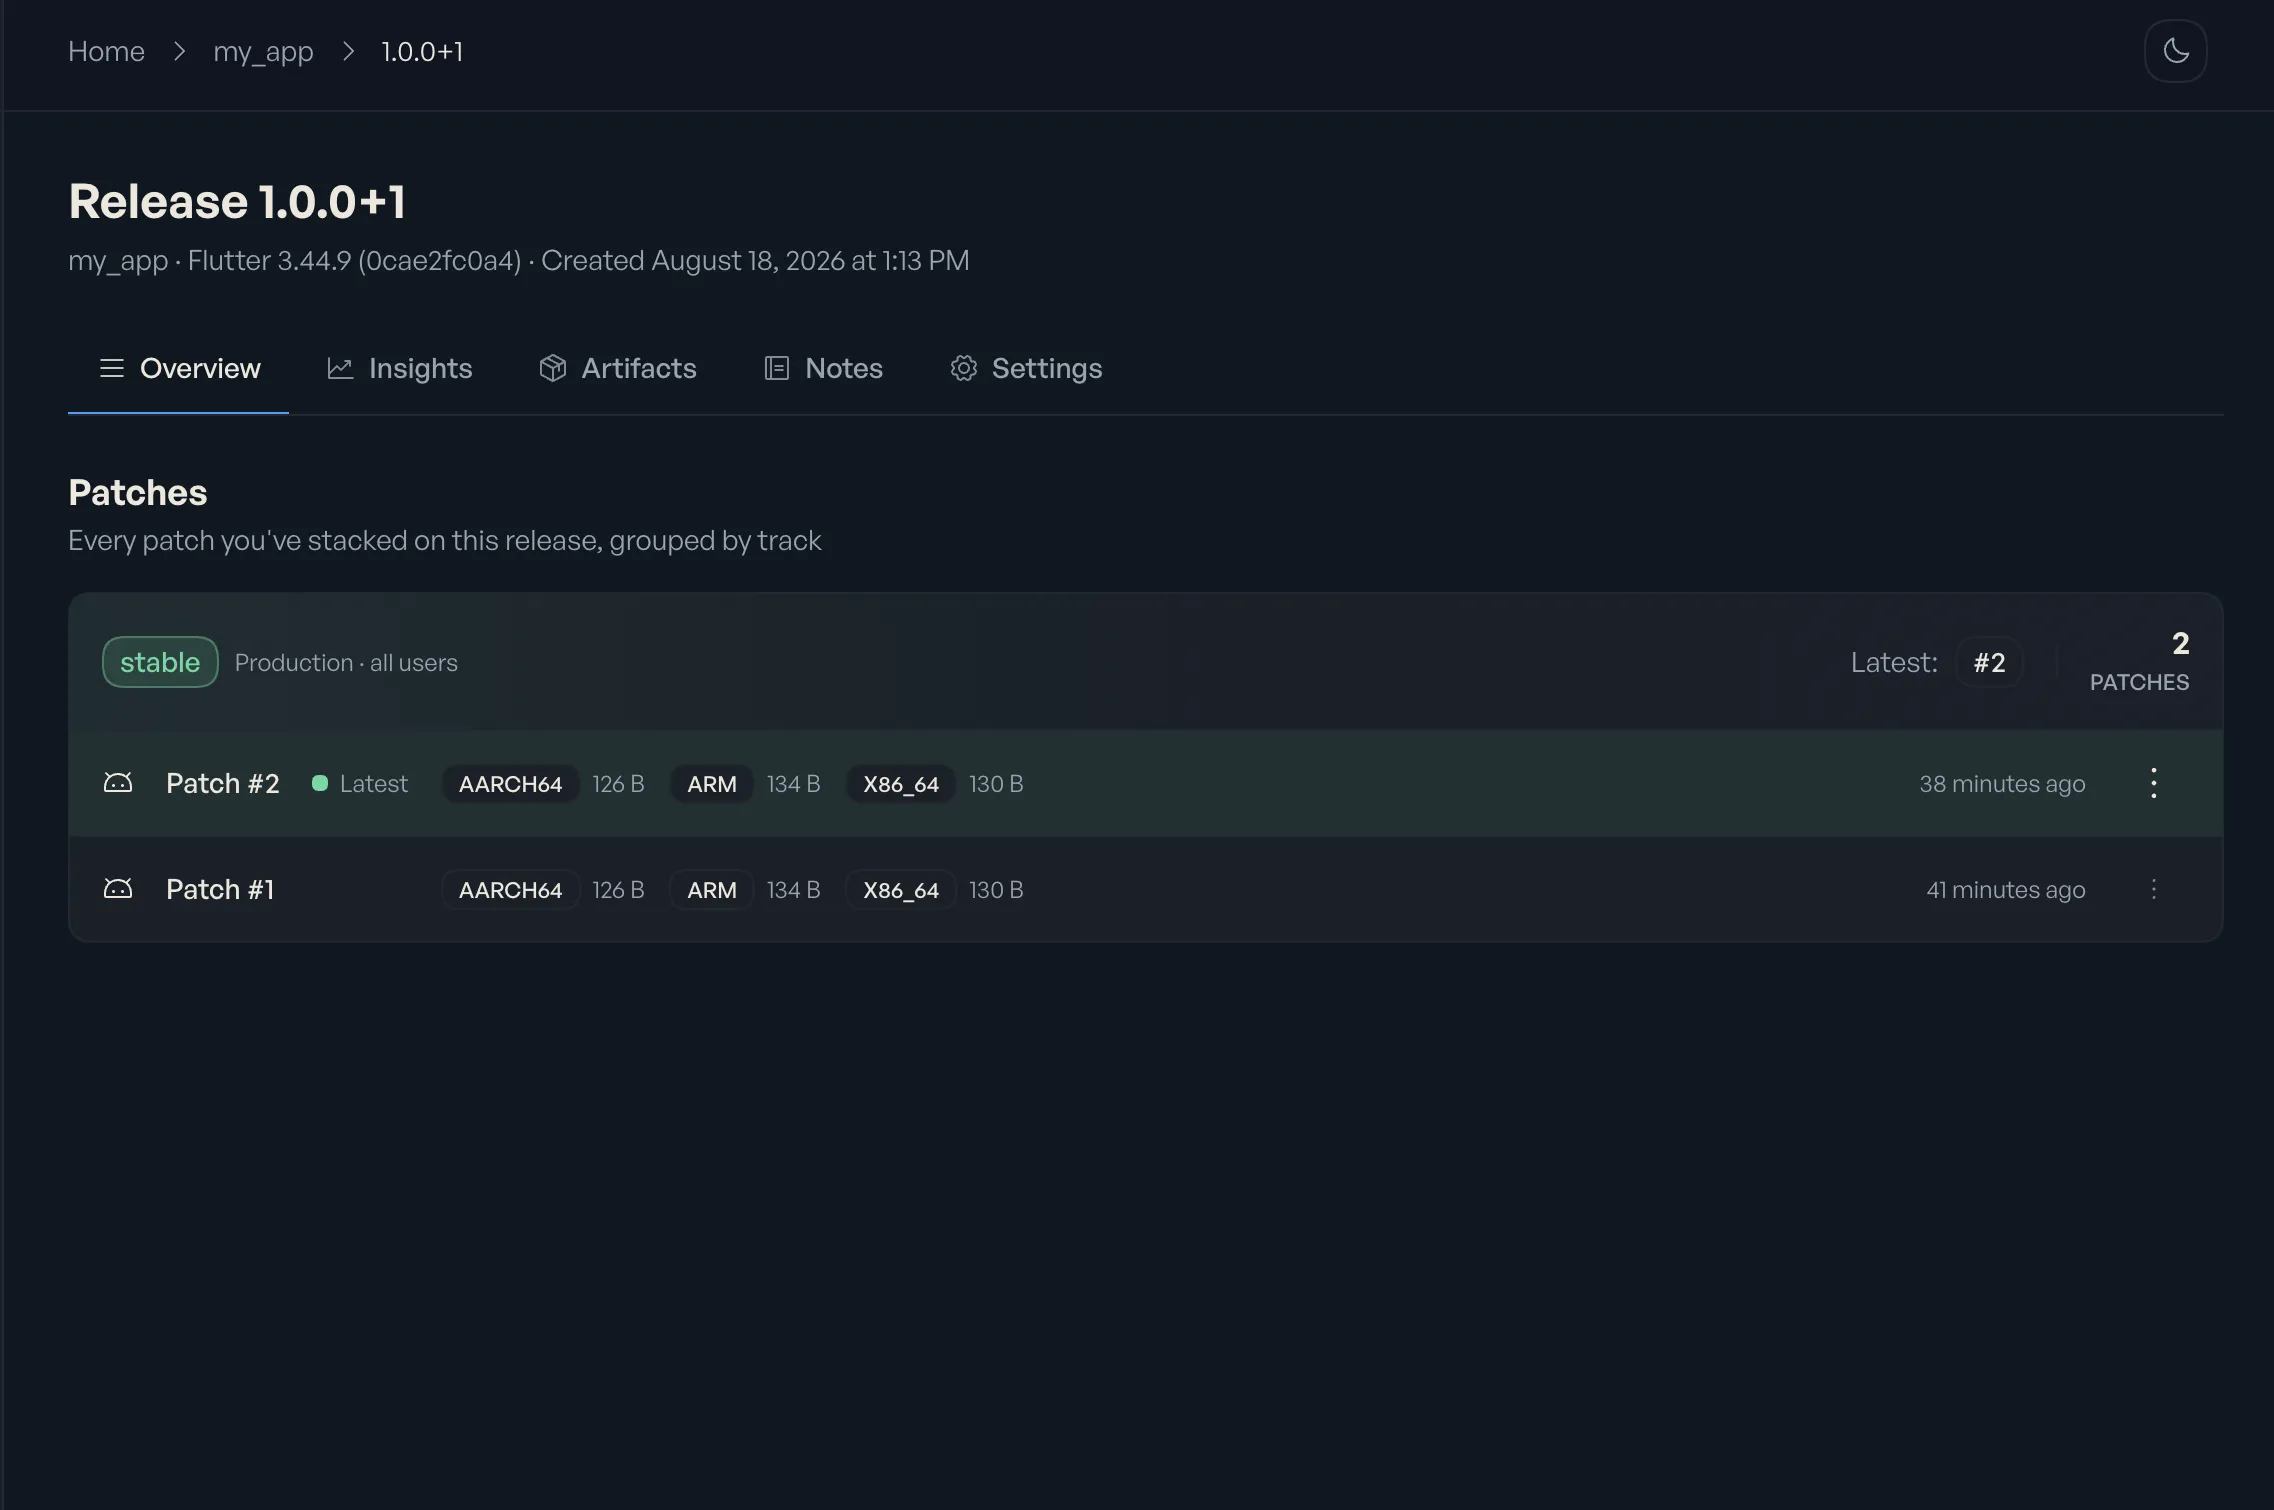
## Conclusion
Starting a Flutter project with `shorebird create` rather than `flutter create` costs you nothing in terms of development workflow; you still get the same project structure, the same hot reload experience, and the same widget-based UI development. What you gain is the ability to push critical fixes to users in minutes instead of waiting days for app store approval.
The combination of Shorebird’s OTA infrastructure with Flutter’s widget composition model and hot reload creates a development experience optimized for rapid iteration at every stage, from first prototype to production maintenance. For any Flutter project that will eventually ship to real users, building in Code Push capability from day one is simply the pragmatic choice.
## Next steps
Now that you’ve created your first Shorebird-enabled Flutter project, here are some recommended next steps to deepen your understanding and optimize your workflow:
**Establish a robust development workflow**: Learn how to integrate Shorebird into your team’s development process with the [Development Workflow guide](https://docs.shorebird.dev/code-push/guides/development-workflow/). This covers best practices for testing patches locally, staging updates before production, and coordinating releases across team members.
**Test patches before releasing to users**: Before pushing updates to production, you should verify they work correctly using the [Testing Patches guide](https://docs.shorebird.dev/code-push/guides/testing-patches/). Learn how to test patches on physical devices, emulators, and with different release versions to catch issues early.
**Implement staged rollouts for safety**: Minimize risk by gradually rolling out patches to a percentage of users first. The [Percentage-Based Rollouts guide](https://docs.shorebird.dev/code-push/guides/percentage-based-rollouts/) shows you how to deploy patches to 10% of your user base, monitor for issues, and then expand to 100% once you’re confident.
**Integrate with your CI/CD pipeline**: Automate your patch delivery process by integrating Shorebird into your continuous integration system. Whether you use [GitHub Actions](https://docs.shorebird.dev/code-push/ci/github/), [Codemagic](https://docs.shorebird.dev/code-push/ci/codemagic/), or another platform, these guides show you how to automatically create and deploy patches on every merge to main.
**Understand patch performance characteristics**: Learn how Shorebird optimizes patch delivery and what performance characteristics to expect in the [Patch Performance documentation](https://docs.shorebird.dev/code-push/performance/). This covers patch download sizes, update timing, and strategies to minimize impact on user experience.
# Flutter SDK Deep Dive
> Learn how the Flutter SDK works under the covers
This article is a technical deep-dive through various parts of Flutter, written by Flutter’s founder. It’s not intended to be comprehensive, and there are more deep dives on [Flutter’s docs site](https://docs.flutter.dev/) and within the codebase, but it will give you a general high-level overview if you’re interested in learning more about how Flutter works on the inside.
# Flutter SDK deep dive: Architecture, tooling, and modern update strategies
Flutter changed how teams think about cross-platform development, but production Flutter apps depend on far more than a widget library. The [Flutter SDK](https://github.com/flutter/flutter) is a complete app runtime and build system. It includes a rendering engine, a UI framework, and the toolchain that turns Dart into signed binaries for every platform you ship to.
Those layers work together to produce fast, native applications. The engine draws pixels. The framework defines layout and interaction. The tooling compiles, packages, and signs your code so it can run on iOS, Android, web, and desktop.
What the SDK does not provide is a modern way to update those applications once they are in users’ hands. Flutter’s default delivery model still revolves around static binaries and app store submissions, which means every fix, no matter how small, moves at the pace of store review cycles. For teams shipping frequently, that gap becomes the bottleneck.
This guide will walk you through what lives inside the Flutter SDK, how those pieces fit together, and how [Shorebird](https://shorebird.dev/) extends it with a production-ready update path for real-world release cycles.
## Dart’s dual compilation gives developers the best of both worlds
Dart is uncommon in that it supports both Just-In-Time (JIT) and Ahead-Of-Time (AOT) compilation, each serving distinct purposes in the development lifecycle. During development, the Dart VM runs in JIT mode, compiling code at runtime and enabling the sub-second hot reload that makes Flutter development remarkably productive. For production, Dart’s AOT compiler transforms your entire codebase into native ARM or x64 machine code, eliminating runtime compilation overhead and delivering consistently fast startup times.
The JIT compiler’s key capability is *incremental recompilation*. When you save a file, only modified functions are recompiled and injected into the running VM while preserving application state. Variables, animations, and scroll positions persist through reloads. Hot Restart, triggered with a capital `R`, differs fundamentally: it destroys the current widget tree, creates a new Dart isolate, and re-executes from `main()`, resetting all state in seconds versus hot reload’s sub-second updates.
AOT compilation runs dart compile, or under the covers, the `gen_snapshot` tool, which performs global analysis from your `main()` entry point, applies tree shaking to eliminate unreachable code, and generates platform-specific binaries. This produces fast startup, small binaries, and code that’s harder to reverse-engineer, but creates a critical limitation: *unlike JIT, an AOT binary cannot be updated without rebuilding and redistributing, which on mobile means long app store waits.*
## Flutter engine and the shift from Skia to Impeller
Another common question is why Flutter has its own rendering pipeline, Impeller.
The Flutter Engine is a portable C++ runtime providing the rendering pipeline, Dart VM integration, and platform abstraction layer. Historically, Flutter used [Skia](https://skia.org/), the same 2D graphics library powering Chrome and Android, for GPU-accelerated rendering. However, Skia’s architecture, like Dart’s development mode, is based on a just-in-time architecture. This architecture is built for web browsers, where each page is different and might need different shaders to produce its graphics. On mobile, this just-in-time compilation is not how best-in-class graphics are done, and it created a persistent problem: shader compilation jank.
When Skia encounters new graphical elements (complex gradients, blur effects, custom shaders), it compiles GPU shaders at runtime. This compilation can consume hundreds of milliseconds (even more on iOS, where compilation must be done out-of-process) when a smooth 60fps animation requires each frame to complete in 16ms. Users would experience visible stuttering during first-time animations, a problem that couldn’t be solved through optimization alone.
Impeller represents Flutter’s ground-up solution, designed specifically for Flutter’s rendering patterns. The key innovation is AOT shader compilation: all shaders are compiled at build time, not runtime, eliminating compilation jank entirely. As of Flutter 3.27, [Impeller](https://docs.flutter.dev/perf/impeller) is the default renderer on iOS (with no fallback option) and Android API 29+, falling back to Skia on older devices. [Benchmarks show](https://medium.com/@raiden.lpf666/skia-vs-impeller-a-performance-comparison-e1c7dfd9e861) a 30% reduction in average GPU raster time and over 70% fewer dropped frames in animation-heavy applications.
## The three-tree architecture powers efficient UI updates
Another common question is how the Flutter interaction pipeline works.
Flutter’s framework layer maintains three parallel tree structures that work together for efficient rendering:
| Tree | Purpose | Characteristics |
| --------------------- | ----------------------------- | ------------------------------------------ |
| **Widget Tree** | Declarative UI blueprint | Immutable, lightweight, frequently rebuilt |
| **Element Tree** | Runtime lifecycle management | Mutable, performs reconciliation (diffing) |
| **RenderObject Tree** | Layout, painting, hit-testing | Expensive to create, handles actual pixels |
The Render tree works like Views in other systems, or the DOM in the web. Mutable, large objects that know how to render themselves but can be tricky to orchestrate, or keep synced with the state of the app.
The Widget tree works like React.js and other popular reactive frameworks do. It’s essentially immutable templates for what you want your UI to look like, that are cheap to build and tear down and can be stamped out every frame. Data flow through widgets is unidirectional, you just make new widgets when you want to change the UI, you don’t need to worry about updating existing ones.
And finally, the Element tree (the BuildContext your `build()` method is passed) is the glue that holds these two worlds together. It’s responsible for managing the lifetimes of render objects and keeping them updated as Widgets come and go.
Here’s what the render process looks like:
[](https://mermaid.live/edit#pako:eNplVNtO4zAQ_ZWRJaRdUdg20Fu0QtqWCK1UStUWKm2yD04yNF5SO7IdoFz-HWfSC2XzkvHczpnjSV5ZolJkPrvP1VOScW1hPogkwNERBNLqNRRKSGsq1214a1CDVWWSoQGTaET5t4pMwkmV5YL4iNKS7yq8QmNLjb80Sv4z1j8uNBqVPyJoTNRSihfUhlKHYcQ2yZDwPI958mCo4puSc140QMlZolWef48YVcxCg3Zmua0LMAUh4dKxp-ggDHJcOSIOKS5FnjrvZqbfsigtzE6SUj8iDQUnJxcwoSnIvCLyZA6JHJkzQiVzsGs2qHpDkXFDrRbhGJ9gIdIlWgNOHUdvC23KeKl5kcFiHtYZMHfyEV1XWb1QpnXugGAWO5ipk0smIhfcCkXOILzmNsngqcYiqeI12HWBcAwPuP6KGsx3knyCDQ5gFwQb7KfTXCaZkEtCvA2nWBqETRvqEIxp4r2LnFWbN-L35sr2rrGC1cY7_jSbTN3aqPgfJvWWTd2aFWl1s3XshkIg7kEipiSoSxqHQ9L3IGnLoL7TaY09rg__QRaiwFxIurlROOJr5RbjGAruFpkEPYZMWLBuL50GXwWdzsMDep9UHR2oOq3JjGrWW3tD5aa0bh2rw104Ec-YG7fp-w-LqFHJXSRZgy21SJlvdYkNtkK94tWRvVZpEbOZu4WI-c6Mq4VkkXx3NQWXf5Rabcu0KpcZ8-95btypJKEvBXdDrXZeTYMNVSkt8zttj5ow_5U9M791dnba9Xr9Zqvldb1uq8HWzPe803671-13Wt3zZu-s03tvsBcCbZ722ucdr913j9dte81Og2EqrNLX9W-H_j7vH01hcuE)
When `setState()` triggers a rebuild, the Element tree compares new widgets with existing ones using type and key matching. If they match, the Element is reused and only the `RenderObject` is updated, avoiding expensive recreation. The `BuildContext` passed to every `build()` method is actually the `Element` itself, wrapped in an interface. This reliance on fast comparison between new and old explains why widget identity and why `const` constructors improve performance by enabling widget reuse.
Flutter’s gesture system is also somewhat innovative, in that “which gesture applies” to a set of inputs is decided locally amongst various “recognizers” rather than through a global set of hard-coded if/else statements. The gesture system operates through a [*GestureArena*](https://www.droidcon.com/2024/10/17/how-to-be-a-gladiator-in-the-gesture-arena/) that resolves conflicts when multiple recognizers compete for the same pointer sequence. Each recognizer can claim victory (accept) or bow out (reject), with the first to complete winning exclusive handling. This helps make it easy to build complex, composable interactions with Flutter Widgets, including making nested scrollable areas and overlapping tap targets behave predictably even when appearing in different contexts, without having to edit other parts of the framework.
## The embedder bridges Flutter to native platforms
Flutter, as portable as it is, isn’t enough alone. Flutter apps run within an operating system and interact with other applications and libraries. To do that, Flutter provides a variety of bridging mechanisms to take care of most of this for you, or let you access the rest of the device when you need.
The embedder layer is the platform-specific native application that hosts Flutter content. Written in Java/C++ for Android, Swift/Objective-C for iOS, and C++ for desktop platforms, embedders provide the entry point, rendering surface, event loop, and thread management.
For Android, Flutter runs as an Activity with `FlutterView` rendering content. iOS hosts Flutter in a `FlutterViewController` using Metal for rendering. [Platform channels](https://docs.flutter.dev/platform-integration/platform-channels) enable communication between Dart and native code through three patterns:
* **MethodChannel**: Request-response calls to native methods
* **EventChannel**: Streaming data from native to Dart (sensors, real-time updates)
* **BasicMessageChannel**: Bidirectional asynchronous messaging
For even lower-level interop, [FFI (Foreign Function Interface)](https://dart.dev/guides/libraries/c-interop) provides synchronous calls to C-compatible code with better performance but increased complexity.
## Hot reload mechanics depend on Dart VM code injection
One of the first things that Flutter was noticed for was Hot Reload. Flutter’s hot-reload provides you with sub-second, on-device updates to your running app while you’re editing your code. Pulling that off is no small feat.
[YouTube video player](https://www.youtube.com/embed/aWwF6kCrQJI?si=4rEy-UVOvk7tzgzh)
Understanding hot reload’s technical implementation reveals its capabilities and limitations. When you press `r`, the host machine scans for changed code, recompiles affected libraries plus the main library, generates Dart kernel files (an intermediate representation), and sends them to the device’s Dart VM. The VM reloads libraries, and the Flutter framework triggers a complete rebuild and repaint of existing widgets.
The [Dart VM wiki](https://github.com/dart-lang/sdk/blob/main/runtime/docs/hot-reload.md) describes this as *pervasive late-binding*: the program behaves as if method lookup happens at every call site. However, field values are preserved; changing an initializer doesn’t affect already-initialized variables. Closures capture their function at creation time and won’t pick up changes.
There are some changes that Hot Reload cannot handle, and a Hot Restart will be required:
* Enum-to-class conversions or generic type modifications
* Changes to `main()` or `initState()`
* Static field initializer changes
* Non-Dart-code changes (e.g., native code) (always require a full app restart)
## Testing spans three tiers with distinct tradeoffs
Another question that comes up sometimes is how one should think about testing one’s Flutter app. After some trial and error, the Flutter framework itself landed on a three-tiered testing pyramid principle: many fast unit tests, fewer widget tests, and minimal integration tests. Golden tests are also often thrown in there too, and should be used with caution.
**Unit tests** use the [test](https://pub.dev/packages/test) package to verify isolated functions and classes. External dependencies should be mocked using packages like [Mockito](https://pub.dev/packages/mockito). These execute in milliseconds and catch logic errors early. It’s often particularly helpful to separate an app into “ui” (Flutter) code and “logic” pure Dart code, and extensively test the logic with unit tests.
**Widget tests** use [flutter\_test](https://api.flutter.dev/flutter/flutter_test/) and the `WidgetTester` class to render widgets without a physical device. Key methods include `pumpWidget()` to build the widget tree, `pump()` to advance by one frame after state changes, and `pumpAndSettle()` to wait for all animations to complete. The `find` API locates widgets by text, type, key, or icon, while matchers like `findsOneWidget` and `findsNothing` verify results. These are very useful for testing complex widgets quickly. They’re essentially Flutter-level unit tests.
**Golden Tests** are a controversial, but common, testing mechanism where the exact pixels from your app are recorded and checked against past recordings. It’s very effective at catching unintentional visual bugs before they reach users, but they can be extremely painful to maintain across multiple platforms and configurations. There are a variety of 3p providers who can help make this easier, including WidgetBook.com.
**Integration tests** use the [integration\_test](https://docs.flutter.dev/testing/integration-tests) package (which replaced `flutter_driver`) to test complete app flows on real devices. Tests run through `IntegrationTestWidgetsFlutterBinding` and can execute on [Firebase Test Lab](https://firebase.google.com/docs/test-lab) for device farm testing. Patrol is an alternative 3p approach as well. In general, integration tests are the most expensive to write, maintain, and run, and should be used sparingly.
## AOT compilation creates the immutability problem
As mentioned above, one of the limitations in stock Flutter is that once you’ve built a binary for distribution, you are left at the whims of each platform. Not anymore. This is a problem Shorebird.dev has solved for you.
The build process using `flutter build apk` or `flutter build ipa` invokes AOT compilation, transforming Dart source into native machine code. Tree shaking removes unreachable code, [R8](https://developer.android.com/studio/build/shrink-code) shrinks Java/Kotlin code on Android, and the final binary is signed for distribution. Build times typically range from **3-8 minutes for Android** and **10-25 minutes for iOS** (with many common dependencies, including Firebase, often adding significant overhead).
Unlike React Native, where JavaScript bundles can be updated at runtime through services like [Microsoft’s CodePush](https://microsoft.github.io/code-push/), Flutter’s compiled Dart code is static machine code with no runtime interpreter in release builds. Once published, fixing bugs requires a full app store submission, typically taking days.
That immutability shows up everywhere in day-to-day delivery. Every fix, no matter how small, has to flow back through the full build and release pipeline. New binaries must be produced, signed, and submitted for each platform before users see the change. What makes this painful is not just store review time, but the fact that there is no smaller unit of deployment. You cannot ship a patch, a hotfix, or a targeted change. You can only ship a whole new app.
## Shorebird enables over-the-air Dart code updates
This release pain is one of the reasons Shorebird was started. [Shorebird](https://shorebird.dev/), solves the distribution problem through sophisticated engine modifications. The platform maintains forks of Flutter and Dart. When you install Shorebird, it provides custom Flutter and Dart copies that produce [Shorebird-enabled binaries](https://docs.shorebird.dev/code-push/).
Apple’s developer agreement requires interpreted code for OTA updates, prohibiting JIT compilation. To provide updates, Shorebird built a *custom Dart interpreter*. To maintain Flutter’s high-performance, while still providing interpreter-updates, Shorebird also introduced a novel linker phase, which allows the vast majority of your app to still run out of the AOT compiled binary, rather than interpreting after update. This linker analyzes two Dart programs (release and patch), finds maximal similarity, and determines per-function whether to use the original binary or interpreter. Typically, 98%+ of patched code runs from the original binary at full speed.
The [workflow](https://docs.shorebird.dev/code-push/guides/development-workflow/) integrates seamlessly with existing development, with no required changes to your application:
```
shorebird release android # Build and register release
# Submit to app stores...
# Fix bug in Dart code...
shorebird patch android # Create and deploy patch
```
[Patches](https://docs.shorebird.dev/code-push/patch/) use **binary diffing**. On Android, patches are typically a few kilobytes. iOS patches tend to be hundreds of kilobytes. Users receive patches on their next app restart, with automatic [rollback protection](https://docs.shorebird.dev/code-push/rollback/) if a patch fails to launch.
Critically, Shorebird helps you maintain app store compliance: patches only modify Dart code (not native code, Flutter engine, or assets).
## Current best practices for Flutter development in 2026
**Flutter 3.47.5** (September 2026) is the current stable release, bundled with **Dart 3.13.4**. Key requirements now include Java 17 minimum for Android, iOS 13+ minimum, and Android 16KB page size support for Google Play compliance. Impeller is fully default across iOS and Android API 29+.
For static analysis, configure `analysis_options.yaml` to include `package:flutter_lints/flutter.yaml` and enable strict mode:
```
analyzer:
language:
strict-casts: true
strict-inference: true
```
Run `flutter analyze` before commits and `dart fix --apply` to automatically resolve deprecated API usage. For deeper analysis, [DCM (Dart Code Metrics)](https://dcm.dev/) provides complexity metrics and unused code detection. Also, use Shorebird for testing and deploying patches quickly to your released app.
State management in 2025-2026 favors *[Riverpod 3](https://riverpod.dev/)* for new projects (compile-time safety, modular architecture), *[Bloc](https://bloclibrary.dev/)* for enterprise applications requiring strict separation of concerns, and *[Provider](https://pub.dev/packages/provider)* for simpler applications. [Flutter Signals](https://pub.dev/packages/signals) has emerged as an option for local reactive state.
Adopt a feature-first project structure for medium-to-large applications, splitting code into `core/`, `features/`, and `services/` directories with each feature containing its own data, domain, and presentation layers. Use `const` constructors liberally, keep widget trees shallow, and profile regularly with [DevTools](https://docs.flutter.dev/tools/devtools/overview).
## Conclusion
Flutter’s architecture delivers native performance through AOT compilation while maintaining development velocity through JIT-powered hot reload. Flutter’s custom Impeller rendering pipeline provides reliably smooth 60fps animations. The three-tree rendering architecture and platform embedder design enable true cross-platform code sharing without sacrificing native integration.
The most significant evolution for production Flutter teams is [Shorebird’s Code Push capability](https://docs.shorebird.dev/code-push/). By building a custom interpreter and novel per-function linker, [Shorebird solves the immutability problem](https://docs.shorebird.dev/code-push/system-architecture/) while maintaining app store compliance, enabling bug fixes in hours rather than days, enabling Flutter teams to ship confidently while retaining the ability to respond quickly to production issues.
## Next steps
Once you understand Flutter’s architecture and update strategies, consider these resources to implement production-ready workflows:
**Set up Code Push for your app**: Start with the [Shorebird Quick Start Guide](https://docs.shorebird.dev/getting-started/) to enable over-the-air updates in your Flutter application. The guide covers installation, initialization, and creating your first release in under 15 minutes.
**Establish a deployment workflow**: Review the [Development Workflow Guide](https://docs.shorebird.dev/code-push/guides/development-workflow/) to understand best practices for managing releases and patches. Learn when to create patches versus new releases, how to test updates before deployment, and strategies for [staging patches](https://docs.shorebird.dev/code-push/guides/staging-patches/) to specific user groups.
**Implement gradual rollouts**: Use [percentage-based rollouts](https://docs.shorebird.dev/code-push/guides/percentage-based-rollouts/) to validate that patched Dart code behaves correctly on real devices before it replaces the AOT-compiled logic for everyone. This lets you verify that a hotfix works across hardware, OS versions, and app states without committing every user to a full store update.
**Secure your deployment pipeline**: Enable [patch signing](https://docs.shorebird.dev/code-push/guides/patch-signing/) so that only code produced by your release pipeline can be executed in place of the original AOT binary. This preserves the same trust model as app-store signing, even though code is now being delivered outside of the store.
# How to Install Flutter
> A complete guide for installing Flutter on Windows, Mac, and Linux
Flutter 3.47.5 is the latest stable release as of September 2026, bundled with Dart 3.13.4, and installing it correctly from day one, alongside [Shorebird](https://shorebird.dev/) for over-the-air updates, eliminates the most common developer pain points, such as broken PATH variables, missing Android SDK command-line tools, and CocoaPods failures on Apple Silicon.
This guide covers exact commands and configuration for macOS, Windows, and Linux, prioritizing the professional workflow used in production teams. macOS remains the only platform that can target all six Flutter output formats (iOS, Android, web, macOS desktop, Windows via cross-compilation, and Linux), making it the dominant choice for mobile development shops.
***
## System requirements and prerequisites across all platforms
Flutter’s SDK weighs approximately 2.8 GB on disk, but a realistic production setup, including Android SDK, emulator images, and an IDE, requires 10 GB or more of free space. The [official docs](https://docs.flutter.dev/get-started/install) do not specify a hard RAM floor, but community consensus and practical experience put the minimum at 8 GB, with 16 GB strongly recommended when running Android emulators or iOS simulators alongside an IDE.
Every platform requires Git 2.x as a prerequisite. On macOS, Git ships with [Xcode Command-Line Tools](https://developer.apple.com/xcode/resources/). On Windows, install [Git for Windows](https://git-scm.com/downloads/win). On Ubuntu, `sudo apt-get install git` handles it. Verify with `git --version` before proceeding.
Here’s a quick rundown of the requirements for each platform:
| Requirement | macOS | Windows | Linux (Ubuntu LTS) |
| -------------- | ------------------------------------------- | --------------------------------- | -------------------------------------------------- |
| **OS version** | macOS 10.15 Catalina through macOS 26 Tahoe | 64-bit Windows 10 or 11 | 64-bit Debian-based or Fedora |
| **Disk space** | 10 GB+ recommended | 10 GB+ recommended | 10 GB+ recommended |
| **RAM** | 8 GB min, 16 GB ideal | 8 GB min, 16 GB ideal | 8 GB recommended |
| **Git** | Via Xcode CLI tools | Git for Windows | `apt-get install git` |
| **Additional** | Xcode, CocoaPods | Visual Studio 2022+ (for desktop) | `curl`, `unzip`, `xz-utils`, `zip`, `libglu1-mesa` |
Flutter bundles the [Dart SDK](https://dart.dev/get-dart), no separate Dart installation is needed.
Always use the stable channel for production work. Four stable releases are [planned for 2026](https://blog.flutter.dev/whats-new-in-flutter-3-41-302ec140e632#:~:text=For%202026%2C%20we%20plan%20to%20release%20four%20stable%20releases).
***
## macOS installation
macOS setup carries the most complexity because it’s the only platform supporting both iOS and Android development simultaneously. The single biggest architectural decision is whether you’re on Apple Silicon (M1/M2/M3/M4) or Intel, because [Homebrew](https://brew.sh/) install paths, Ruby environments, and emulator image choices all differ.
### Installing the Flutter SDK
The fastest method is Homebrew:
```
brew install --cask flutter
```
Homebrew automatically selects the correct architecture. On Apple Silicon, Homebrew lives at `/opt/homebrew/`; on Intel, it’s at `/usr/local/`.
If you prefer manual installation, download the architecture-specific zip from the [Flutter SDK archive](https://docs.flutter.dev/install/archive#stable-channel). Apple Silicon uses the `flutter_macos_arm64_*.zip` bundle and Intel uses `flutter_macos_*.zip`.
Once downloaded, extract the zip to a development directory:
```
mkdir -p ~/develop
unzip ~/Downloads/flutter_macos_arm64_3.47.5-stable.zip -d ~/develop/
```
For manual installs, add Flutter to your PATH. Since macOS defaults to **zsh** (since Catalina), edit `~/.zshrc`:
```
export PATH="\$HOME/develop/flutter/bin:\$PATH"
```
For bash users, add the same line to `~/.bash_profile`. Apple Silicon users also need Homebrew’s shell environment configured:
```
eval "\$(/opt/homebrew/bin/brew shellenv)"
```
Intel users must substitute `/usr/local/bin/brew`. You can verify your Flutter CLI installation with the `which flutter` and `flutter --version` commands.
### Xcode and iOS toolchain
Install [Xcode](https://developer.apple.com/xcode/) from the Mac App Store (Flutter 3.38+ fully supports Xcode 26 and iOS 26), then run these commands in sequence:
```
xcode-select --install
sudo sh -c 'xcode-select -s /Applications/Xcode.app/Contents/Developer && xcodebuild -runFirstLaunch'
sudo xcodebuild -license accept
xcodebuild -downloadPlatform iOS
```
### CocoaPods: the Apple silicon pain point
[CocoaPods](https://cocoapods.org/) remains required for Flutter plugins that use native iOS/macOS code, and it is the single most common source of build failures on Apple Silicon.
Here’s how to install CocoaPods via Homebrew:
```
brew install cocoapods
```
Typically, the system Ruby shipped with macOS (2.6.x) is too old. Therefore, you could install a modern Ruby first and then install CocoaPods via gem if the first option doesn’t work:
```
brew install ruby
echo 'export PATH="/opt/homebrew/opt/ruby/bin:\$PATH"' >> ~/.zshrc
source ~/.zshrc
gem install cocoapods
```
If you encounter `ffi` gem errors on Apple Silicon, run `sudo gem install ffi`. [Rosetta 2](https://support.apple.com/en-us/HT211861) may still be needed for some edge-case components. To install that, run `sudo softwareupdate --install-rosetta --agree-to-license`.
Also, never use `sudo gem install` with the system Ruby. It can corrupt future macOS updates.
A notable 2025–2026 development: *Swift Package Manager* is now supported as an alternative to CocoaPods for Flutter plugins, documented in the [Flutter Swift Package Manager guide](https://docs.flutter.dev/packages-and-plugins/swift-package-manager/for-app-developers).
***
## Windows and Linux installation procedures
### Windows 10/11 setup
After installing Git for Windows, the Flutter team recommends the VS Code quick-install path:
1. Install [VS Code](https://code.visualstudio.com/)
2. Add the Flutter extension
3. Open the Command Palette (`Ctrl+Shift+P`)
4. Type `Flutter: New Project`, and VS Code will prompt you to download the SDK and add it to PATH automatically.
For manual installation, download the latest `.zip` from the [Flutter SDK archive](https://docs.flutter.dev/install/archive#stable-channel) and extract it to a path without spaces or special characters (as a reminder, never use `C:\Program Files\`). A good choice is `%USERPROFILE%\develop\`:
```
Expand-Archive -Path \$env:USERPROFILE\Downloads\flutter_windows_3.47.5-stable.zip -Destination \$env:USERPROFILE\develop\
```
Next, to add Flutter to your path, configure PATH through **System Properties → Advanced → Environment Variables**. Edit the `Path` user variable and add `C:\Users\{username}\develop\flutter\bin`. Move this entry to the top of the list. Once done, close and reopen all terminal windows to ensure the new path gets applied.
Three Windows-specific gotchas trip up nearly every developer.
First, Windows Defender scanning Flutter’s hundreds of thousands of small files causes severe performance degradation. To avoid this, add exclusions for the Flutter SDK directory and the pub cache (`%LOCALAPPDATA%\Pub\Cache`):
```
Add-MpExclusion -ExclusionPath "C:\Users\{username}\develop\flutter"
```
Second, Developer Mode must be enabled for building Windows apps with plugins (**Settings → Privacy & Security → For Developers → Developer Mode: On**).
Third, for Windows desktop development, you need [Visual Studio 2022+](https://visualstudio.microsoft.com/downloads/) with the “Desktop development with C++” workload. Remember, this is Visual Studio, not VS Code.
***
### Linux (Ubuntu LTS) setup
To get started, install required dependencies first:
```
sudo apt-get update -y && sudo apt-get upgrade -y
sudo apt-get install -y curl git unzip xz-utils zip libglu1-mesa
```
The simplest method to install Flutter is via **snap**:
```
sudo snap install flutter --classic
```
If you want to install Flutter, manually, download the `.tar.xz` from the [SDK archive](https://docs.flutter.dev/release/archive) and extract:
```
mkdir -p ~/develop
tar -xf ~/Downloads/flutter_linux_3.47.5-stable.tar.xz -C ~/develop/
```
```
echo 'export PATH="\$HOME/develop/flutter/bin:\$PATH"' >> ~/.bashrc
source ~/.bashrc
```
For Linux desktop development, additional packages are required as documented in the [Flutter Linux desktop setup guide](https://docs.flutter.dev/platform-integration/linux/setup):
```
sudo apt-get install clang cmake git ninja-build pkg-config libgtk-3-dev liblzma-dev libstdc++-12-dev
```
> Never run Flutter commands with `sudo` on Linux, as this can create permission issues that are painful to unwind.
***
## Android SDK setup
Regardless of your operating system, the Android toolchain is where most `flutter doctor` failures occur.
To get started, install the latest Android Studio from the [Android Studio download page](https://developer.android.com/studio). During the setup wizard, Android Studio installs the base SDK. But the wizard does not install everything Flutter needs.
To do that, open the SDK Manager (Android Studio → **Tools** →**SDK Manager**, or from the welcome screen: **More Actions** → **SDK Manager**). You need to configure two tabs:
1. In the **SDK Platforms** tab, install the platform for **API Level 36** (Android 16).
2. In the **SDK Tools** tab (this is the critical step that most guides gloss over) ensure all four of these are checked:
* **Android SDK Command-line Tools (latest)**, the #1 most common missing component
* **Android SDK Build-Tools** (latest)
* **Android SDK Platform-Tools** (includes `adb`)
* **Android Emulator**
Click **Apply** and confirm.
> Without the command-line tools specifically, `flutter doctor` will fail with: `cmdline-tools component is missing`.
### Environment variables for the Android SDK
Set `ANDROID_HOME` and add platform-tools to PATH. The default SDK locations differ by OS:
**macOS** (`~/.zshrc`):
```
export ANDROID_HOME="\$HOME/Library/Android/sdk"
export PATH="\$PATH:\$ANDROID_HOME/platform-tools"
export PATH="\$PATH:\$ANDROID_HOME/cmdline-tools/latest/bin"
export PATH="\$PATH:\$ANDROID_HOME/emulator"
```
**Windows** (System Environment Variables):
* Variable: `ANDROID_HOME` = `C:\Users\{username}\AppData\Local\Android\Sdk`
* Add to PATH: `%ANDROID_HOME%\platform-tools` and `%ANDROID_HOME%\cmdline-tools\latest\bin`
**Linux** (`~/.bashrc`):
```
export ANDROID_HOME="\$HOME/Android/Sdk"
export PATH="\$PATH:\$ANDROID_HOME/platform-tools"
export PATH="\$PATH:\$ANDROID_HOME/cmdline-tools/latest/bin"
```
After configuring the SDK, accept all Android licenses:
```
flutter doctor --android-licenses
```
Type `y` at each prompt. This step is mandatory before Flutter can build any Android app.
***
## Shorebird CLI belongs in your initial setup, not as an afterthought
[Shorebird](https://shorebird.dev/), founded by Flutter creator Eric Seidel, enables over-the-air Code Push, pushing Dart code updates directly to users’ devices without App Store or Play Store review cycles.
Installing it alongside Flutter from day one avoids the common “retrofit under pressure” scenario where teams scramble to add OTA capability while rushing to fix a production bug. [Patches](https://docs.shorebird.dev/code-push/patch/) are tied to exact release versions, so having Shorebird configured early prevents version-matching headaches.
### Installation commands
**macOS / Linux:**
```
curl --proto '=https' --tlsv1.2 https://raw.githubusercontent.com/shorebirdtech/install/main/install.sh -sSf | bash
```
**Windows (PowerShell):**
```
Set-ExecutionPolicy RemoteSigned -scope CurrentUser
iwr -UseBasicParsing 'https://raw.githubusercontent.com/shorebirdtech/install/main/install.ps1' | iex
```
Shorebird installs to `~/.shorebird/bin` and automatically adds itself to PATH. It also installs a private copy of Flutter inside `~/.shorebird/bin/cache/flutter`, this is Shorebird’s modified Flutter for Code Push and should **not** be added to your PATH. The total installation size is approximately **300 MB**.
You can verify the installation by running this:
```
shorebird --version
shorebird doctor
```
The `shorebird doctor` output checks connectivity to Shorebird’s API, console, OAuth, storage, and CDN endpoints, and verifies that the Flutter installation is correct. A clean output should look like this:
```
✓ https://api.shorebird.dev OK
✓ https://console.shorebird.dev OK
✓ Shorebird is up-to-date
✓ Flutter install is correct
No issues detected!
```
The core workflow to get started is:
1. `shorebird login` (authenticates your Shorebird account)
2. [Initialize your project](https://docs.shorebird.dev/code-push/initialize/) with `shorebird init` (creates `shorebird.yaml` with your app ID)
3. [Create a release](https://docs.shorebird.dev/code-push/release/) with `shorebird release android` or `shorebird release ios`,
4. [Push OTA updates](https://docs.shorebird.dev/code-push/patch/) with `shorebird patch android/ios`.
The [`shorebird create` command](https://shorebird.dev/blog/shorebird-create/) scaffolds new projects with OTA, CI/CD, and release tooling baked in from the start.
Shorebird is purely CLI-driven and works seamlessly alongside the standard Flutter and Dart VS Code extensions.
***
## VS Code configuration for professional Flutter development
Install the **Flutter extension** (ID: `Dart-Code.flutter`) from the VS Code marketplace. It automatically installs the **Dart extension** (`Dart-Code.dart-code`) as a dependency. These two extensions provide debugging, hot reload, widget inspector, code completion, refactoring, and snippets.
After installation, open the Command Palette (Ctrl + Shift + P) and run `Dart: Use Recommended Settings` to apply sensible defaults, or add these to your `settings.json`:
```
{
"[dart]": {
"editor.formatOnSave": true,
"editor.formatOnType": true,
"editor.rulers": [80],
"editor.selectionHighlight": false,
"editor.wordBasedSuggestions": "off",
"editor.tabCompletion": "onlySnippets"
},
"editor.codeActionsOnSave": {
"source.fixAll": true
},
"debug.internalConsoleOptions": "openOnSessionStart"
}
```
Key shortcuts to remember:
* `F5` starts debugging
* `Ctrl+F5` / `Cmd+F5` triggers hot reload
* `Ctrl+Shift+F5` performs a hot restart
* `Ctrl+.` / `Cmd+.` opens quick-fix actions for wrapping or extracting widgets.
Creating a new project is done through the Command Palette: `Flutter: New Project` → select Application → choose directory → enter name.
***
## Reading `flutter doctor` output and fixing what’s broken
Run `flutter doctor -v` (verbose mode) after completing setup. The command checks eight categories: Flutter SDK, Android toolchain, Xcode (macOS only), Chrome, Android Studio, VS Code, connected devices, and network resources. Each line is prefixed with one of three symbols:
| Symbol | Meaning | Action needed |
| -------- | ------- | ------------------------------------------------- |
| **\[✓]** | Passed | None |
| **\[!]** | Warning | May need attention; development often still works |
| **\[✗]** | Error | Must fix before building for that platform |
A fully healthy macOS output looks like:
```
[✓] Flutter (Channel stable, 3.41.4, on macOS 26.2 25C56 darwin-arm64, locale
en-IN) [605ms]
• Flutter version 3.41.4 on channel stable at
/Users//development/flutter
• Upstream repository https://github.com/flutter/flutter.git
• Framework revision 582a0e7c55 (5 days ago), 2026-02-12 17:12:32 -0800
• Engine revision 3452d735bd
• Dart version 3.11.1
• DevTools version 2.54.1
• Feature flags: enable-web, enable-linux-desktop, enable-macos-desktop,
enable-windows-desktop, enable-android, enable-ios, cli-animations,
enable-native-assets, omit-legacy-version-file, enable-lldb-debugging,
enable-uiscene-migration
[✓] Android toolchain - develop for Android devices (Android SDK version 36.1.0)
[1,702ms]
• Android SDK at /Users//Library/Android/sdk
• Emulator version 33.1.24.0 (build_id 11237101) (CL:N/A)
• Platform android-36-ext19, build-tools 36.1.0
• Java binary at: /Applications/Android
Studio.app/Contents/jbr/Contents/Home/bin/java
This is the JDK bundled with the latest Android Studio installation on
this machine.
To manually set the JDK path, use: `flutter config
--jdk-dir="path/to/jdk"`.
• Java version OpenJDK Runtime Environment (build
17.0.10+0-17.0.10b1087.21-11572160)
• All Android licenses accepted.
[✓] Xcode - develop for iOS and macOS (Xcode 26.2) [1,475ms]
• Xcode at /Applications/Xcode.app/Contents/Developer
• Build 17C52
• CocoaPods version 1.16.2
[✓] Chrome - develop for the web [7ms]
• Chrome at /Applications/Google Chrome.app/Contents/MacOS/Google Chrome
[✓] Connected device (3 available) [7.2s]
• User’s iPhone (wireless) (mobile) • 00XXXX01-00XXXXXXXXXXXX1E • ios
• iOS 26.0 2XXXX1
• macOS (desktop) • macos •
darwin-arm64 • macOS 26.2 25C56 darwin-arm64
• Chrome (web) • chrome •
web-javascript • Google Chrome 144.0.7559.135
[✓] Network resources [6.8s]
• All expected network resources are available.
• No issues found!
```
The most frequently encountered errors and their fixes:
* **`flutter: command not found`**, Flutter is not in PATH. Re-add the `export PATH=...` line to the correct shell config file (`~/.zshrc`, `~/.bashrc`, or Windows Environment Variables) and restart your terminal.
* **`cmdline-tools component is missing`**, Open Android Studio → Tools → SDK Manager → SDK Tools tab → check “Android SDK Command-line Tools (latest)” → Apply.
* **`Android license status unknown`**, Run `flutter doctor --android-licenses` and accept each license with `y`.
* **`Unable to find bundled Java version`**, Newer Android Studio versions renamed the `jre` directory to `jbr`. On macOS, create a symlink: `cd "/Applications/Android Studio.app/Contents" && ln -s jbr jre`. This issue is resolved in recent Flutter+Android Studio combinations, but persists if either is outdated.
* **CocoaPods failures on Apple Silicon**, Ensure you’re using Homebrew Ruby, not system Ruby. Run `which ruby`, it should show `/opt/homebrew/opt/ruby/bin/ruby`, not `/usr/bin/ruby`. Reinstall CocoaPods via `brew install cocoapods` if needed.
* **Lock file errors during `pub get`**, Run `flutter clean`, then `flutter pub cache repair`, then `flutter pub get`. If persistent, delete `pubspec.lock` and retry.
* **“No devices available”**, Either no emulator is running, no physical device is connected, or platform support isn’t enabled. Start an emulator from Android Studio’s Device Manager or run `flutter emulators --launch` with an available emulator name.
***
## Conclusion
The 2026 Flutter installation process has matured significantly, the VS Code quick-install path now handles SDK download and PATH configuration in one step, and Swift Package Manager offers a welcome alternative to the historically fragile CocoaPods dependency chain.
Three setup decisions matter most for production teams: choosing Homebrew on macOS (it handles architecture differences automatically), installing Android SDK Command-line Tools explicitly via SDK Manager (the universal failure point that no wizard handles automatically), and integrating Shorebird from project inception rather than retrofitting it under deadline pressure.
To confirm everything works, run `flutter doctor -v` and `shorebird doctor` after every installation step. If both report no issues, your environment is production-ready.
***
## Next steps
Now that your Flutter environment is properly configured, here are strategic next steps based on your project needs:
**For production deployment planning**: Explore [Shorebird’s Code Push system architecture](https://docs.shorebird.dev/code-push/system-architecture/) to understand how over-the-air updates work at a technical level, then review [update strategies](https://docs.shorebird.dev/code-push/update-strategies/) to determine when patches download and apply in your app’s lifecycle.
**For team collaboration**: Set up [organizations in Shorebird](https://docs.shorebird.dev/account/orgs/) to manage team access and permissions, and integrate with your [CI/CD pipeline using GitHub Actions](https://docs.shorebird.dev/code-push/ci/github/), [Codemagic](https://docs.shorebird.dev/code-push/ci/codemagic/), or [generic CI systems](https://docs.shorebird.dev/code-push/ci/generic/).
**For security-conscious environments**: Review [patch signing](https://docs.shorebird.dev/code-push/guides/patch-signing/) to cryptographically verify patch authenticity, understand [Shorebird’s security model](https://docs.shorebird.dev/system/security/), and learn about [obfuscation and security tooling integration](https://docs.shorebird.dev/code-push/guides/security-tools/).
**For staged rollouts**: Implement [percentage-based rollouts](https://docs.shorebird.dev/code-push/guides/percentage-based-rollouts/) to gradually deploy patches to user segments, set up [staging patches](https://docs.shorebird.dev/code-push/guides/staging-patches/) for internal testing, and understand [patch rollback procedures](https://docs.shorebird.dev/code-push/rollback/) for emergency scenarios.
**For multi-flavor apps**: Configure [Android flavors](https://docs.shorebird.dev/code-push/guides/flavors/android/) and [iOS/macOS flavors](https://docs.shorebird.dev/code-push/guides/flavors/ios/) to manage separate development, staging, and production builds with independent patch tracks.
# Release Overview and Prerequisites
> A technical guide to Flutter's release architecture, compilation pipeline, build modes, versioning, obfuscation, and pre-release checklist.
Releasing a Flutter app transforms your local Dart codebase and native platform wrappers into hardened, cryptographically signed binaries. Under the hood, the Flutter build engine compiles your Dart code Ahead-of-Time (AOT), strips debug runtimes, minifies assets, and packages native platform artifacts for distribution on [Google Play](https://play.google.com/console/about/) and the [Apple App Store](https://developer.apple.com/app-store/).
This guide explains the Flutter release lifecycle, how the build pipeline transforms your Dart and native code into store-ready artifacts, and the core architectural prerequisites for production deployments.
```
graph LR
Dev["Source Code (Dart + Native)"] --> Opt["Optimization (AOT, Tree Shaking, Obfuscation)"]
Opt --> Sign["Code Signing (Keystore / Apple Certs)"]
Sign --> Build["Store Artifacts (AAB / IPA)"]
Build --> Dist["Store Ingestion (Google Play / App Store)"]
Dist --> Users["Production Users"]
style Dev fill:#e1f5fe,stroke:#03a9f4,stroke-width:2px,color:#000
style Opt fill:#e8f5e9,stroke:#4caf50,stroke-width:2px,color:#000
style Sign fill:#fff3e0,stroke:#ff9800,stroke-width:2px,color:#000
style Build fill:#fce4ec,stroke:#e91e63,stroke-width:2px,color:#000
style Dist fill:#f3e5f5,stroke:#9c27b0,stroke-width:2px,color:#000
style Users fill:#e0f2f1,stroke:#009688,stroke-width:2px,color:#000
```
## Flutter build modes
Flutter compiles applications in three distinct [build modes](https://docs.flutter.dev/testing/build-modes): **Debug**, **Profile**, and **Release**. Choosing the correct build mode is critical because each mode trades debugging convenience for execution performance.
| Feature | Debug Mode | Profile Mode | Release Mode |
| :----------------------- | :---------------------------- | :--------------------------- | :------------------------ |
| **Compilation** | Just-in-Time (JIT) | Ahead-of-Time (AOT) | Ahead-of-Time (AOT) |
| **Hot reload / restart** | Supported | Disabled | Disabled |
| **Debugging tools** | Full DevTools & VM service | DevTools tracing & profiling | Disabled |
| **Debug banner** | Visible | Hidden | Hidden |
| **Binary size** | Large (includes VM & AST) | Optimized for tracing | Fully stripped & minified |
| **Execution speed** | Slower (unoptimized bytecode) | Near-native | Maximum native speed |
### Debug mode
During development, Flutter uses Dart’s JIT compiler. The Dart VM compiles code on the fly, enabling stateful hot reload and full step-debugging. However, debug binaries contain debugging symbols and the Dart VM runtime, resulting in larger file sizes and slower execution. Never ship debug builds to end users.
### Profile mode
Profile mode compiles Dart code Ahead-of-Time to native machine code using `gen_snapshot`, matching the runtime performance of release mode while keeping performance tracing hooks and [Flutter DevTools](https://docs.flutter.dev/tools/devtools) CPU/memory profilers active. This mode is ideal for diagnosing frame drops ([jank](https://docs.flutter.dev/perf)) and memory leaks on real hardware.
### Release mode
Release builds apply aggressive compiler optimizations:
* Unused code and dead branches are eliminated via tree shaking.
* Dart code is compiled to native ARM machine code (`libapp.so` on Android, `App.framework` on iOS).
* Debugging assertions (`assert()` statements), debug banners, and the VM service are completely stripped from the final binary.
* Assets and font icons are minified.
To produce a release artifact, pass the `--release` flag (which is the default for `flutter build appbundle` and `flutter build ipa`).
Note
Because `assert()` statements only execute in debug mode and are removed in release builds, avoid putting critical application logic or state mutations inside assertions.
## App versioning and build numbers
Mobile operating systems and app stores track versions through two distinct identifiers: a user-visible version string and an internal numeric build counter.
In Flutter, you define both in your `pubspec.yaml` file using the format `version: +`:
```
# pubspec.yaml
name: my_app
description: A production Flutter application.
version: 1.2.0+42
```
In this example:
* `1.2.0` represents the **Version Name** ([Semantic Versioning](https://semver.org/): `MAJOR.MINOR.PATCH`).
* `42` represents the **Build Number** (an integer that increments with every build).
### Platform mapping
Flutter automatically injects these values into the native build configurations:
* **Android**: `version` maps to `versionName` in `build.gradle`, and `+42` maps to `versionCode` (see [Android versioning](https://docs.flutter.dev/deployment/android#updating-the-apps-version-number)).
* **iOS**: `version` maps to `CFBundleShortVersionString` in `Info.plist`, and `+42` maps to `CFBundleVersion` (see [iOS versioning](https://docs.flutter.dev/deployment/ios#updating-the-apps-version-number)).
### Overriding version parameters in CI/CD
When building in automated CI/CD pipelines, you can override the values in `pubspec.yaml` without modifying source files by passing CLI flags:
```
flutter build appbundle --build-name=1.2.1 --build-number=43
flutter build ipa --build-name=1.2.1 --build-number=43
```
Note
Both the [Google Play Console](https://play.google.com/console/about/) and [App Store Connect](https://appstoreconnect.apple.com/) enforce monotonically increasing build numbers. Once you upload an artifact with build number `42`, the store will reject any subsequent upload with a build number equal to or lower than `42`, even if the version name changes.
## Compile-time environment configuration
Avoid hardcoding production API keys or backend URLs in your code. Pass configuration values at compile time using `--dart-define` or `--dart-define-from-file`:
```
flutter build appbundle --release \
--dart-define=API_URL=https://api.example.com \
--dart-define=ENVIRONMENT=production
# Or load from a JSON/env configuration file:
flutter build appbundle --release \
--dart-define-from-file=config/production.json
```
Access these variables in Dart using `String.fromEnvironment()`:
```
const apiUrl = String.fromEnvironment(
'API_URL',
defaultValue: 'https://api.staging.example.com',
);
```
## Code obfuscation and debug symbols
To protect proprietary business logic and reduce binary size, enable Dart AOT obfuscation during the release build. For further details, refer to the [Flutter Obfuscation Guide](https://docs.flutter.dev/deployment/obfuscate).
### Enabling obfuscation
Obfuscation replaces symbol identifiers with short, non-descriptive names and strips debug symbols:
```
flutter build appbundle --release \
--obfuscate \
--split-debug-info=./build/symbols/android
flutter build ipa --release \
--obfuscate \
--split-debug-info=./build/symbols/ios
```
* `--obfuscate`: Obfuscates Dart code names.
* `--split-debug-info=`: Extracts debug symbol tables into separate symbol files rather than embedding them into the compiled binary.
### Symbolicating crash logs
When an obfuscated app crashes in production, the stack trace contains memory addresses and obscured names. Use the saved symbol files to restore original file names and line numbers:
```
flutter symbolize \
--input=stacktrace.txt \
-d ./build/symbols/android
```
Upload these symbol files to crash reporting providers to enable automatic stack trace symbolication:
* [Uploading Symbols to Shorebird](/code-push/crash-reporting/uploading-symbols/)
* [Firebase Crashlytics Integration](/code-push/crash-reporting/crashlytics/)
* [Sentry Integration](/code-push/crash-reporting/sentry/)
## Binary size optimization
Keeping download sizes low improves conversion rates and user retention. Flutter provides built-in diagnostics to analyze binary contents (see [Flutter App Size](https://docs.flutter.dev/perf/app-size)).
### Analyzing application size
Generate a JSON size breakdown during the build:
```
flutter build appbundle --analyze-size
flutter build ipa --analyze-size
```
This command outputs a detailed summary of your package size and produces a size report JSON file. You can load this file into Flutter DevTools (**App Size Tool**) to inspect:
* Largest compiled Dart libraries and native dependencies.
* Asset overhead (images, audio, custom fonts).
* Unused resource opportunities.
### Optimization techniques
1. **Tree shake icons**: Flutter automatically tree-shakes font icons by default in release builds (`--tree-shake-icons`), keeping only the glyphs actually referenced in code.
2. **Compress assets**: Convert large PNG assets to WebP or vector formats (SVGs).
3. **Deferred loading**: Use [deferred components](https://docs.flutter.dev/perf/deferred-components) (`import 'package:.../feature.dart' deferred as feature;`) to download complex application modules on demand.
4. **Android resource shrinking**: Enable `shrinkResources true` and `minifyEnabled true` in `build.gradle` to strip unused native resources.
## Automating releases with CI/CD
Manual release processes are error-prone and slow down deployment cadence. Modern teams automate compilation, code signing, and distribution using CI/CD pipelines.
Popular tools and workflows:
* **Fastlane**: Open-source automation tool for generating screenshots, managing provisioning profiles (`fastlane match`), and deploying to stores (`supply` for Google Play, `deliver` / `pilot` for App Store Connect). See the [Fastlane Integration Guide](/code-push/ci/fastlane/).
* **GitHub Actions**: Cloud workflows for continuous integration and automated tag-triggered release builds. See the [GitHub Actions Guide](/code-push/ci/github/).
* **Codemagic**: A CI/CD service purpose-built for Flutter that manages code signing certificates and direct store delivery. See the [Codemagic Integration Guide](/code-push/ci/codemagic/).
## Shorebird: updating production apps instantly
A traditional app store release cycle requires compiling a new binary, submitting it to Google Play or Apple App Store, waiting for review (hours to days), and waiting for users to download the update.
```
graph TD
subgraph Traditional Store Release
A[Code Change] --> B[Full Binary Build]
B --> C[Store Review]
C --> D[User Downloads App Update]
end
subgraph Shorebird Code Push
E[Dart Code Fix] --> F[shorebird patch]
F --> G[Instant Cloud Delivery]
G --> H[App Applies Patch on Next Launch]
end
style A fill:#ffebee,stroke:#f44336,stroke-width:2px,color:#000
style B fill:#ffebee,stroke:#f44336,stroke-width:2px,color:#000
style C fill:#ffebee,stroke:#f44336,stroke-width:2px,color:#000
style D fill:#ffebee,stroke:#f44336,stroke-width:2px,color:#000
style E fill:#e8f5e9,stroke:#4caf50,stroke-width:2px,color:#000
style F fill:#e8f5e9,stroke:#4caf50,stroke-width:2px,color:#000
style G fill:#e8f5e9,stroke:#4caf50,stroke-width:2px,color:#000
style H fill:#e8f5e9,stroke:#4caf50,stroke-width:2px,color:#000
```
[Shorebird](https://shorebird.dev) integrates Code Push capabilities into your Flutter release strategy (see [Getting Started](/getting-started/)):
1. **Create a base store release**: Build your release artifact using Shorebird CLI instead of standard Flutter tooling (see [Shorebird Release](/code-push/release/)):
```
shorebird release android
shorebird release ios
```
Submit the resulting artifact to Google Play and Apple App Store as normal.
2. **Deploy instant patches**: When you need to fix a bug or push an urgent change to Dart code, deploy a patch (see [Shorebird Patch](/code-push/patch/)):
```
shorebird patch android
shorebird patch ios
```
Patches bypass store review delays and install seamlessly in the background on user devices.
### When to use a store release vs a Code Push patch
* **Store release required**: Adding new native plugins, modifying native Android/iOS configurations (e.g., `AndroidManifest.xml`, `Info.plist`, `build.gradle`, `Podfile`), or upgrading the Flutter engine version.
* **Code Push patch supported**: Modifying Dart widgets, updating business logic, adjusting styling, fixing calculation bugs, or refining state management.
## Release checklist
Before publishing your application build to production tracks, verify every item on this checklist:
1. **Verify build mode**
Ensure all release artifacts are compiled with `--release`.
2. **Increment version numbers**
Update `version` in `pubspec.yaml` with an incremented build number and proper semantic version string.
3. **Check permissions and privacy compliance**
Ensure all native permission strings in `AndroidManifest.xml` and `Info.plist` have clear, compliant descriptions. Verify that iOS Privacy Manifests are included if using required reason APIs.
4. **Verify environment and API keys**
Ensure production endpoints and keys are configured (using `--dart-define` or secure remote configs) instead of development credentials.
5. **Test on real devices**
Test release builds on physical iOS and Android hardware across different screen sizes and OS versions.
6. **Backup signing keys**
Store your Android release keystores, key aliases, passwords, and Apple distribution certificates in a secure credentials manager.
7. **Verify crash reporting and symbolication**
Confirm that crash reporting SDKs (Sentry, Crashlytics) receive events and that debug symbols (`--split-debug-info`) are uploaded.
## Platform release guides
Continue to the dedicated platform guides to prepare and publish store artifacts:
[Releasing for Android (Google Play)](/flutter-concepts/releasing-flutter-apps/android)Generate upload keystores, configure Gradle signing, build AABs, and configure Google Play Console tracks.
[Releasing for iOS (Apple App Store)](/flutter-concepts/releasing-flutter-apps/ios)Configure Xcode signing identities, Privacy Manifests, build IPAs, and distribute via TestFlight and App Review.
[Releasing for Windows (Microsoft Store)](/flutter-concepts/releasing-flutter-apps/windows)Create a Shorebird Windows release, then package an MSIX with package:msix without rebuilding on stock Flutter.
# Releasing for Android
> A step-by-step guide to configuring application IDs, creating keystores, configuring Gradle signing, building AABs, and publishing to Google Play.
Releasing an Android Flutter application requires generating a signed **Android App Bundle (AAB)**, configuring your package identifiers, and managing signing keys securely.
## Step 1: Configure application ID and permissions
Open `android/app/build.gradle` (or `android/app/build.gradle.kts`) and verify the `applicationId`, `minSdkVersion`, and `targetSdkVersion`:
```
defaultConfig {
applicationId "com.example.myapp"
minSdkVersion flutter.minSdkVersion
targetSdkVersion flutter.targetSdkVersion
versionCode flutterVersionCode.toInteger()
versionName flutterVersionName
}
```
Ensure all runtime permissions requested in `android/app/src/main/AndroidManifest.xml` comply with [Google Play Developer Policy](https://play.google.com/about/developer-content-policy/).
## Step 2: Create an upload keystore
Google Play uses digital certificates to verify the author of an application. Create a private signing key using the `keytool` utility:
```
keytool -genkey -v -keystore ~/upload-keystore.jks \
-keyalg RSA -keysize 2048 -validity 10000 \
-alias upload
```
Keep this keystore file secure and backed up. If you lose your keystore and do not use [Google Play App Signing](https://support.google.com/googleplay/android-developer/answer/9842756), you cannot update your application.
## Step 3: Configure signing in Gradle
Create a file named `android/key.properties` to reference the keystore:
```
storePassword=your-store-password
keyPassword=your-key-password
keyAlias=upload
storeFile=/Users/username/upload-keystore.jks
```
Caution
Add `key.properties` and all `*.jks` / `*.keystore` files to your `.gitignore` to prevent leaking private signing credentials into source control.
Reference the `key.properties` file in `android/app/build.gradle`:
```
import java.util.Properties
import java.io.FileInputStream
def keystoreProperties = new Properties()
def keystorePropertiesFile = rootProject.file('key.properties')
if (keystorePropertiesFile.exists()) {
keystoreProperties.load(new FileInputStream(keystorePropertiesFile))
}
android {
...
signingConfigs {
release {
keyAlias keystoreProperties['keyAlias']
keyPassword keystoreProperties['keyPassword']
storeFile keystoreProperties['storeFile'] ? file(keystoreProperties['storeFile']) : null
storePassword keystoreProperties['storePassword']
}
}
buildTypes {
release {
signingConfig signingConfigs.release
}
}
}
```
## Step 4: Build the Android app bundle
Google Play requires the [Android App Bundle (AAB)](https://developer.android.com/guide/app-bundle) format for all new applications. The AAB contains all compiled code and resources, but delegates final APK generation to Google Play, which delivers tailored APKs optimized for each device’s screen density and CPU architecture:
```
flutter build appbundle --release
```
The resulting bundle is saved to: `build/app/outputs/bundle/release/app-release.aab`.
If you need a standalone APK for manual QA testing or distribution outside the Play Store, generate architecture-specific APKs:
```
flutter build apk --split-per-abi --release
```
## Step 5: Google Play Console distribution tracks
Upload your `.aab` file to the [Google Play Console](https://play.google.com/console/about/) through one of its release tracks:
1. **Internal testing**: Instant distribution to up to 100 designated testers without full store review delays.
2. **Closed testing (Alpha/Beta)**: Testing with larger defined groups or organizations.
3. **Open testing**: Public pre-release track with store visibility.
4. **Production**: General availability for all users. Supports **staged rollouts** (e.g., releasing to 10%, 20%, then 100% of users over several days to monitor crash rates).
## Building with Shorebird Code Push
If you are using Shorebird to enable over-the-air updates for your Android application, create your base release using the Shorebird CLI:
```
shorebird release android
```
This builds the signed `.aab` bundle and registers the release artifact with the Shorebird cloud. Upload the generated `.aab` to Google Play Console as normal. When you need to deploy Dart bug fixes later, use `shorebird patch android`.
To produce a smaller APK that contains only one ABI (for example `arm64-v8a`), do not use `flutter build apk --split-per-abi` with Shorebird. That Flutter flag is not supported. Pass `--target-platform` instead:
```
shorebird release android --artifact apk --target-platform android-arm64
```
See [Build a smaller APK for one architecture](/code-push/release/#build-a-smaller-apk-for-one-architecture).
# Releasing for iOS
> A step-by-step guide to configuring Xcode signing, Privacy Manifests, building IPAs, and submitting to Apple App Store Connect.
Releasing an iOS Flutter application requires provisioning profiles, Apple Developer certificates, privacy manifests, and App Store Connect configuration.
## Step 1: Configure bundle identifier and signing in Xcode
Open the `ios` directory in Xcode:
```
open ios/Runner.xcworkspace
```
1. Select the `Runner` project in the sidebar.
2. Under the **Signing & Capabilities** tab, select your **Team** registered with the [Apple Developer Program](https://developer.apple.com/programs/).
3. Set a unique **Bundle Identifier** (e.g., `com.example.myapp`).
4. Choose **Automatically manage signing** (recommended for standard release flows) or configure custom provisioning profiles.
Disable automatic build number management
When distributing via Xcode Organizer, uncheck **Manage Version and Build Number** in the distribution dialog. If Xcode automatically increments the build number during upload, it will no longer match the build number used to create the release, which prevents Shorebird patches from being applied to that release.
## Step 2: Privacy manifests and permission descriptions
Apple requires explicit usage descriptions in `ios/Runner/Info.plist` for any hardware or sensitive APIs accessed by your app or third-party packages (see [Apple Info.plist Keys](https://developer.apple.com/documentation/bundleresources/information_property_list)):
```
NSCameraUsageDescriptionThis app requires access to the camera to scan documents.NSPhotoLibraryUsageDescriptionThis app requires access to your photo library to select a profile picture.
```
Starting in iOS 17 and macOS 14, Apple also mandates [Privacy Manifests](https://developer.apple.com/documentation/bundleresources/privacy_manifest_files) (`PrivacyInfo.xcprivacy`) declaring required reason APIs used by your application or its dependencies.
## Step 3: Build the iOS archive (IPA)
Generate the release archive using the Flutter CLI:
```
flutter build ipa --release
```
This command creates a `.xcarchive` under `build/ios/archive/` and exports an IPA package under `build/ios/ipa/`.
You can also pass custom export options using `--export-options-plist`:
```
flutter build ipa --export-options-plist=ios/ExportOptions.plist
```
If you are building on a CI machine where signing is handled in a later pipeline stage (such as via Fastlane), build an unsigned archive with `--no-codesign`:
```
flutter build ipa --release --no-codesign
```
## Step 4: Upload to App Store Connect
Upload the `.ipa` package to App Store Connect using any of the following methods:
* Xcode organizer
1. Open Xcode and select **Window > Organizer** (`Cmd + Option + Shift + O`).
2. Select the latest build under the **Archives** tab.
3. Click **Distribute App** and follow the prompts to validate and upload to App Store Connect.
* Transporter app
1. Download the [Transporter app](https://apps.apple.com/app/transporter/id1450874784) from the macOS App Store.
2. Drag and drop the exported `.ipa` file from `build/ios/ipa/` into Transporter.
3. Click **Deliver** to upload.
* Command line (xcrun)
Upload using Apple’s command-line notarization and delivery tools:
```
xcrun altool --upload-app --type ios \
-f build/ios/ipa/*.ipa \
--apiKey YOUR_API_KEY \
--apiIssuer YOUR_ISSUER_ID
```
## Step 5: TestFlight and store submission
1. **TestFlight Internal Testing**: Available immediately after processing for members of your [App Store Connect](https://appstoreconnect.apple.com/) team.
2. **TestFlight External Testing**: Distribute builds to up to 10,000 external testers using [TestFlight](https://developer.apple.com/testflight/) (requires a brief initial Beta App Review from Apple).
3. **App Store submission**: Fill out App Store listing metadata, screenshots, age ratings, and privacy nutrition labels, then submit for [App Review](https://developer.apple.com/app-store/review/guidelines/). Apple offers **Phased Release for Automatic Updates** (rolling out over 7 days).
## Building with Shorebird Code Push
If you are using Shorebird to enable over-the-air updates for your iOS application, create your base release using the Shorebird CLI:
```
shorebird release ios
```
This builds the release archive and registers the release artifact with Shorebird. Upload the resulting `.ipa` to App Store Connect as normal. When you need to deploy Dart bug fixes later, use `shorebird patch ios`.
# Releasing for Windows
> Build a Shorebird Windows release, then package an MSIX from that output without letting package:msix rebuild the app with stock Flutter.
To submit an app to the Microsoft Store, you need an **MSIX** package. [`package:msix`](https://pub.dev/packages/msix) is a common way to produce that file from a Flutter Windows build. By default it runs `flutter build windows` with the Flutter SDK on your `PATH`, not Shorebird’s Flutter. That rebuild is not a Shorebird release, so patches will not apply.
Build with Shorebird first, then tell `package:msix` to package the existing output.
## Step 1: Create a Shorebird Windows release
```
shorebird release windows
```
The Windows executable is written to `build/windows/x64/runner/Release`. See [Create a Release](/code-push/release/) for flavors, targets, and `--flutter-version`.
## Step 2: Disable the MSIX rebuild
Add [`package:msix`](https://pub.dev/packages/msix) as a dev dependency if you do not already use it:
```
flutter pub add dev:msix
```
Then set `build_windows: false` in the `msix_config` section of `pubspec.yaml`:
```
msix_config:
display_name: My App
publisher_display_name: Example
publisher: CN=00000000-0000-0000-0000-000000000000
identity_name: com.example.myapp
msix_version: 1.0.0.0
store: true
build_windows: false
```
`build_windows: false` skips `flutter build windows` and packages the directory Shorebird already produced.
Copy `identity_name`, `publisher`, and `publisher_display_name` from Partner Center (Product identity). With `store: true`, `package:msix` refuses to build if any of them is missing. The fourth part of `msix_version` must be `0` for Store submissions.
## Step 3: Create the MSIX package
```
dart run msix:create
```
Submit the generated `.msix` file to the Microsoft Store.
Caution
After `shorebird release windows`, do not run `flutter build windows`, or `msix:create` without `build_windows: false`. Those commands rebuild with non-Shorebird Flutter and overwrite the build output, so the resulting MSIX will not receive patches.
# Advanced State Management (BLoC)
> Build a production-ready weather app with the BLoC Single State pattern
The [Beginner Guide](/flutter-concepts/state-management/beginner) explored the core philosophy of BLoC and how to leverage the Single State + Enum pattern to avoid screen flickering and preserve data.
Now, put these professional state management practices into action by building a fully-featured, production-ready weather app from scratch using BLoC, the repository pattern, and HTTP integrations.
This walkthrough will cover:
* Modeling domain entities with value equality (`Equatable`)
* Fetching and parsing multi-step HTTP requests in a repository
* Creating a single-state BLoC using status enums
* Implementing silent pulls-to-refresh
* Wiring the BLoC and repository dependencies into the Flutter UI
* Using `BlocObserver` to log and trace transitions
***
## Setting up a new project
To get started, create a new Flutter app by running the following command:
```
flutter create my_new_app
```
Alternatively, if you want support for over-the-air updates from day 1, you can [install the Shorebird CLI](/getting-started/) and run:
```
shorebird create my_new_app
```
### Setting up: packages
Add the following packages to your `pubspec.yaml` file:
```
dependencies:
flutter_bloc: ^9.1.0
equatable: ^2.0.5
http: ^1.2.0
```
* `flutter_bloc` wires streams into the widget tree with `BlocProvider` and `BlocBuilder`.
* `equatable` gives your events, states, and models value equality.
* `http` is used by the repository to call the weather API.
***
## Step-by-step implementation
This implementation includes two user actions:
1. **Fetch** shows a spinner and replaces the UI state.
2. **Refresh** updates silently in the background, keeping the existing content visible while indicating a loading overlay.
### Step 1: model the domain
A small, UI-friendly model makes state rendering predictable. It also keeps your UI independent of the raw API response shape.
```
// lib/features/weather/models/weather.dart
import 'package:equatable/equatable.dart';
/// A minimal, UI-friendly weather model for the BLoC tutorial.
final class Weather extends Equatable {
final String city;
final double tempC;
final int conditionCode;
final String condition;
final DateTime fetchedAt;
const Weather({
required this.city,
required this.tempC,
required this.conditionCode,
required this.condition,
required this.fetchedAt,
});
factory Weather.fromOpenMeteo({
required String city,
required Map json,
}) {
final current = (json['current'] as Map?)?.cast();
if (current == null) {
throw const FormatException('Missing "current" in weather response.');
}
final temp = current['temperature_2m'];
final code = current['weather_code'];
final time = current['time'];
if (temp == null || code == null || time == null) {
throw const FormatException('Weather response missing required fields.');
}
final fetchedAt = DateTime.tryParse(time.toString());
if (fetchedAt == null) {
throw const FormatException('Invalid "time" in weather response.');
}
final codeInt = (code as num).toInt();
return Weather(
city: city,
tempC: (temp as num).toDouble(),
conditionCode: codeInt,
condition: WeatherCondition.fromCode(codeInt).label,
fetchedAt: fetchedAt.toLocal(),
);
}
@override
List